
Do you have an all time favorite dish? One where it doesn’t matter how picky, fussy, pretending to be a foodie you are, when it comes to this dish, you just wolf it down like there is no tomorrow, no fuss. You might complain a little if you encounter the not quite good one but still eat it, can’t let it go to waste. Kanom Gui Chai is that dish for me. Well, one of many, actually. That’s right, it ranks as high as a fancy foie gras, Toro steak, handmade papardelle with truffles, and a few others, believe it or not.
Why do I call it Kanom Gui Chai but listed the name as Gu Chai? The first one, Kanom Gui Chai, is a Thai name which was adopted from the original Teochew Chinese name, Gu Chai Guoi or Gu Chai Gue. Kanom is a Thai word that has two different meanings. One refers to snacks but another refers to desserts. How could a language become that confusing? Of course the culture had some influence in it.
The middle to upper class Thais will eat several times in a day, about 4-6 meals throughout the day. Owing to the hot climate in the region, eating a big meal is unappealing. Also, the majority of dishes are not very high in calories, consequently we do eat more often. Kanom generally refers to foods that are served in between the main meals. They can be either sweet or savory.
Kanom Gui Chai originated from the Teochew Chinese immigrants. They made Gu chi guio as a part of their offering to pay respect to their gods during the ceremonies, which are about 8 times in a year, not counting their 6 other special spirits and gods that they would make the offering to separately.
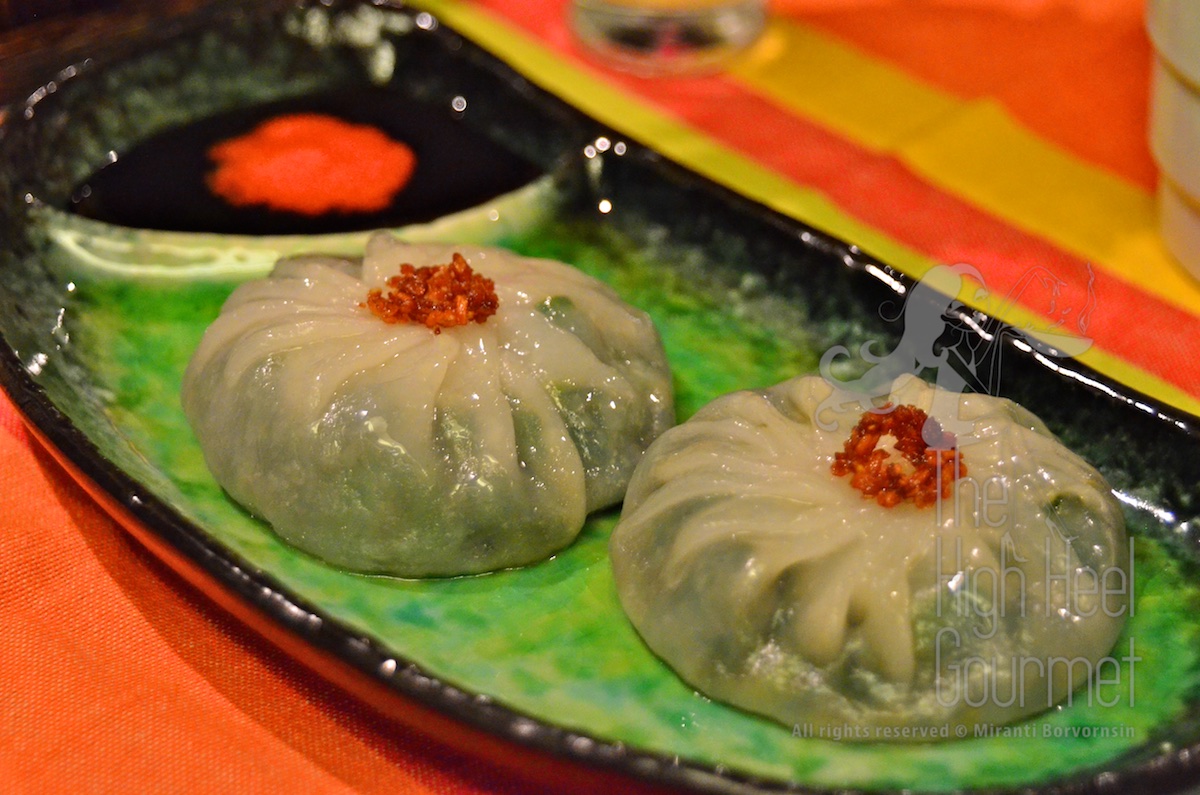
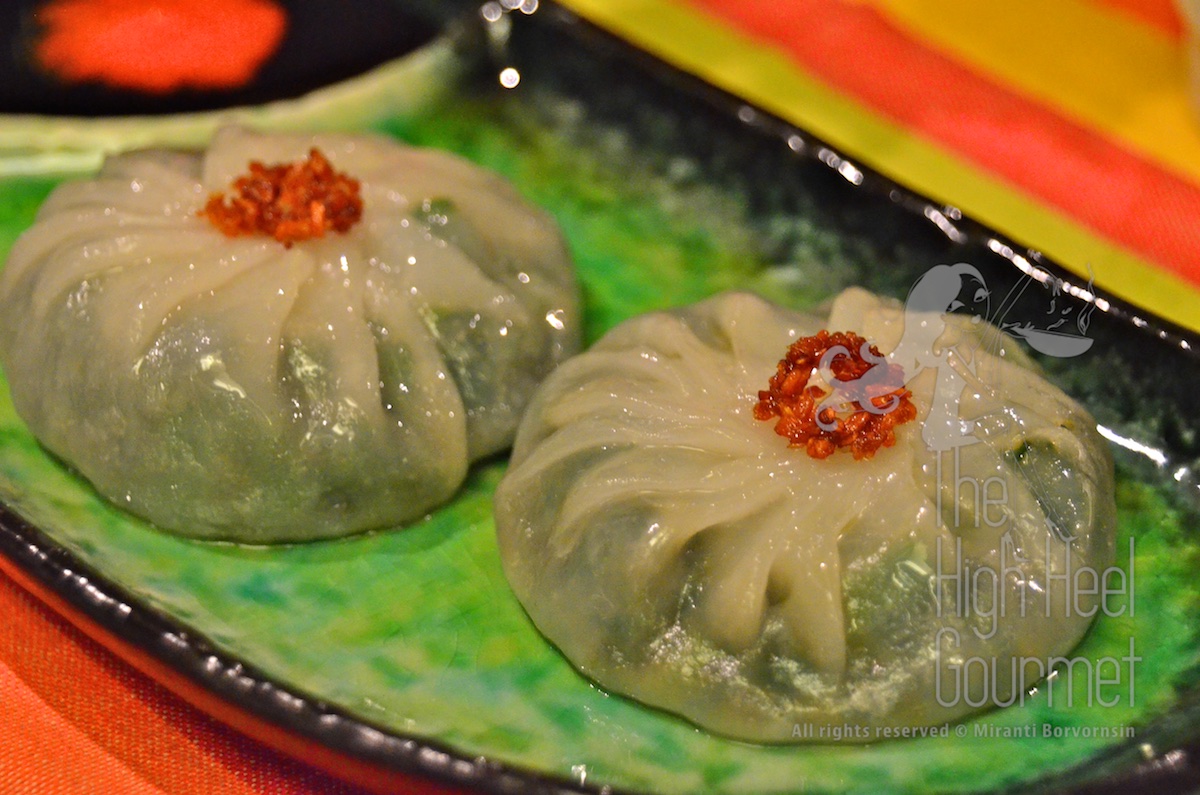
Now you probably are wondering what is this awesome dish. Sorry, I have just called the badger a bishop here. It’s just plain cut garlic chives wrapped in glutenous rice flour dough and steamed and then sometimes pan-fried afterwards. The dumplings are served with sweet and spicy soy sauce. Yeah, that’s it really, no meat, no hidden treasure. Only people who know or have eaten them would understand the true awesomeness of it. That’s all I’m saying.
Ingredients: (for 12-18 dumplings)
Filling
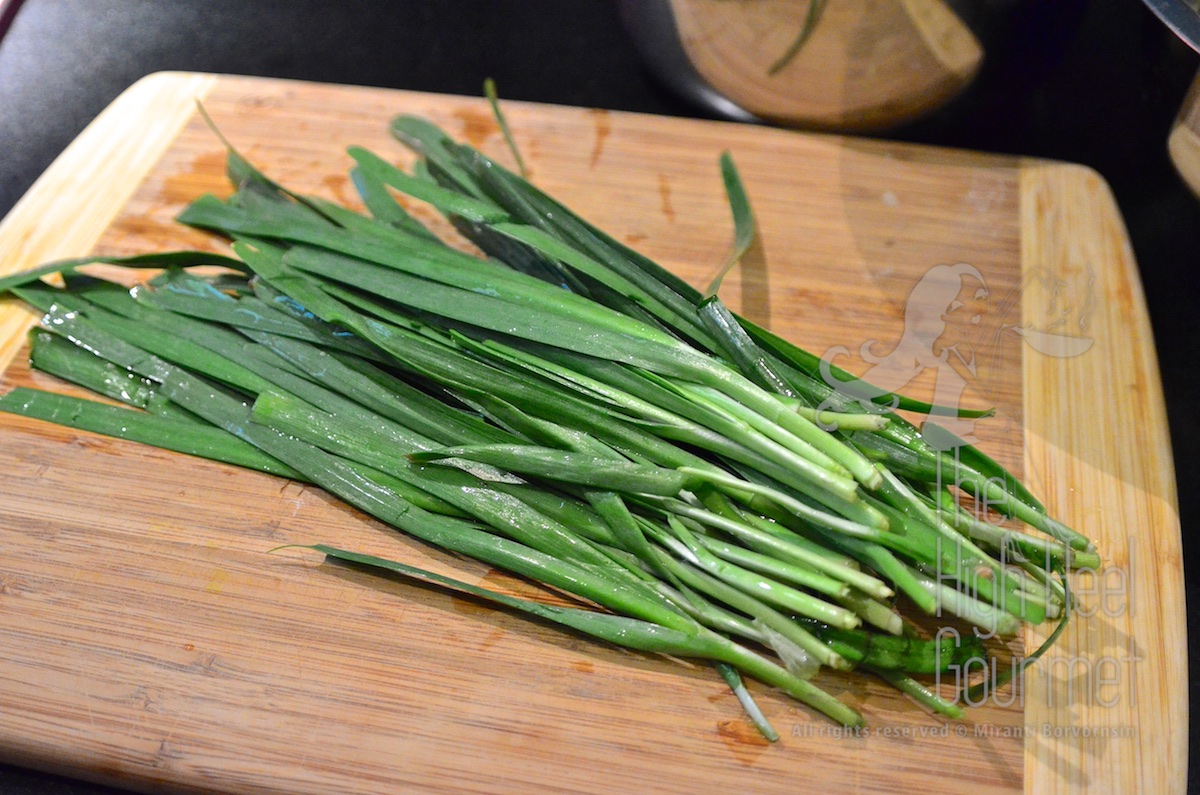
Garlic Chives or Chinese leeks 2lb. or 1 Kilogram
Chopped garlic 1 tablespoon
Salt 2 teaspoons
Sugar 2 teaspoons
Baking soda 1 teaspoon (Optional) This is just for keeping the chives green after cooking.
Oil 1 tablespoon
Dough
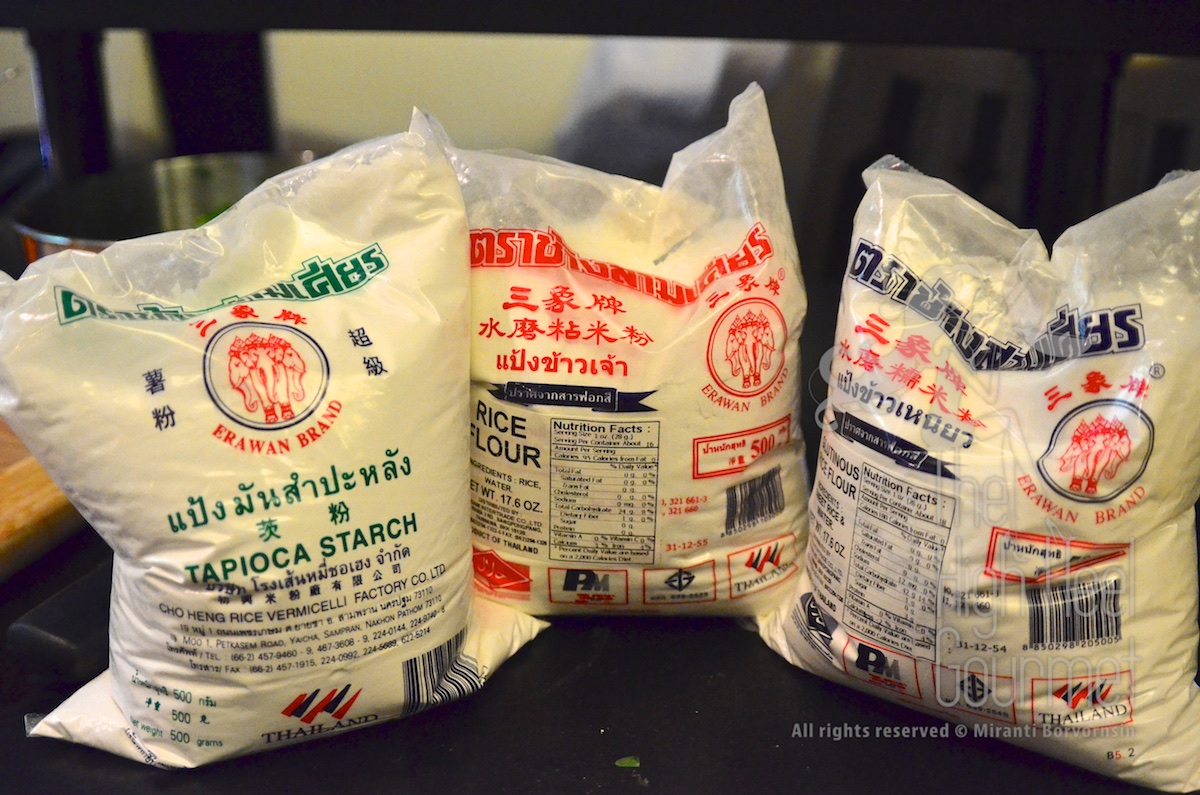
Rice flour 3/4 cup (White rice flour)
Sticky rice flour 1/4 cup (Sometime it’s called sweet rice flour)
Tapioca flour 3/4 cup (set aside 1/4 cup for kneading)
– Note I used an Asian brand for this, but Bob’s Red Mill brand is offering all three kinds of flour too. I was trying to use the organic white rice flour, but found it too coarse for my taste.
Water 1 cup
Oil 1 tablespoon
Salt 1 teaspoon
Sugar 1 tablespoon
Dipping Sauce
Thick sweet soy sauce http://importfood.com/sakh2102.html (I found this one on the internet but I use a different brand. My favorites are “Healthy Baby” brand or “Dragon Fly” brand. You can make it yourself from mixing 1 portion molasses with 1 portion soy sauce)
Chinese black vinegar or vinegar http://www.gourmetsleuth.com/Dictionary/C/Chinese-black-vinegar-6140.aspx
Sriracha Chili sauce If you prefer a very spicy version, use crushed fresh red chilies to substitute.
For steaming we need some tools
A Steamer
Banana leaves (Usually you can find them in the frozen section of the Asian market but if you can’t find them, use Napa cabbage or Chard leaves as a substitute.)
A pastry brush and plenty of vegetable oil
Method:
Filling
1) Wash all the chives thoroughly and put them in a colander to drain off the water. You don’t want them swimming around in water in the wok while you cook them because they will already be releasing water due to the heat and salt.
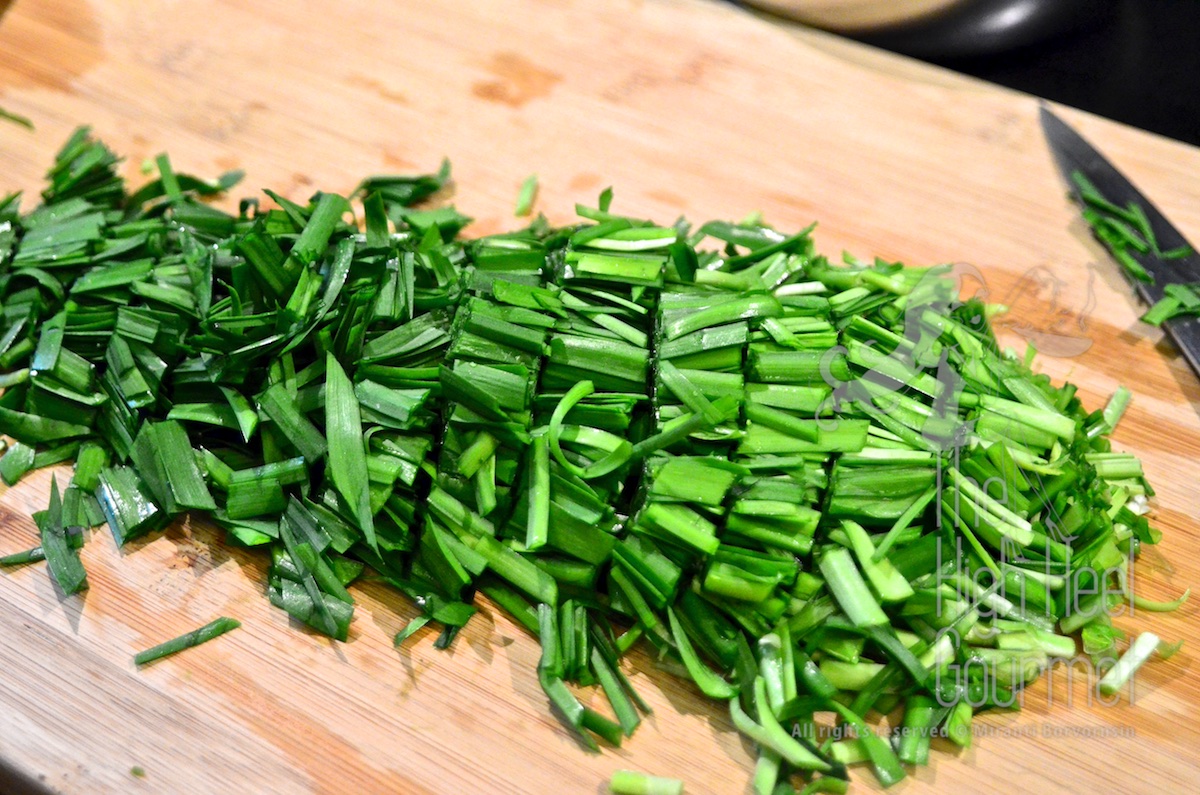
2) Trimming off the white part at the bottom.

Cut the chives into 1/2” long pieces.
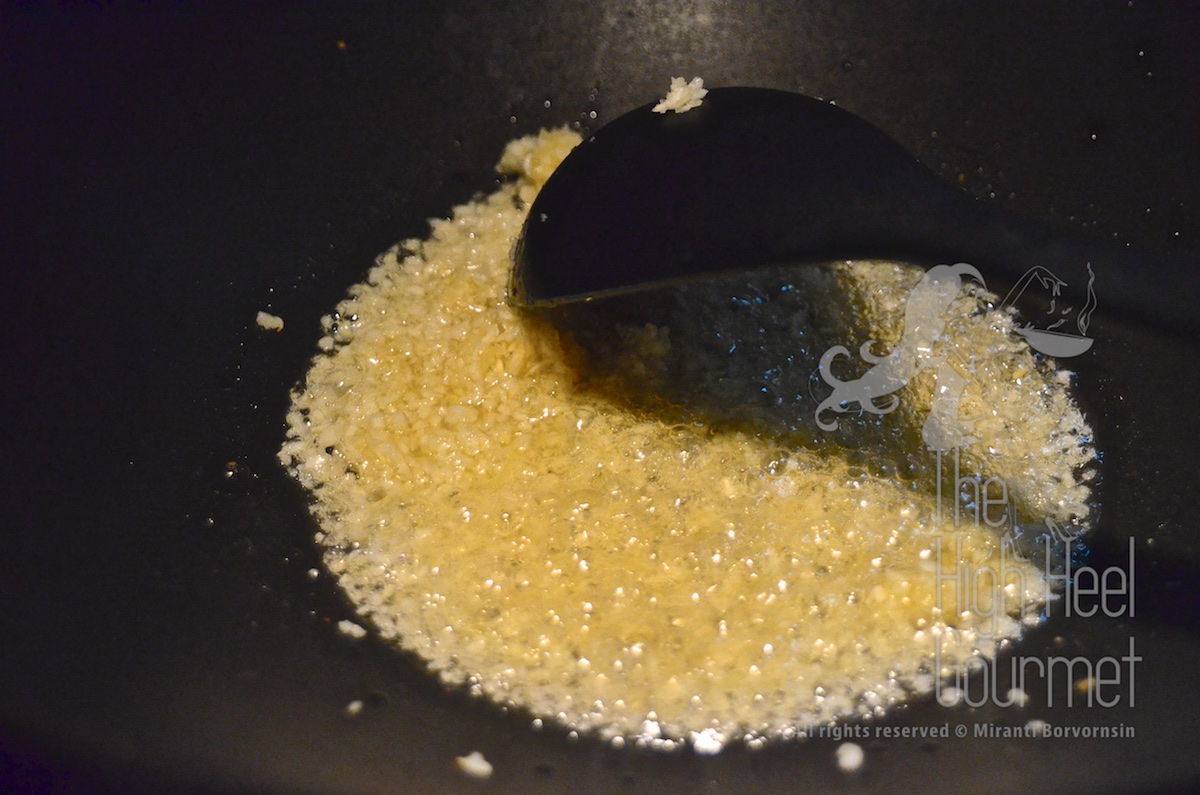
3) Heat the oil in the wok over high heat, add chopped garlic, stir until the garlic starts to get golden.
4) Add the chives, salt, sugar, and baking soda and stir them really briskly.
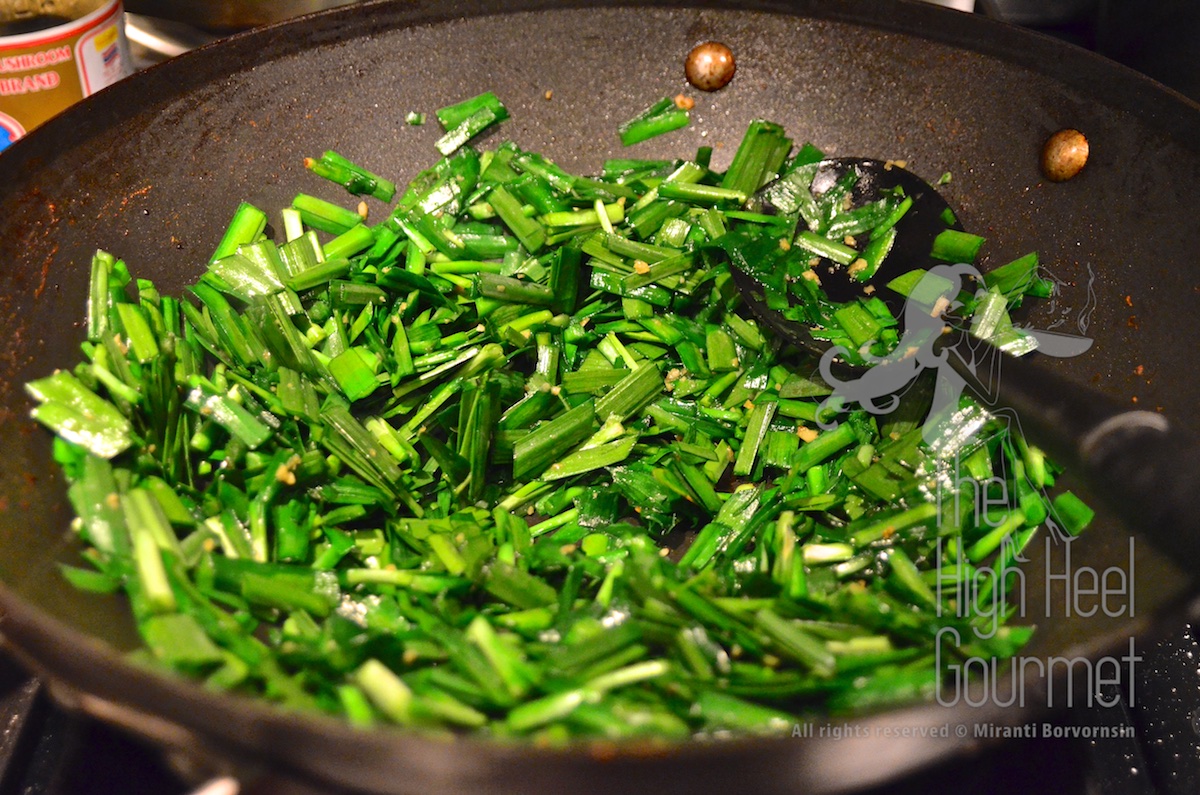
Turn off the stove after 30-45 seconds. The chives will continue cooking from the left over heat. Do not overcook or this vegetable will get really soft and lose its natural sweetness. Some people would just fried the garlic and toss them with the raw garlic chive to preserve the sweetness of the vegetables.
5) Put them in the colander to drain the liquid out. Let them cool down while you work on the dough.
Dough
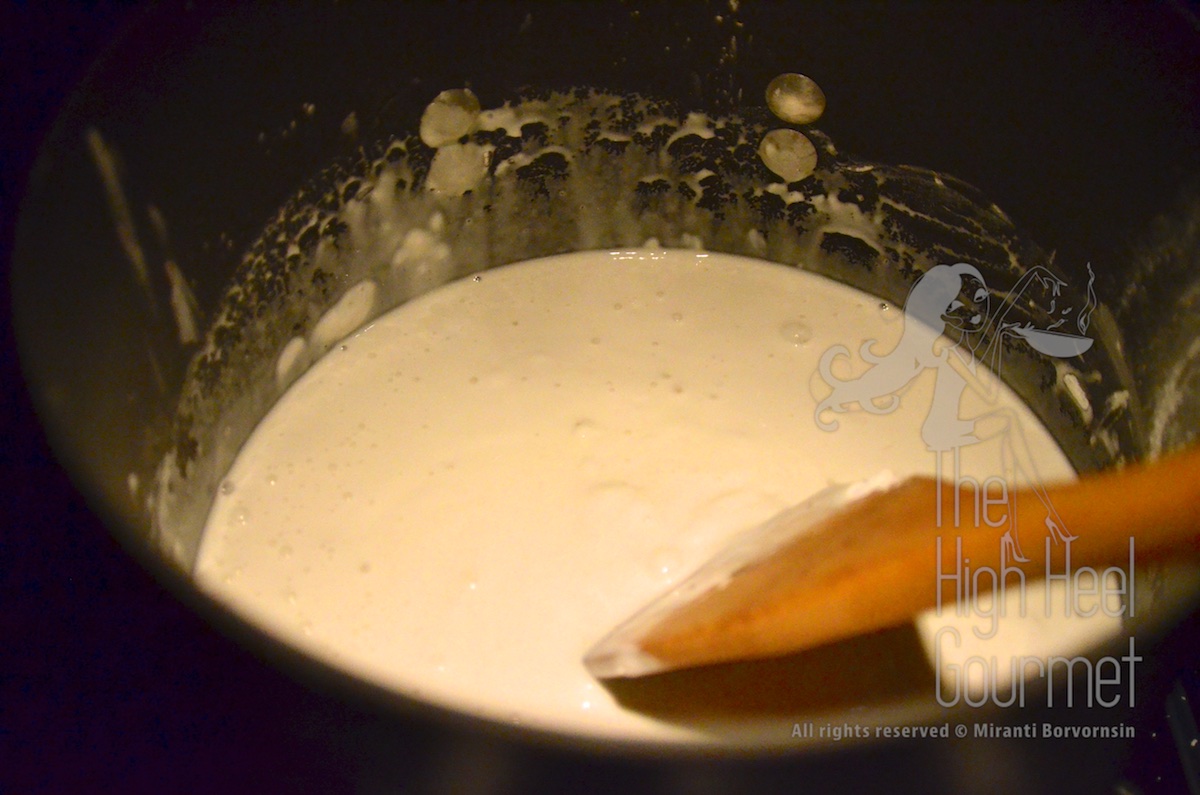
6) Put everything together in a pot except the 1/4 cup of tapioca flour that was reserved for kneading. Stir with a whisk to break down ALL the lumps. The finish should be a smooth liquid. No, you don’t need to strain it, just use the whisk and whisk vigorously.
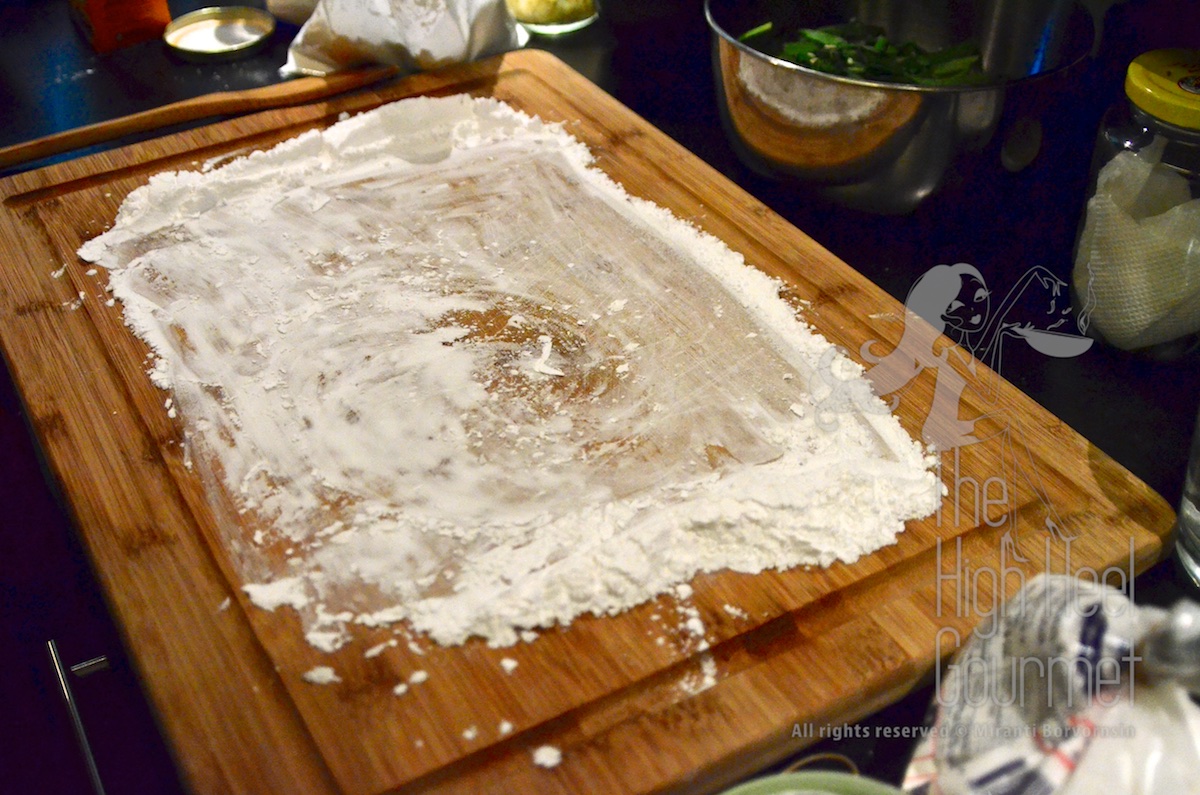
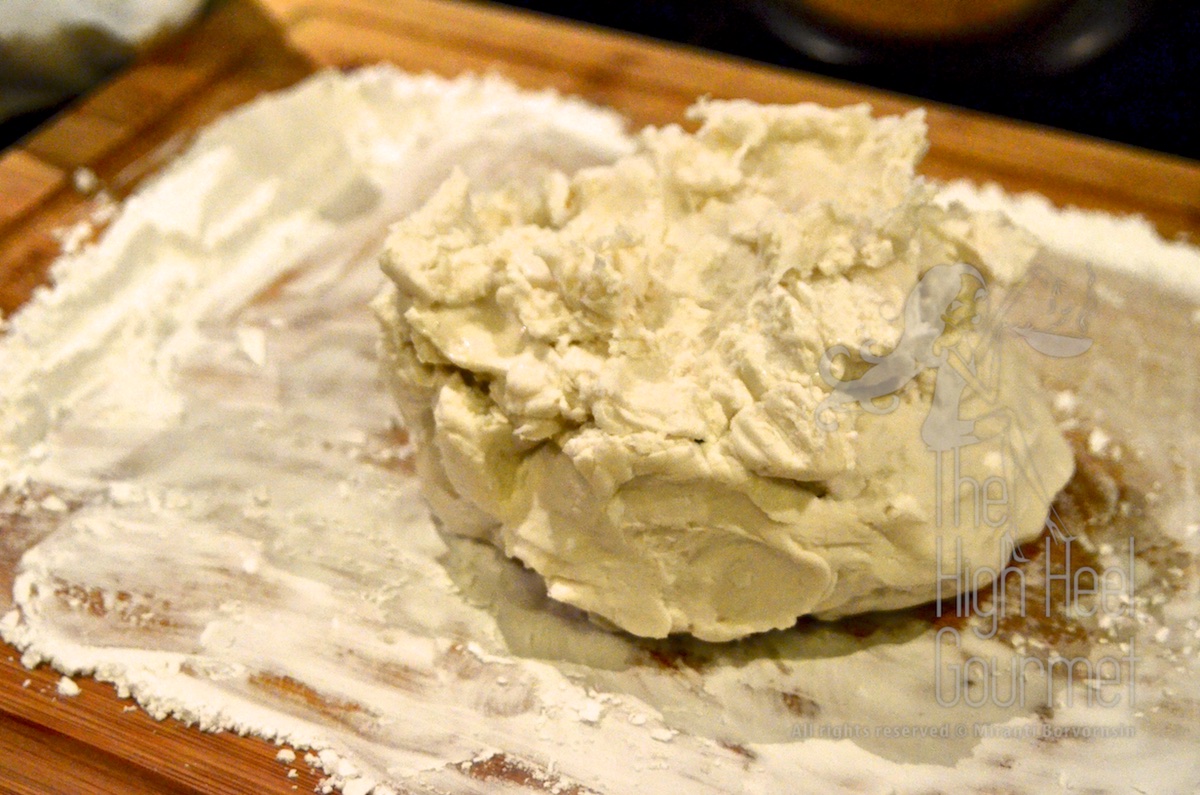
7) Flour the kneading board with the tapioca flour. If you need more flour then add more. You should have a good layer of flour and still have some left on the side for your hands later. We are not making bread here, so we are not going to ruin the dough with that extra flour.
8) Set the pot over medium heat on the stove. Stir continuously.
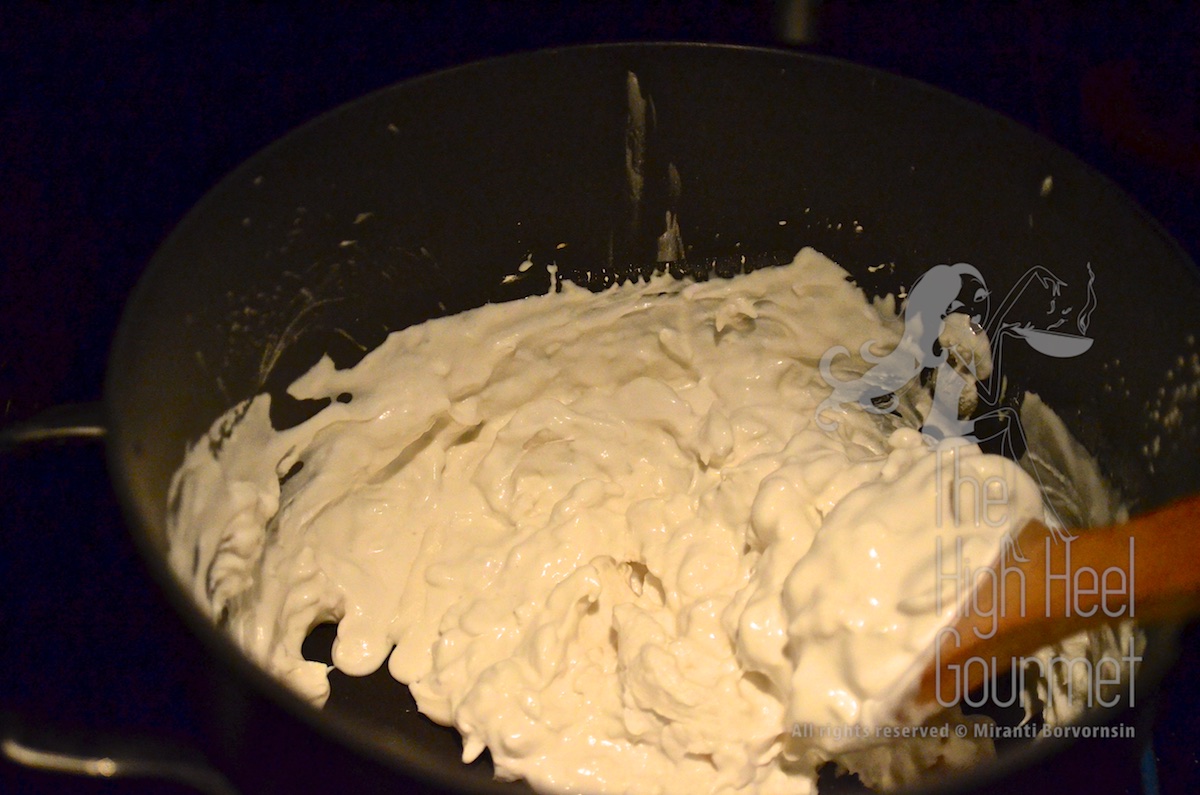
The liquid will get lumpy again and stickier and sticker as the flour gets cooked.
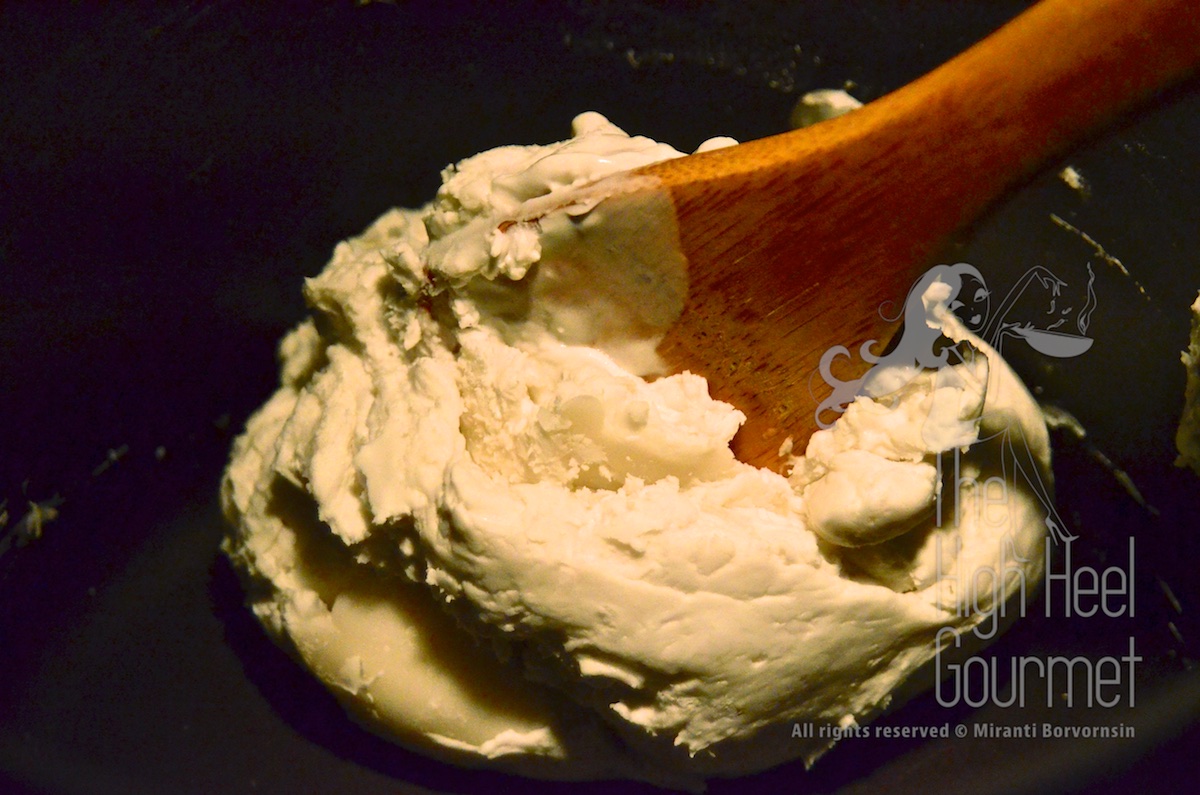
Dig down to the bottom and fold the cooked dough up on top. Keep doing it until the dough lifts from the side and bottom of the pot, then turn off the stove.
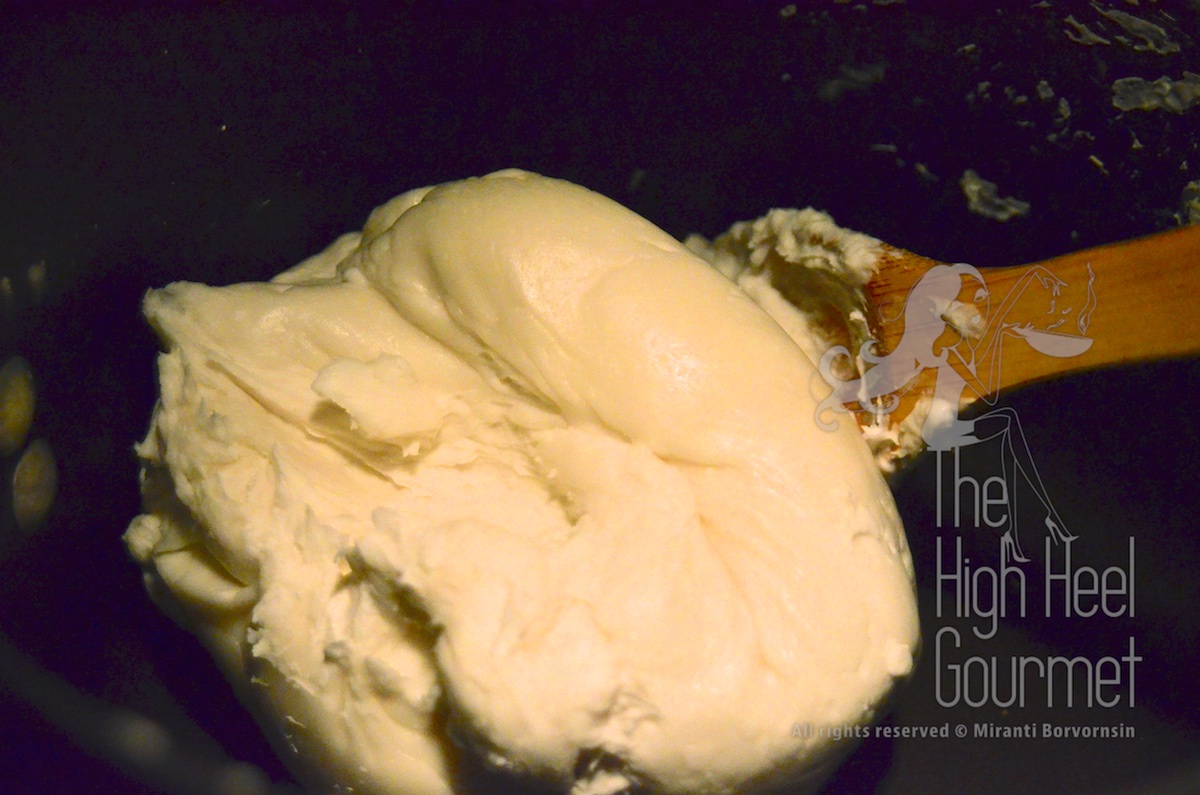
9) Put the dough on the kneading board, flour your hands and start kneading while its hot.
Yes, you read it right. It’s not that hot, come on.
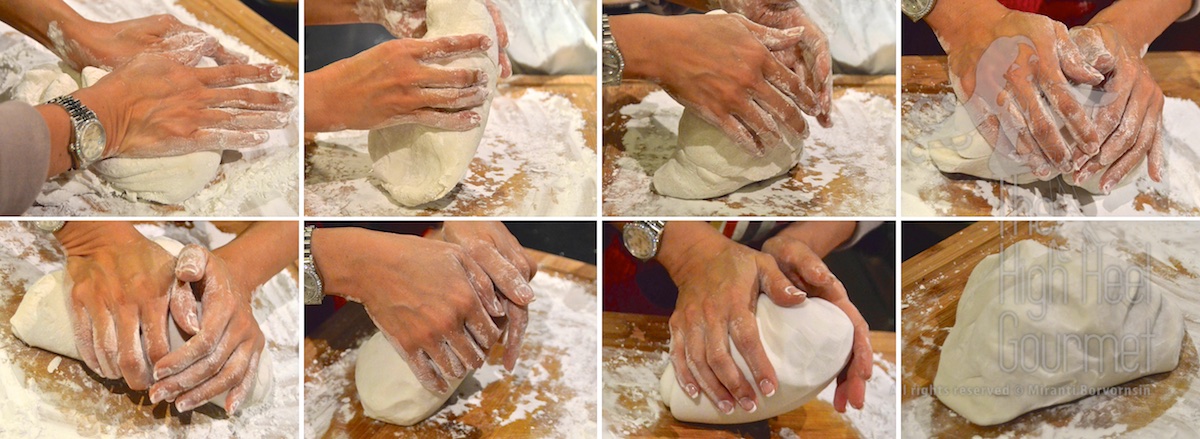
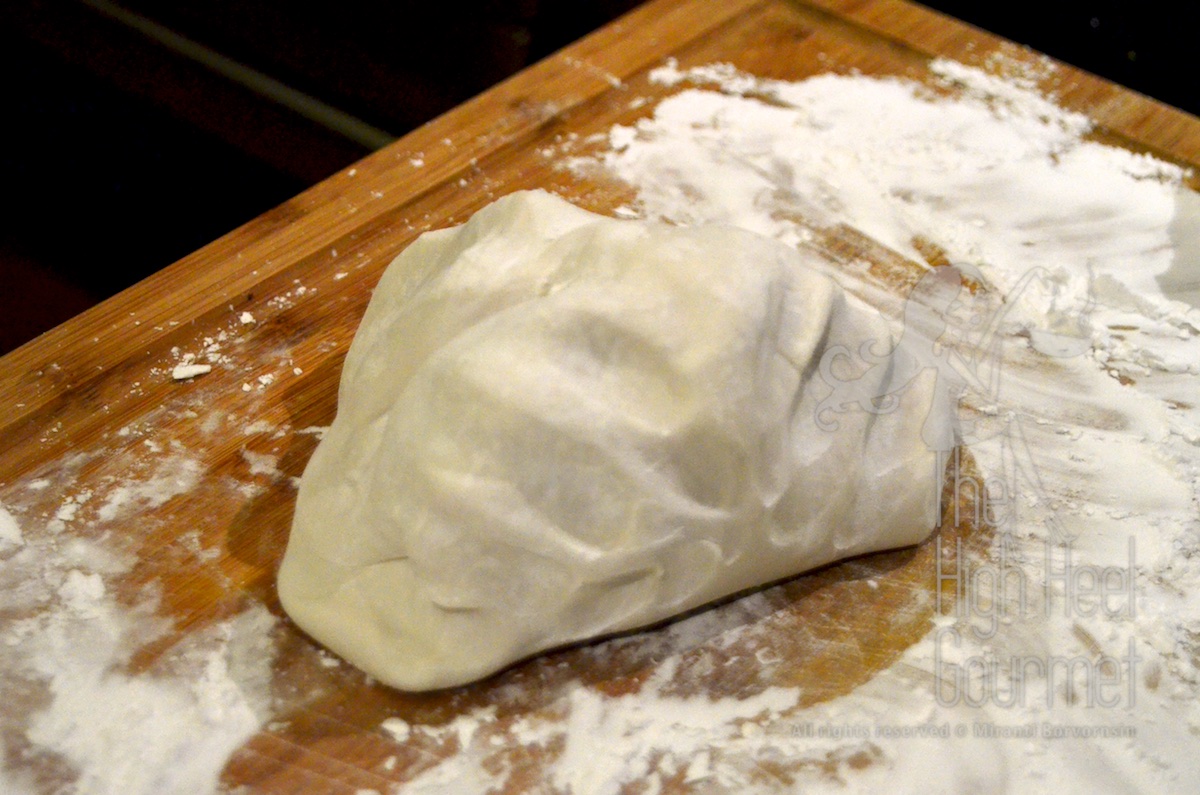
If you are afraid of the heat, put more flour on your hands. Knead until the dough is smooth and no longer sticky. Your dough is ready to use for the wrap.
I’ve never found any commercial pre-made dough for this type of dumpling so that’s not an option.
Wrap the dumpling
10) Now we get to the fun part, but before we start, lets divide the dough equally into the portions we want. I can make 15 dumplings with this portion, with each dumpling about 2 1/2”- 3” in finished size. Then the chive filling should divided into three or four big portions. This way you won’t get “fat dumplings” or “skinny dumplings” toward the end.
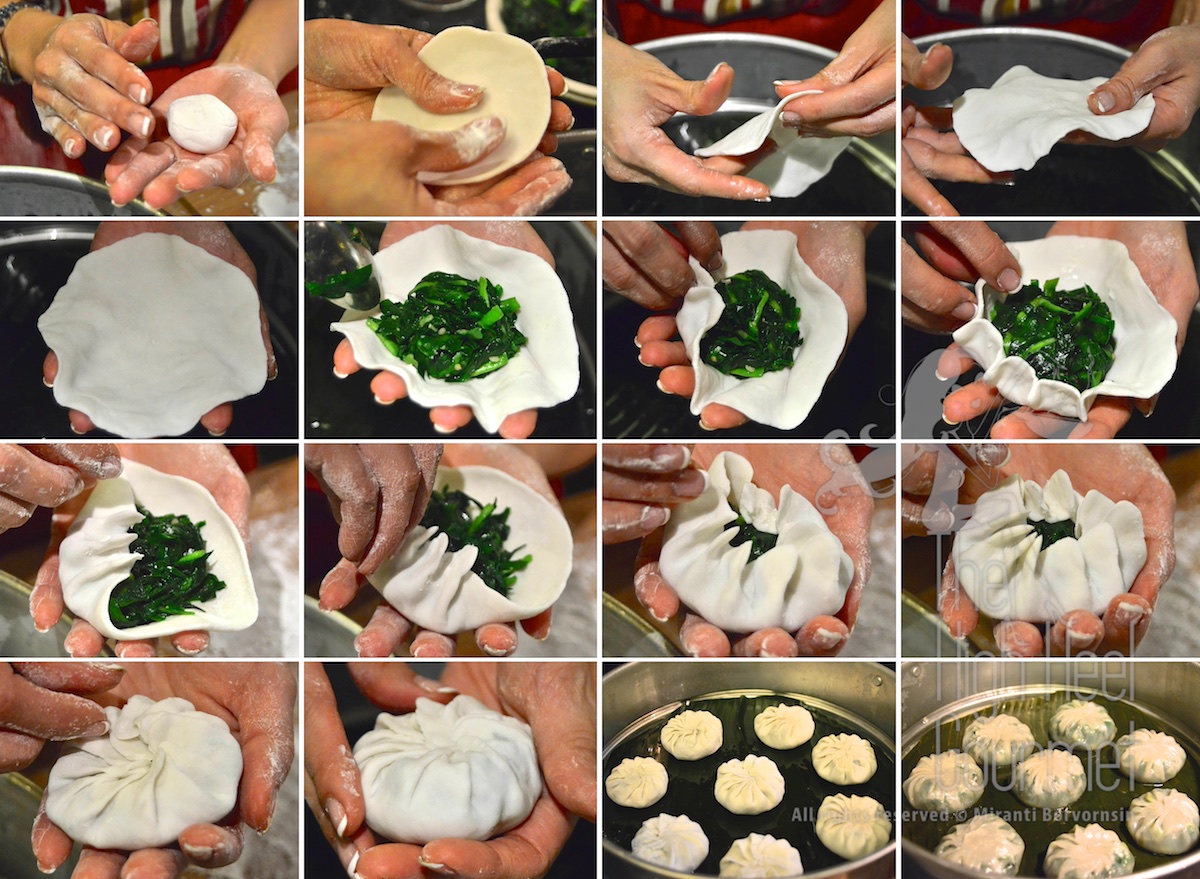
11) After flouring your hands well, roll an individual dough piece into a ball
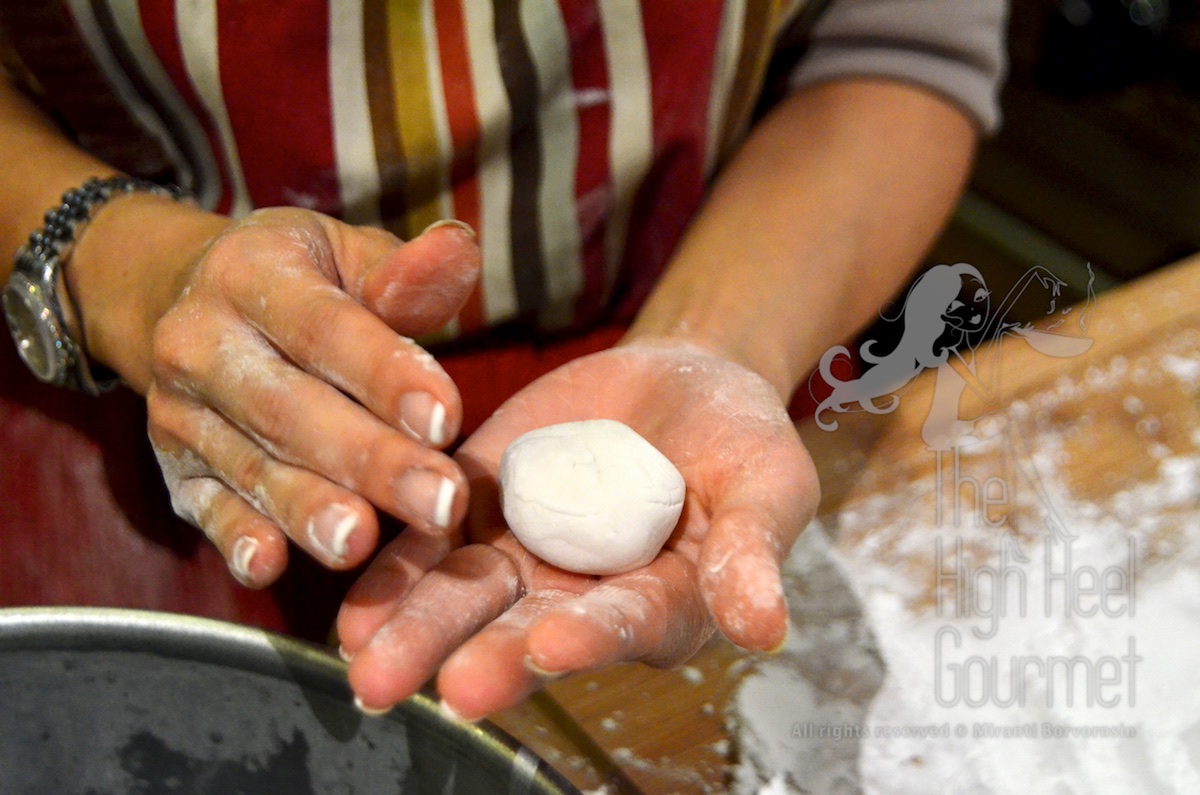
and flatten it down.

Make the edge thinner than the middle.
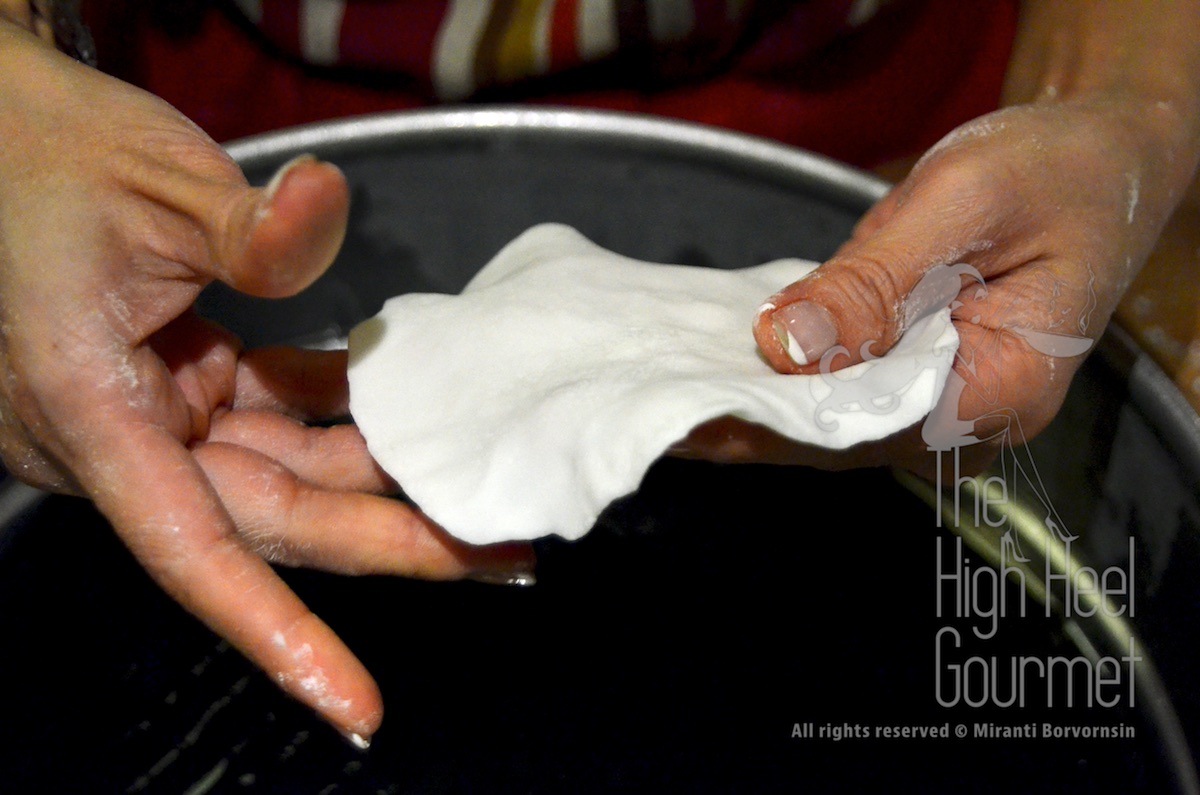
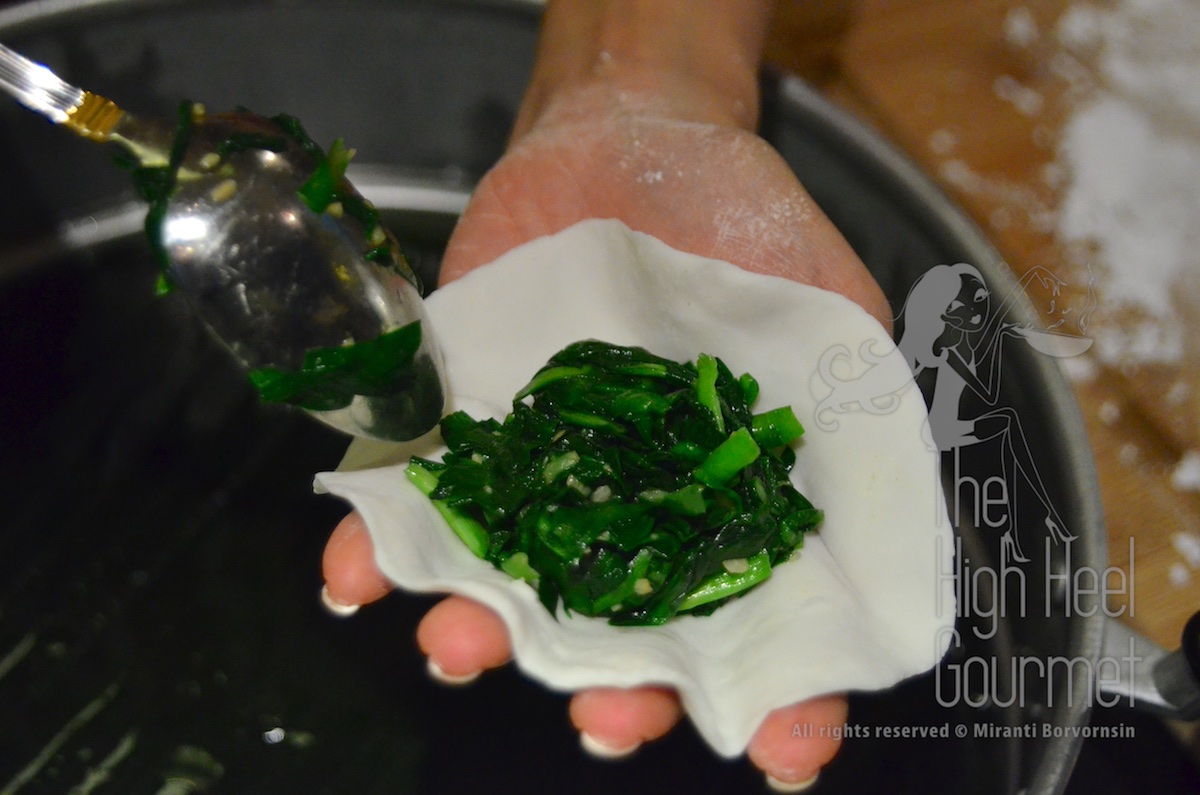
Then put it in the palm of your hand.
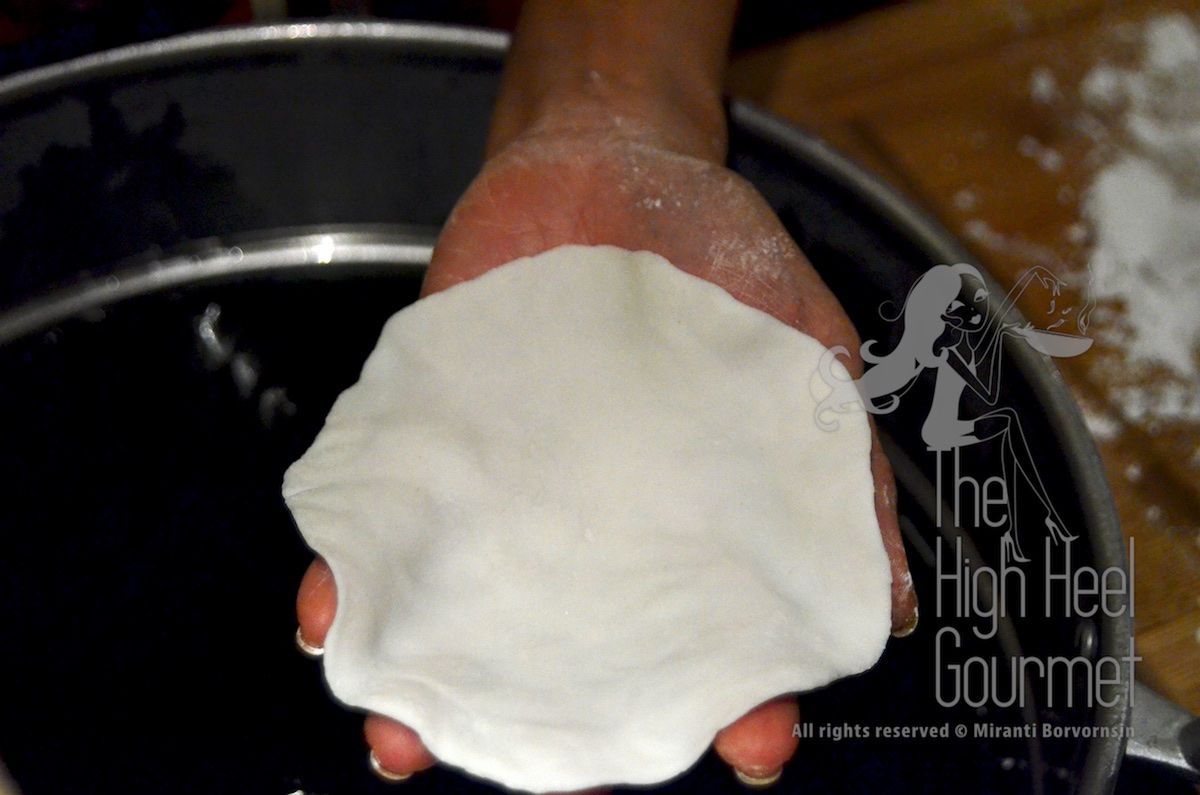
I’m a righty so I put the dough in my left hand. Cup the dough with your hand then put filling in the middle of the dough
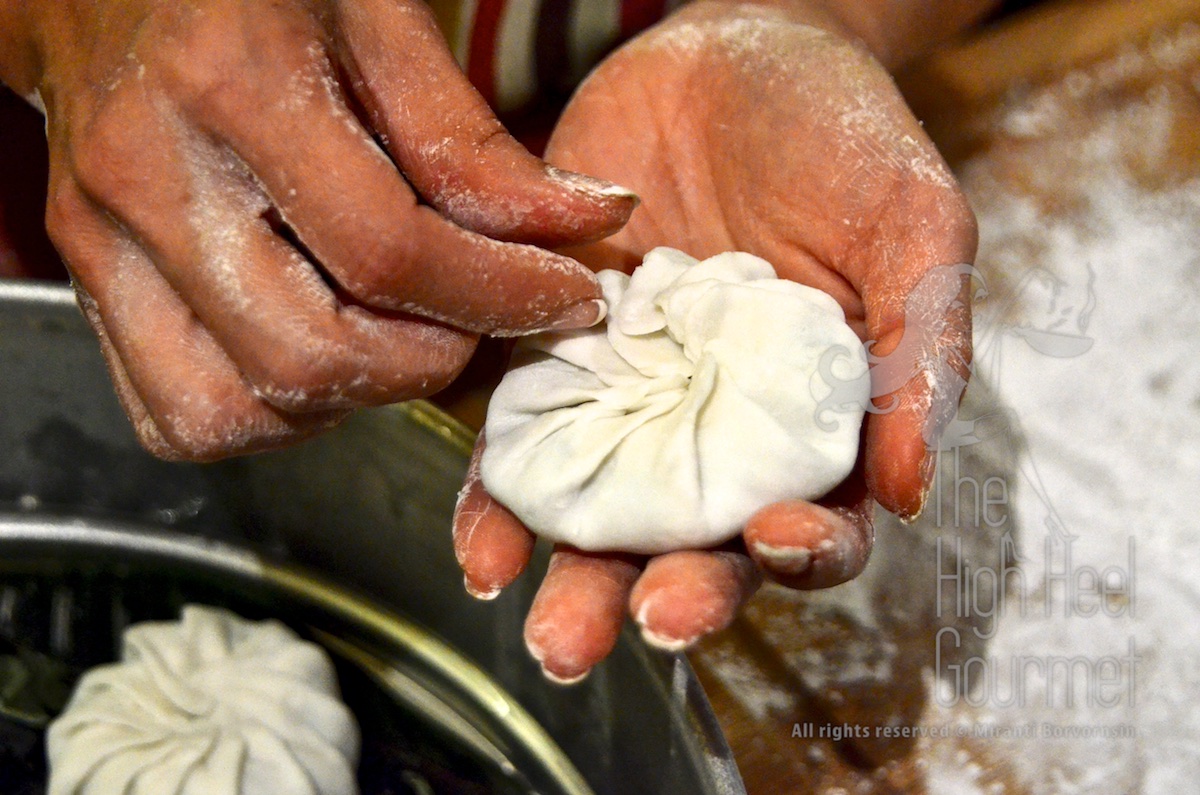
and pinch the edge of the dough together with the thumb and forefinger of your right hand.
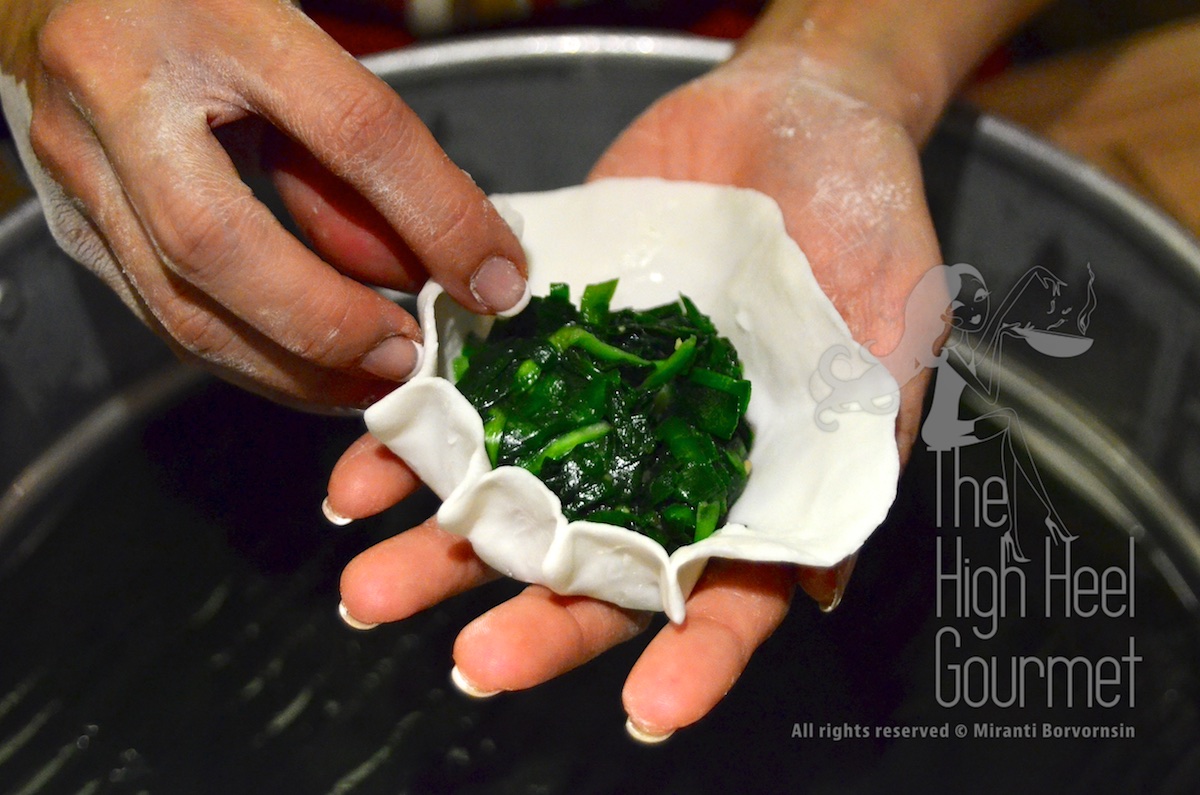
The pinch doesn’t have to be big because you will have to continue making more pinches around the edge of the dough, like pleats,while pulling each of the pinches into the middle together
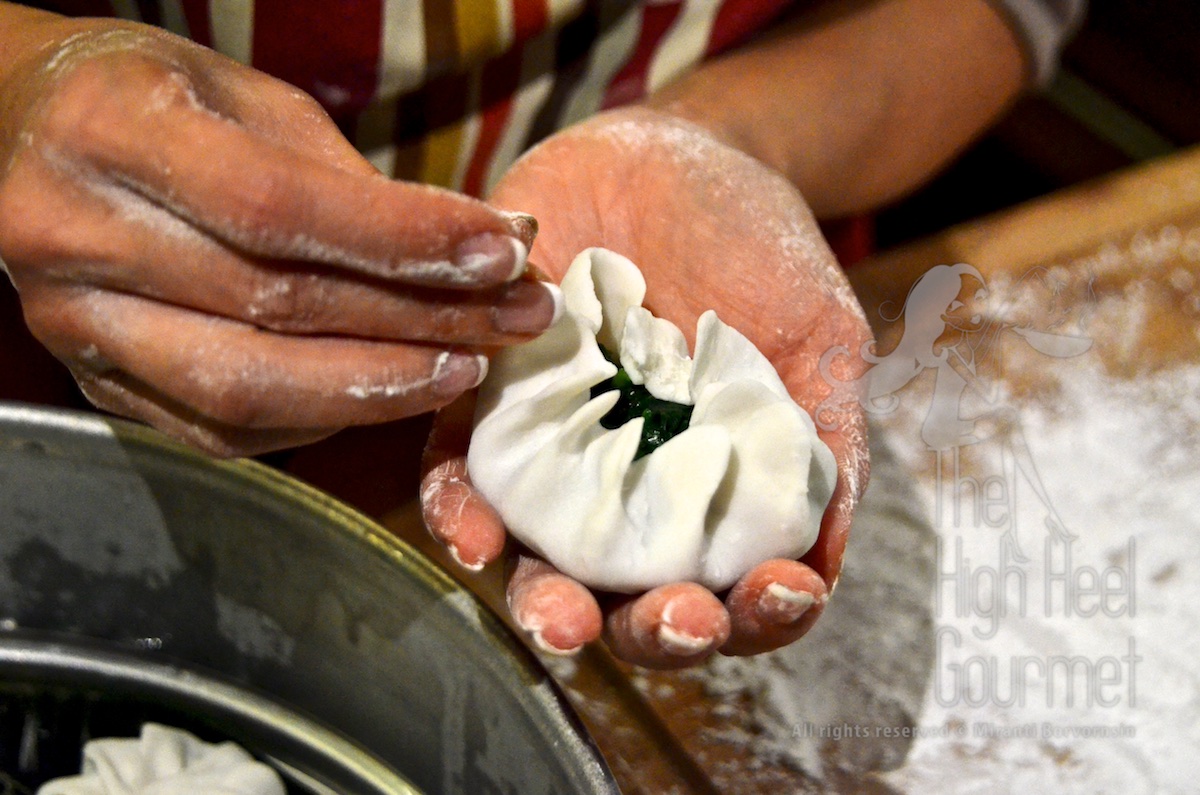
so the dumpling can be closed.
You can watch this video
[wpvideo pRhy1Kwu]
Keep them covered so they don’t get dry. You can lightly spray them with water, if you work too slowly and the finished dumplings start to get dry.
12) Once they’re are all wrapped, then you are ready to steam. Line the bottom of the steamer with banana leaves and brush them with plenty of oil. Put the water in the steamer. Start the steamer.
13) Add the dumplings in the steamer, making sure they have at least an inch of room around each dumpling.
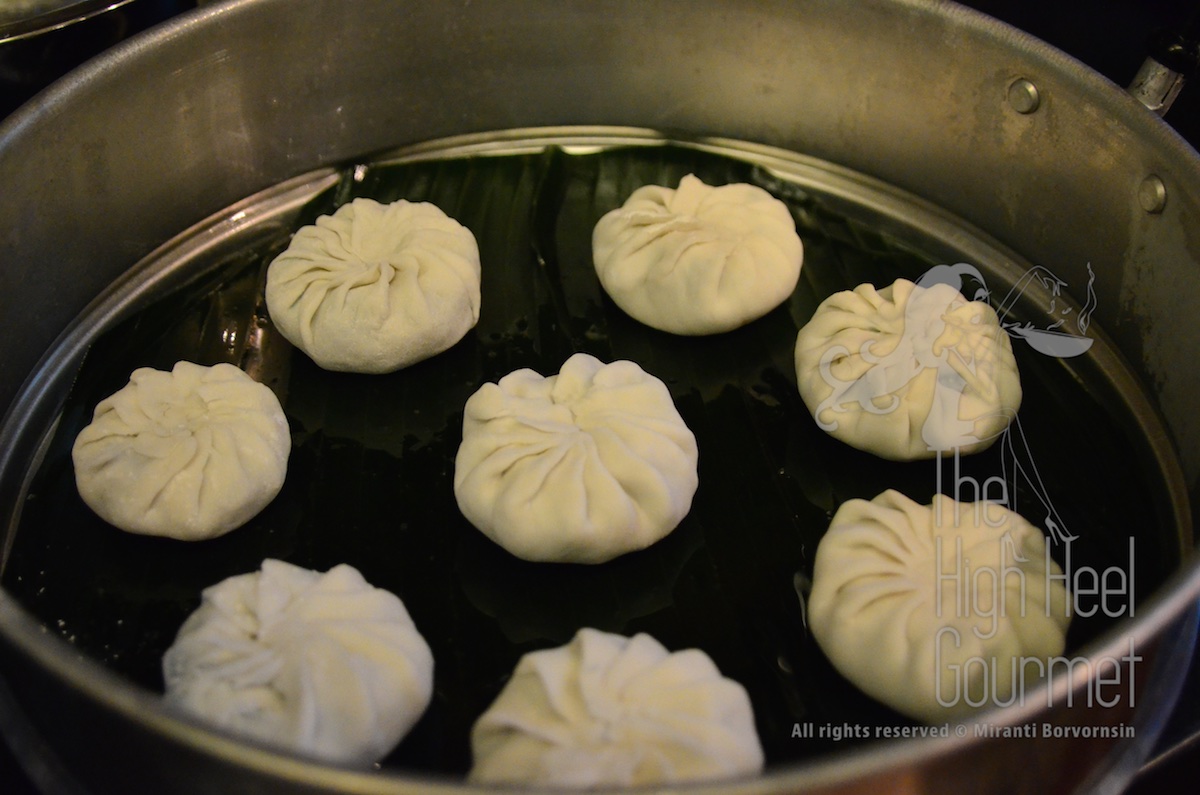
Steam them for 9-10 minutes or until the skins are completely cooked.
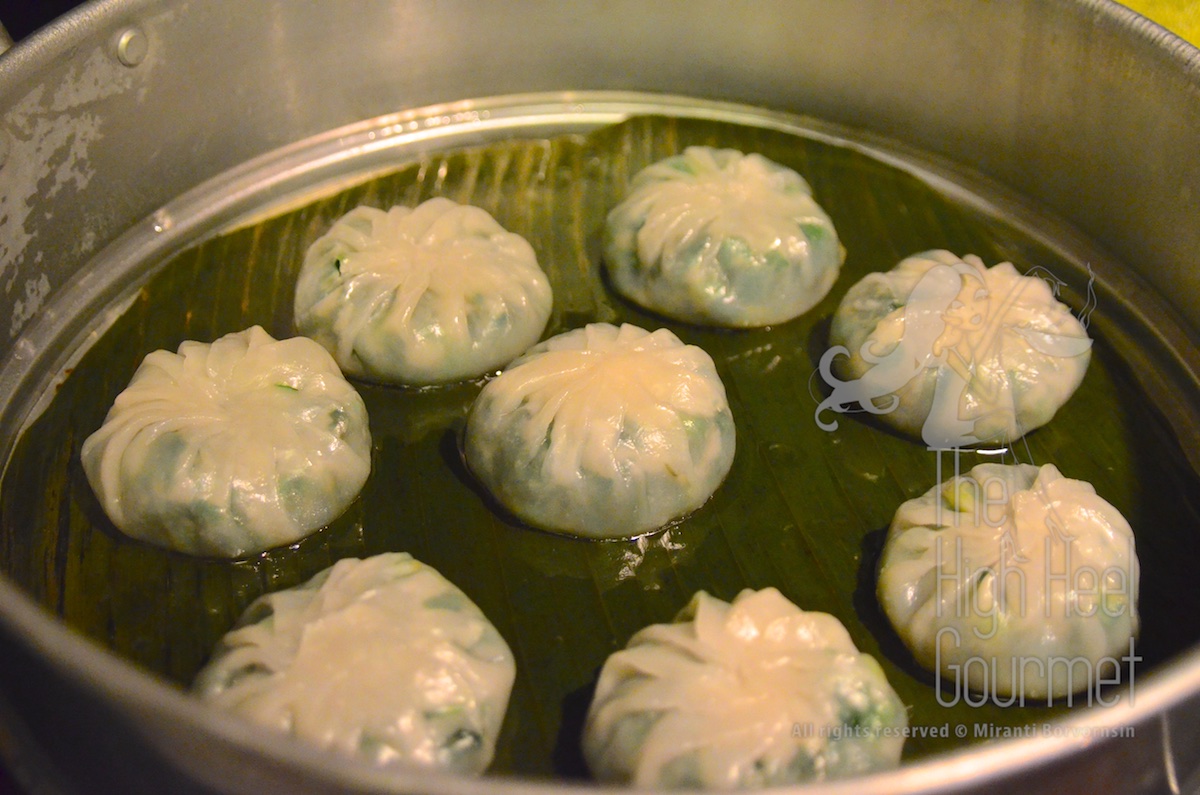
14) Brush the cooked dumplings with more oil to prevent them from sticking to each other. Traditionally the Thai will use fried garlic infused oil to brush the finished dumplings. You can make this easily by frying chopped garlic with oil until the garlic is golden.

Dipping Sauce
15) Mix all the sauces. Adjust the tastes to your preference.
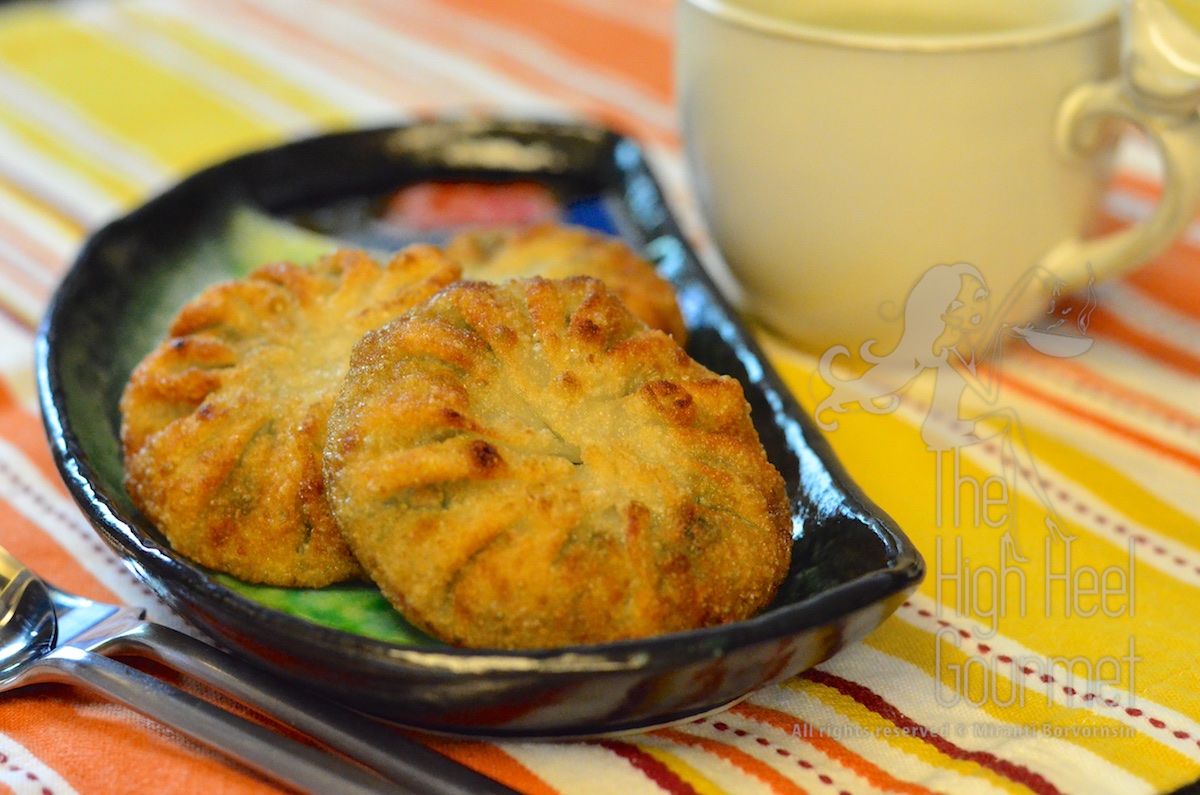
If you can’t finish all the dumplings (OMG you are banned from my club for one thousand and one hours!), you can put them in the fridge or even freeze them. With this dough it’s not that great to re-heat them in the microwave and try to eat the leftovers as a steamed dumpling. The dough gets tough.
I would suggest frying them in vegetable oil over high heat until the skin is crispy. Then you get to enjoy this new twist of the dumplings. Frankly, I refused to eat the dumplings without frying them first for years, (not so long—only a few decades!) I just learned to eat them steamed last year…haha.
Elegant! Chinese/Asian food is terrible in my town, and this recipe is so tempting! I am convinced that food made at home is the best! You are so patient to complete this recipe. I fear it is too labor intensive for my kitchen! Yet thank you for the lesson!
lol it’s so labour intensive for sure but the traditional Chinese-Thai, or the Chinese, usually make these for their tradition so, most of the time they have the whole family gathering to cook together. There will be some more Asian recipe that’s easier to make. I will put them up from time to time. Thanks for visiting!
Thank you so much for the recipe!! Tried this out because we had a lot of chives growing in the garden, and it worked great 🙂 Just need more practice with making the pastry and wrapping!
Reblogged this on ELANA – The Voice of the Future.
Reblogged this on ELANA – The Voice of the Future.
hi hiheel, i found your recipe dough perfect for me; thanks very much for sharing. However i did not cook my dough on the stove; i just pour boiling hot water, the same amount as your instruction, into the mixed flour.
Yes, you can do that too. My grandmother would do it that way but I’m too scared to knead the dough while it THAT hot!
hi hiheel, i found your recipe dough perfect for me; thanks very much for sharing. However i did not cook my dough on the stove; i just pour boiling hot water, the same amount as your instruction, into the mixed flour.
We are selling chinese steam chives (gu chai) but once we steam the gu chai can we keep tham for next day.or if we not yet steam the gu chai how we can keep tham for next day.
If you don’t steam them, the flour and the gu chai will get really soft and not good. Yes, the steamed one can keep for the next day if you keep them in the fridge and re-steam them or fry when you are ready to eat.
In Malaysia, we use only Rice Flour and Tapioca to make the skin. Didn’t know that we can add glutinous rice flour in xD. Thank you for this recipe. I like your photos!!
Some of the vendors in Thailand use only rice flour and tapioca flour too. The more tapioca flour in the mix the more translucent the skin would look. I use glutinous flour because it helps make the flour less sticky. (Funny isn’t it) So, it’s easier to shape.
Good idea!! LOL!! These dumplings really look delicious 🙂
Thank you for this post! This is one of the many street foods I seek out every time I go visit my grandmother in Bangkok (Yawarat), It’s been several years so I’m excited about the possibility to have it here in SoCal (if I’m successful at making it). Planning to make this tomorrow…
BTW are you close to Los Angeles? Because if you are, there are a few places that sell them.
OMG, Miranti! These are exactly how I remember them tasting whenever I visit Thailand! I just finished making them (was able to make 16 from your recipe) and I am in such a happy spot right now enjoying these right out of the steamer. I may pan fry a few later to try them that way but I have always just had them steamed from the street vendors. Thank you for posting this recipe and detailed instructions. I will be combing through your site to see what other delectable goodies I can try to reproduce. 🙂
I’m glad you enjoy them. It’s not the most popular street food to the foreigners obviously but I LOVE them. I can go to Dim-Sum but I will only get the rectangle kind that are different because you will not get the flour wrap around vegetable but they are the vegetable cake with so much flour in them.