
Have you ever seen an Asian person and wondered? DO THEY EAT RICE EVERY DAY?
Think again…and I don’t recommend asking someone—especially me—THAT question!
That way I won’t have to find where you are and go there just to smack you in the head!
Of course, I do know how to cook rice really really well, without having to eat it every day. I haven’t shared how to cook many different kinds of rice because I thought everyone knew already. Sorry for that (racial!) assumption. I thought you all had the rice cookers, steamers and such that you can use to cook rice. Don’t you?
Well, this post isn’t going to be about how to cook rice in a rice cooker. For THAT you should just read the manual, if that’s what you want to know. I didn’t own a rice cooker for the longest time and the one I own now was given to me by an American friend who thought it was such a necessity for an Asian to have a rice cooker. I didn’t care to use it because rice cooked with an automatic rice cooker isn’t as good as the rice cooked with my method.
To talk about cooking the perfect rice and not talk about the many different types of rice is like talking generically about pasta. Each pasta needs its own different cooking time, and rice does too.
Let’s start with the basics:
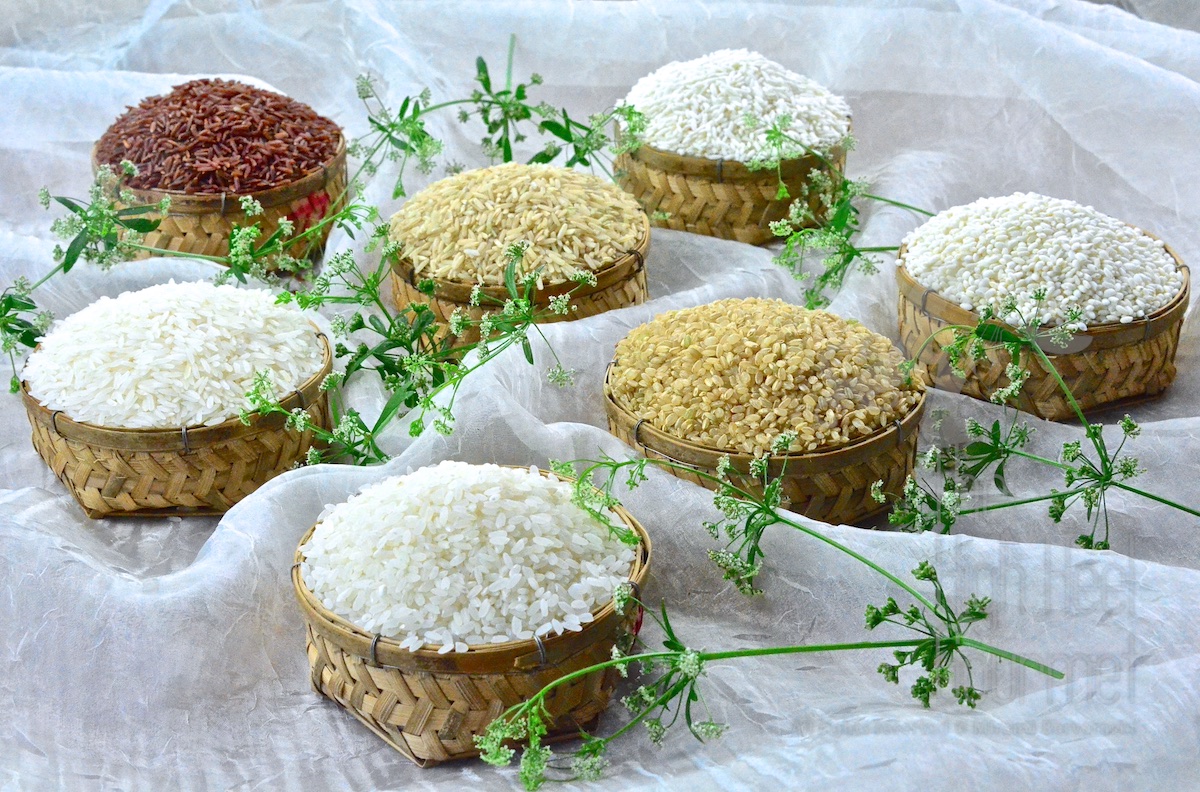
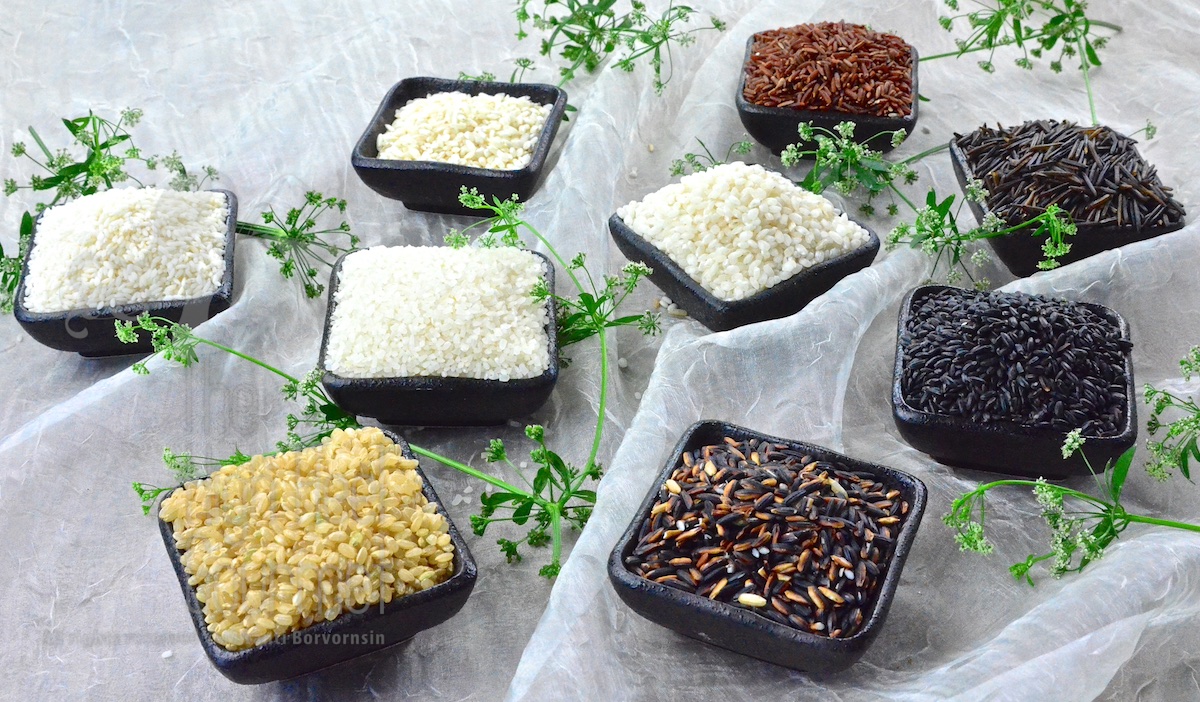
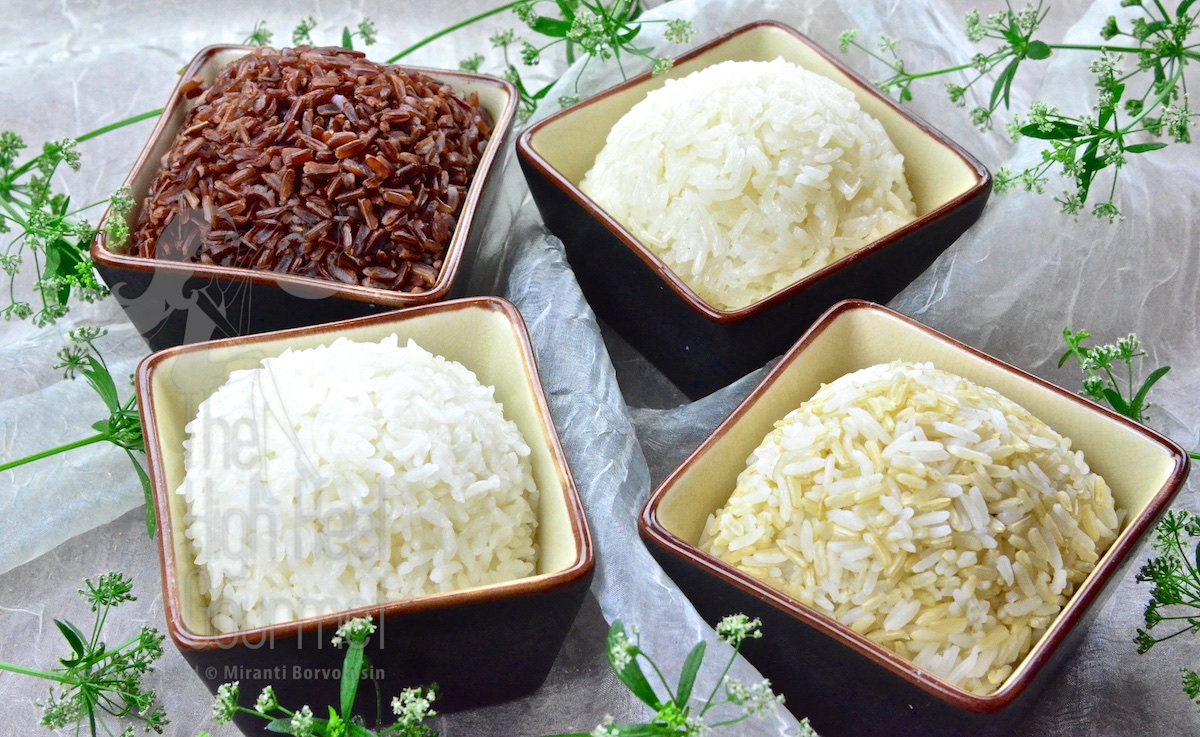
1) There are many different types of rice
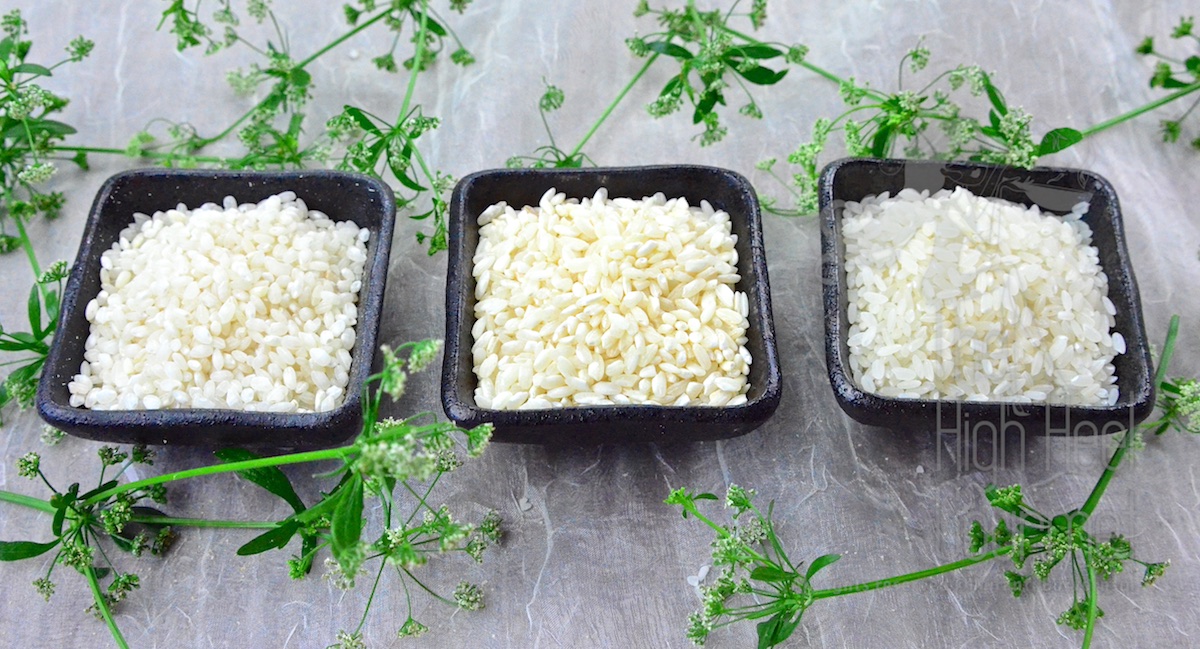
Counter-clockwise from the front: Sprouted brown Kohishi-Nikari rice, Thai purple sticky rice, Black sushi rice, Wild rice, Thai red rice (Himalayan rice), Arborio rice, Tiny rice, Broken rice, Bomba rice.
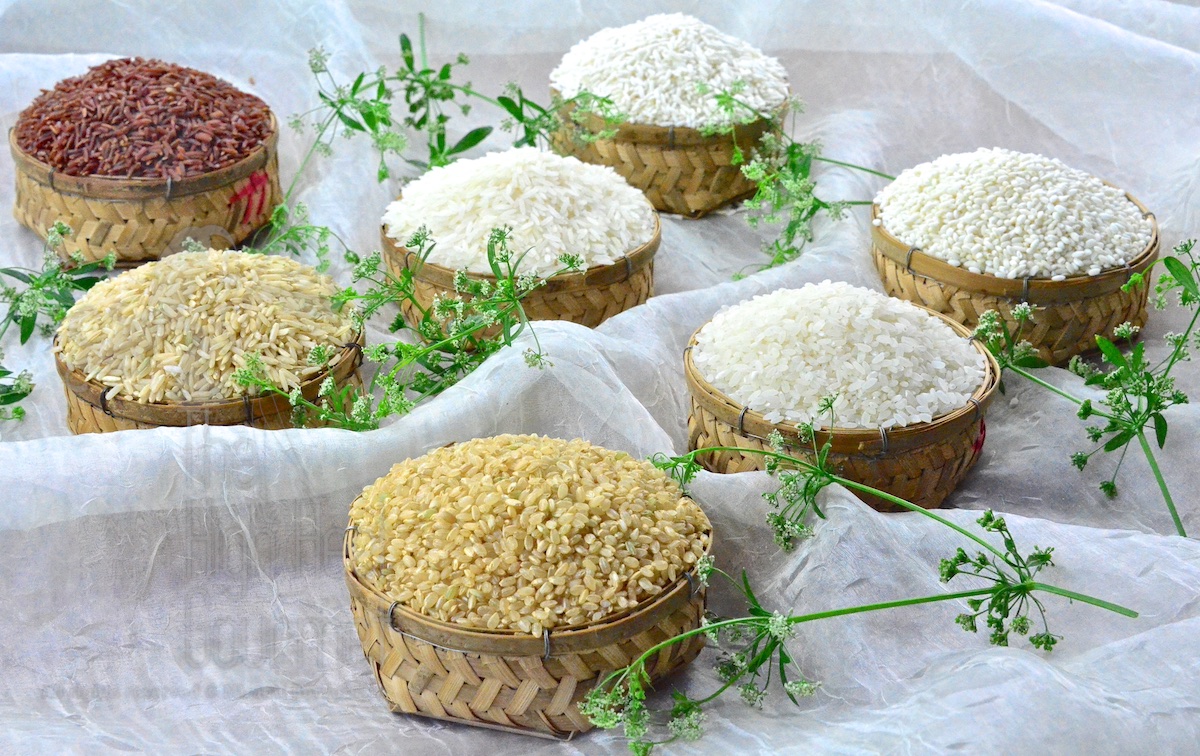
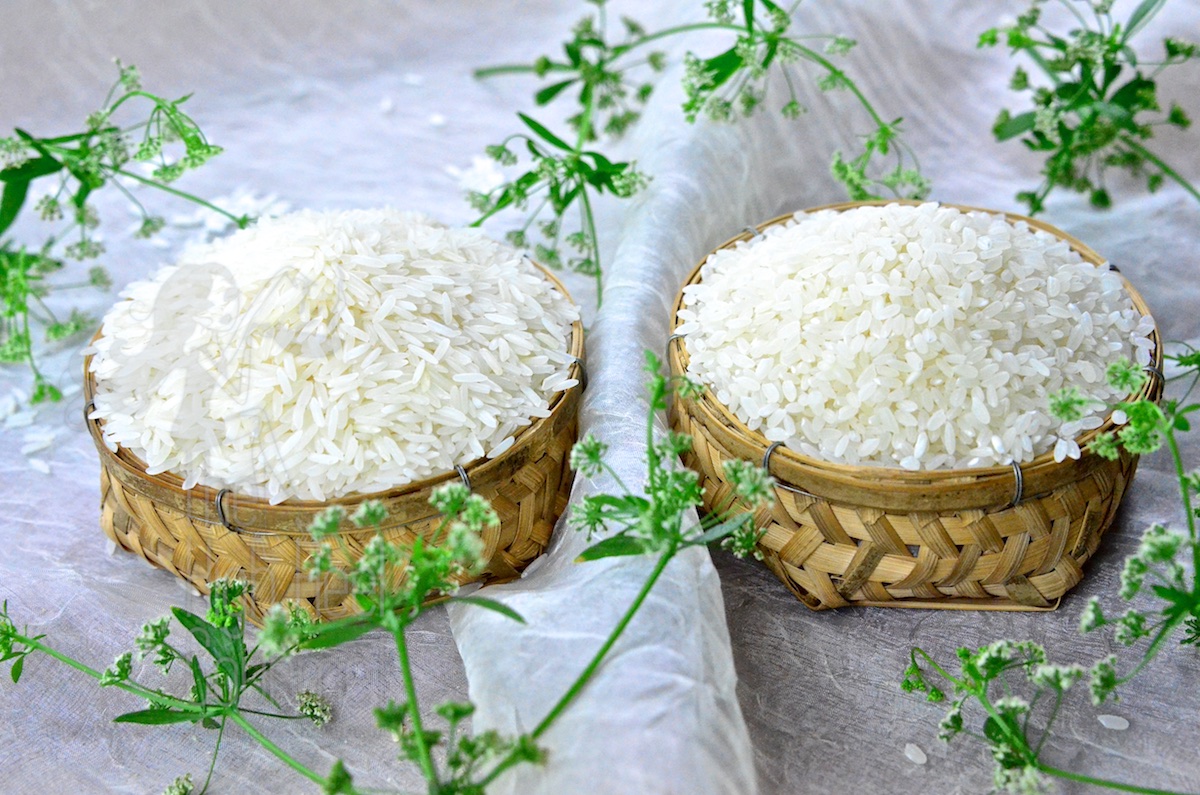
Counter clockwise from the red rice: Thai red rice (Himalayan rice), Brown Jasmine rice, brown Calrose rice, white Calrose rice, Japanese sweet rice (sticky rice), Thai sticky rice, white Jasmine rice.
1.1) If you divide it by the size and shape of the grains, there will be short grain and long grain.
Some might add medium grain as a category, but I normally consider them the same as short grain.
Three different type of short grain, From left: Bomba Rice, Arborio Rice, Calrose Rice
I’m not going to tell you how to identify them. The width to the length ratio isn’t my interest. What matters to me is how to cook each type perfectly.
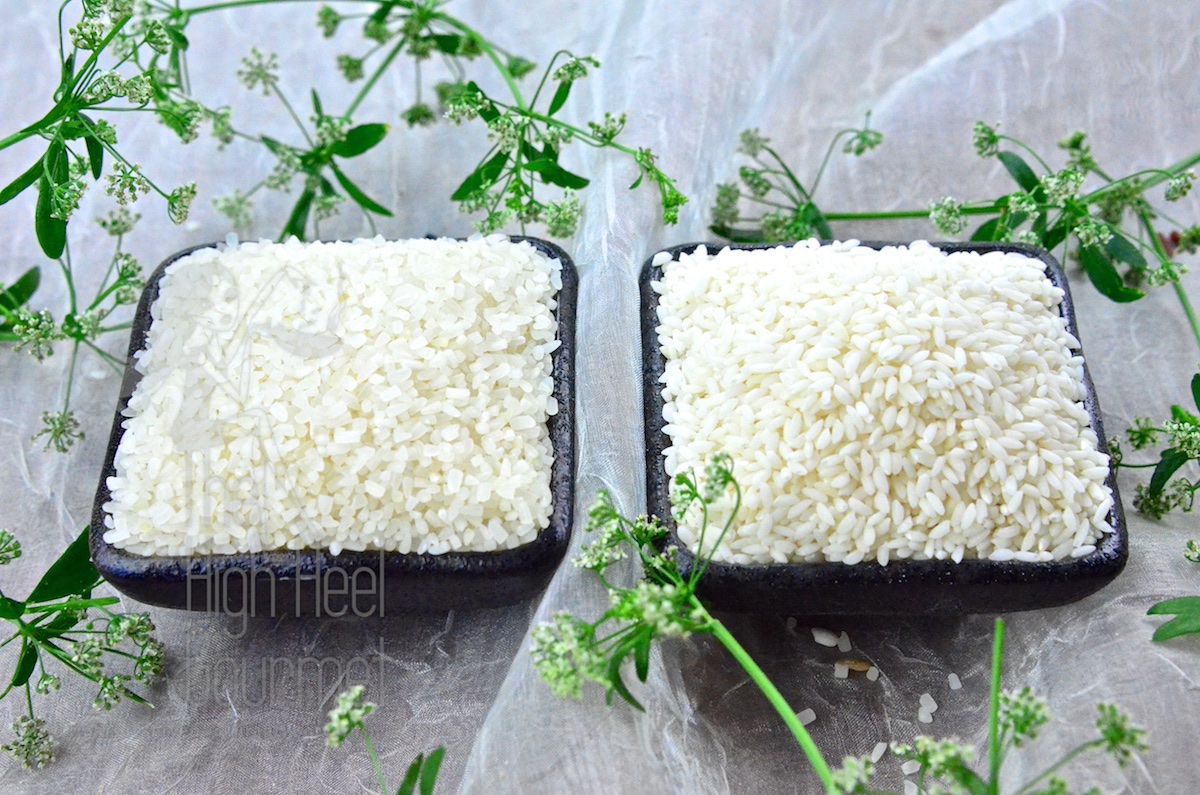
These two are interesting. The one on the left is Vietnamese Broken Rice and the one on the right is Tiny rice.
The broken rice is Jasmine rice grains that are broken into small pieces. This is usually happened during the milling and the broken grains will be separated to sell as Broken Rice.
The Tiny Rice grains are all full grains but just tiny, about a quarter of the regular rice size.
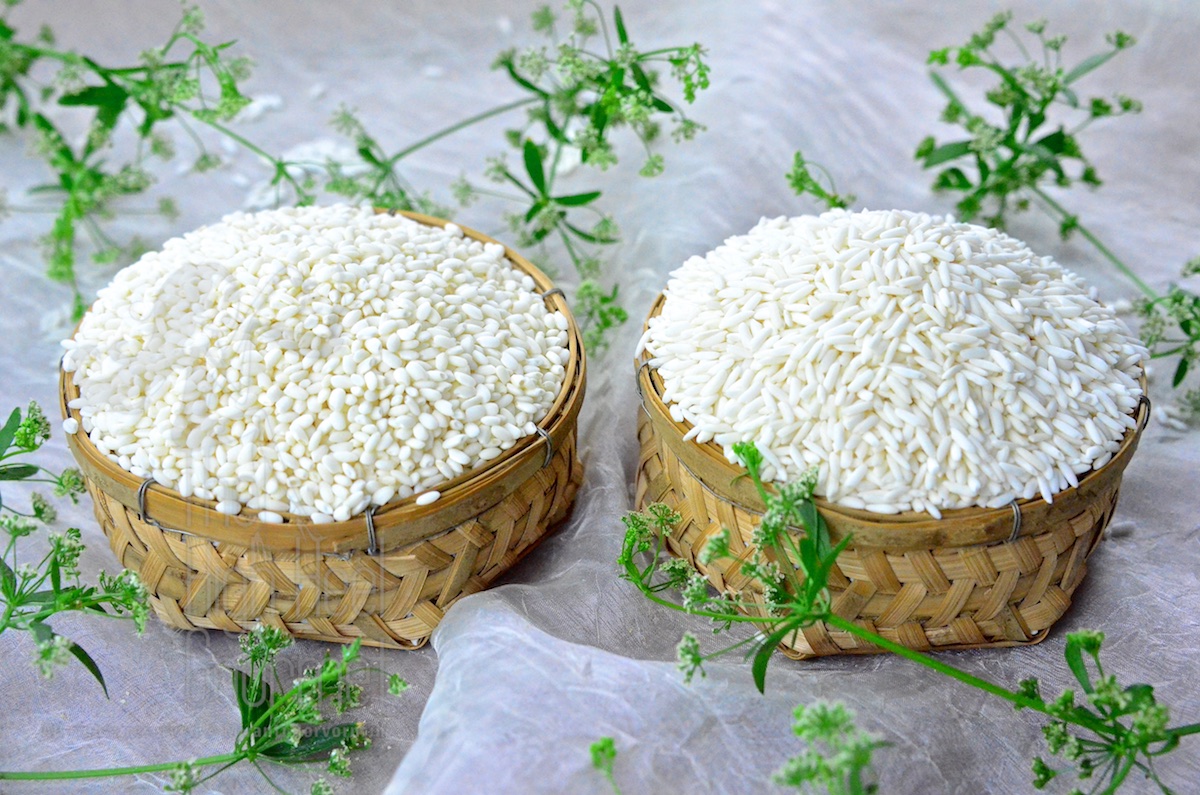
1.2) Other than dividing them by shape, rice also can be divided by the type of starch. In this case you will have plain or regular rice that contains more Amylose (the straight chain polymer of glucose units) and sticky rice that contains more Amylopectin (the branched chain polymer of glucose units).

Left is plain white rice; right is sticky rice. Sticky rice usually is opaque white and the regular white rice is translucent white and they’re reversed after cooking.
Sticky rice has many different names: sticky, glutinous or sweet rice. The differences between the two are in the molecular level as I briefly described above. I don’t want to bore you with the details, but ask me if you really want to know.
1.3) There is another way to divide the rice, by how the rice kernels were milled. This way you will have brown rice, the rice grains that only got the hull removed but the rest still intact.
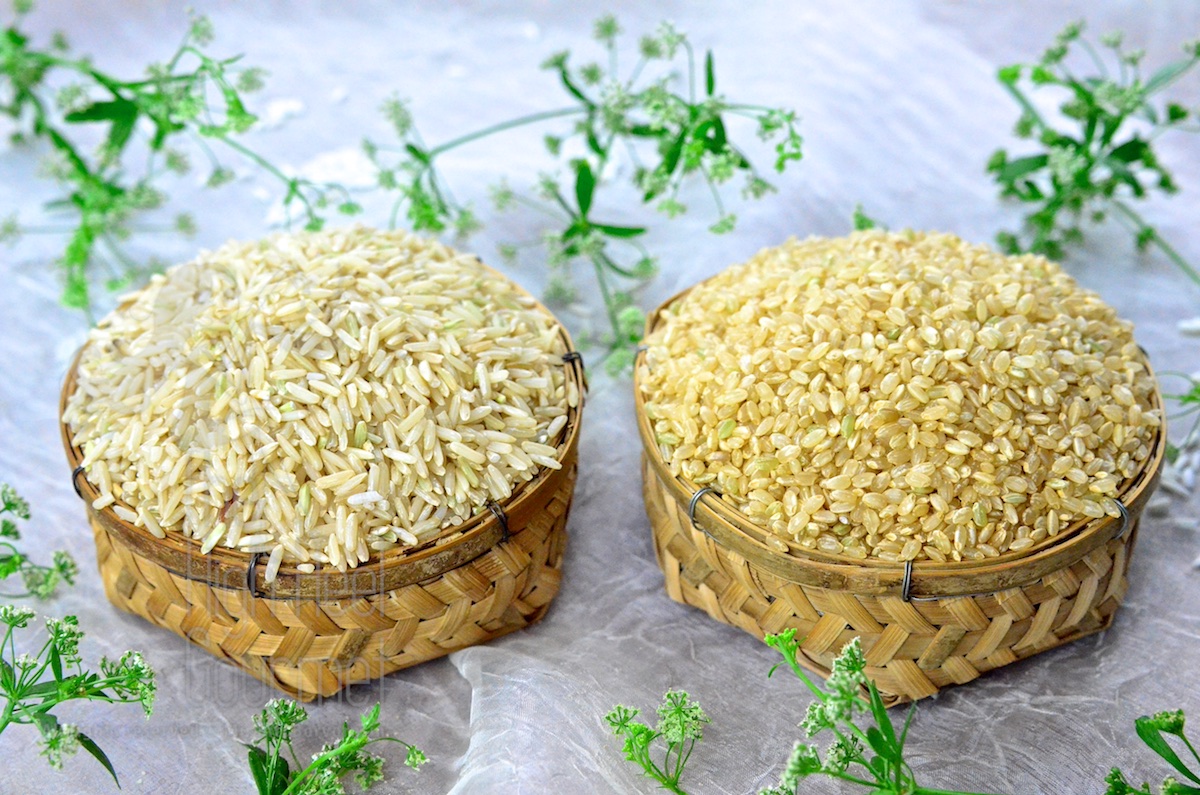 and white rice is the brown rice that got more polished during milling until the nutritious brown shells are all removed.
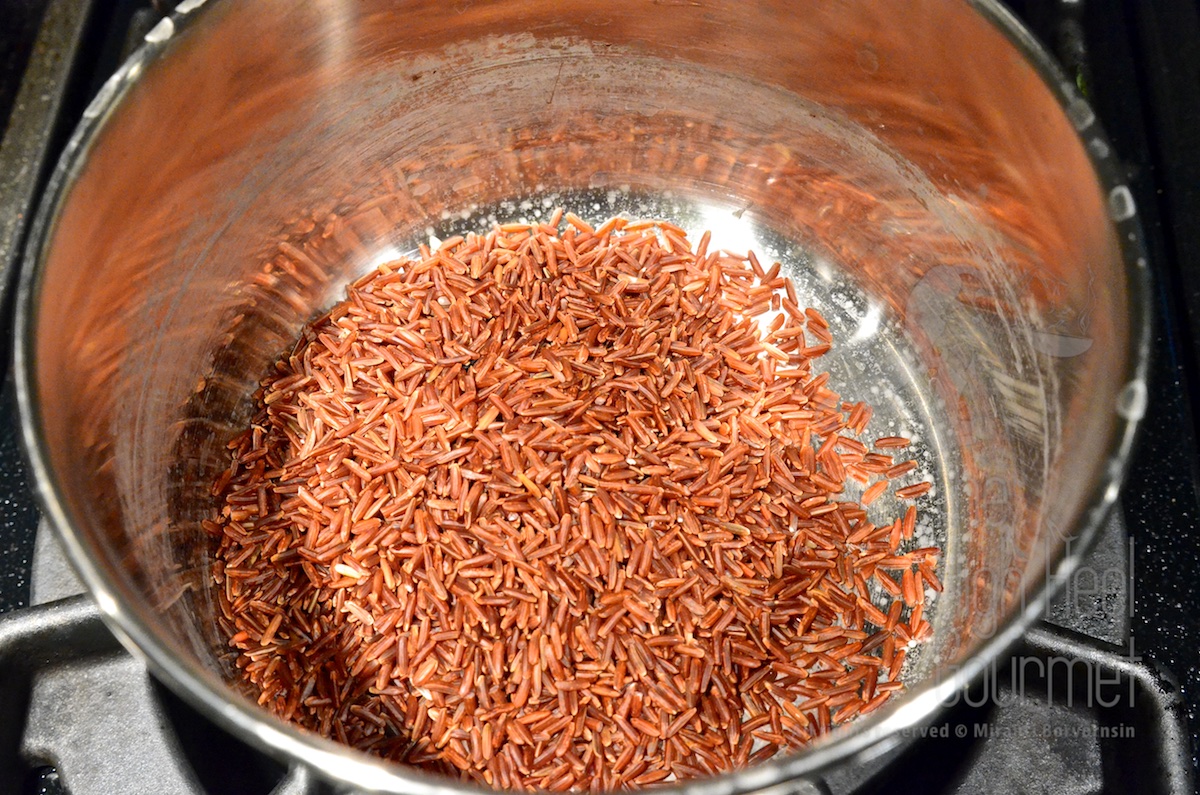
“Brown” rice also comes in many different colors—purple rice, black rice, red rice—and maybe some more that I don’t know.
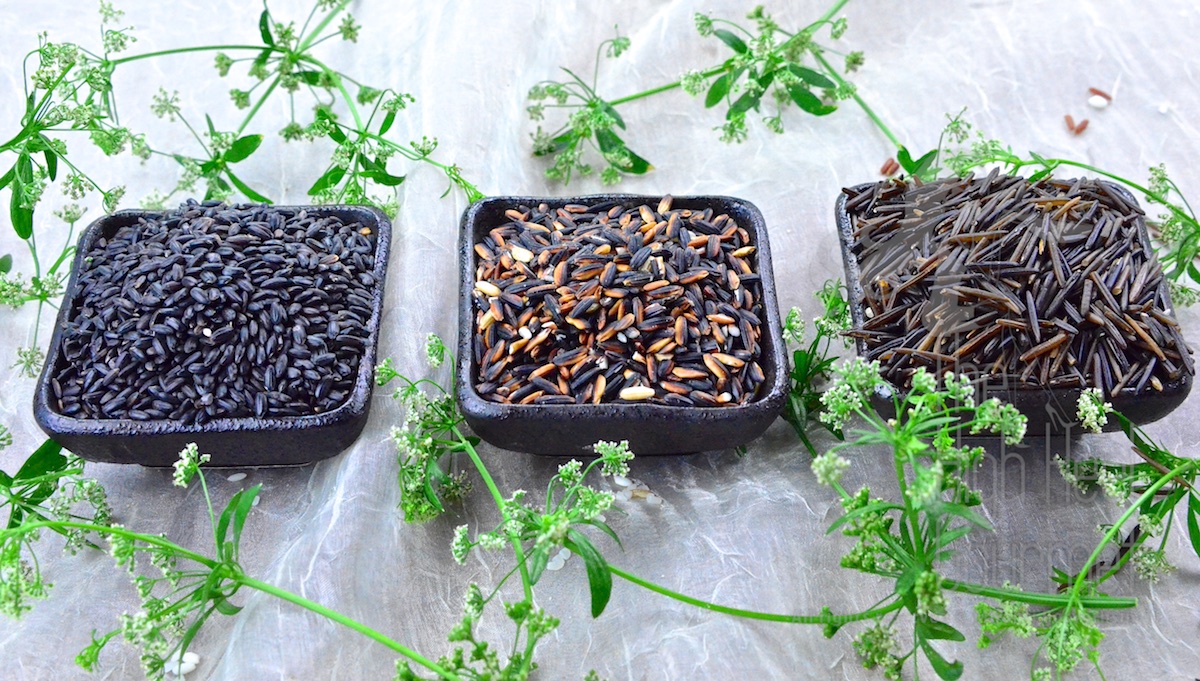
From left: Black sushi rice, Thai purple rice, Wild rice.
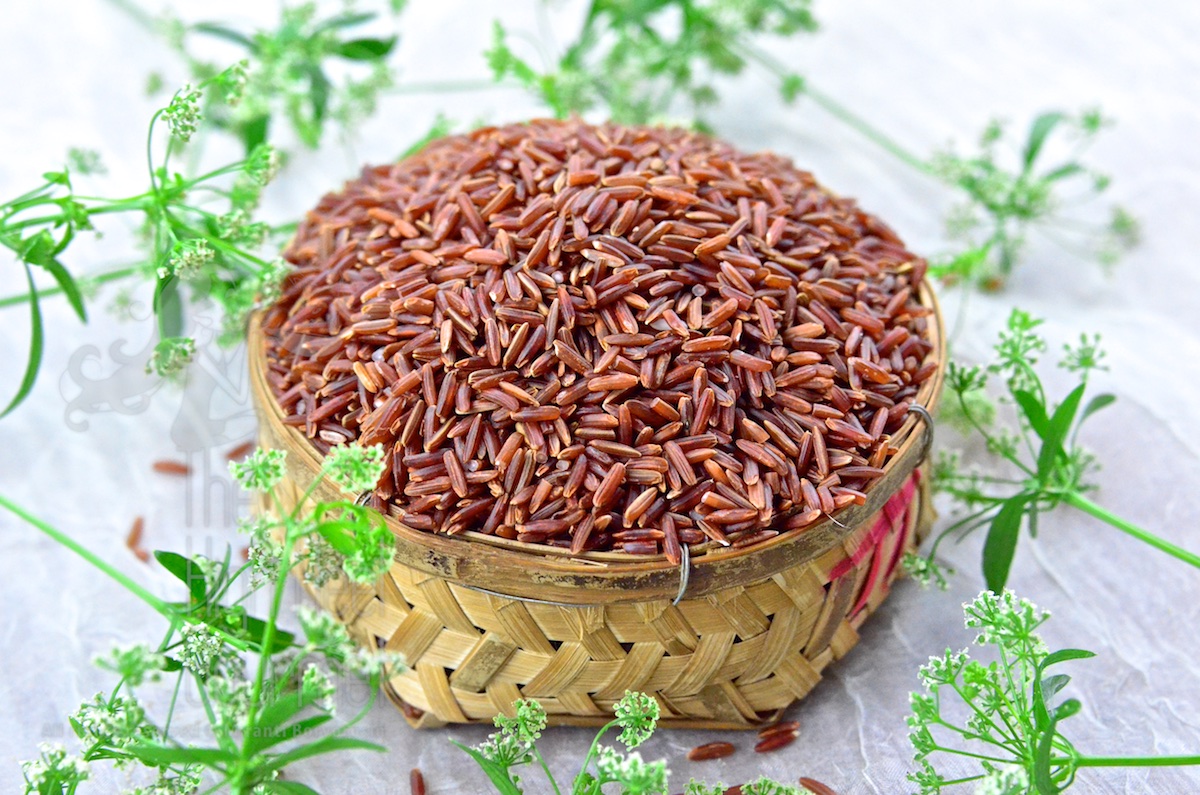
Thai red rice (Himalayan rice)
2) The basic method of rice cooking (for steamed plain rice only, not including risotto, paella, or any rice that’s cooked with some other liquid other than plain water). There are many ways of cooking rice, but the principle is always the same: Rice grains need to absorb water until they’re fully cooked.
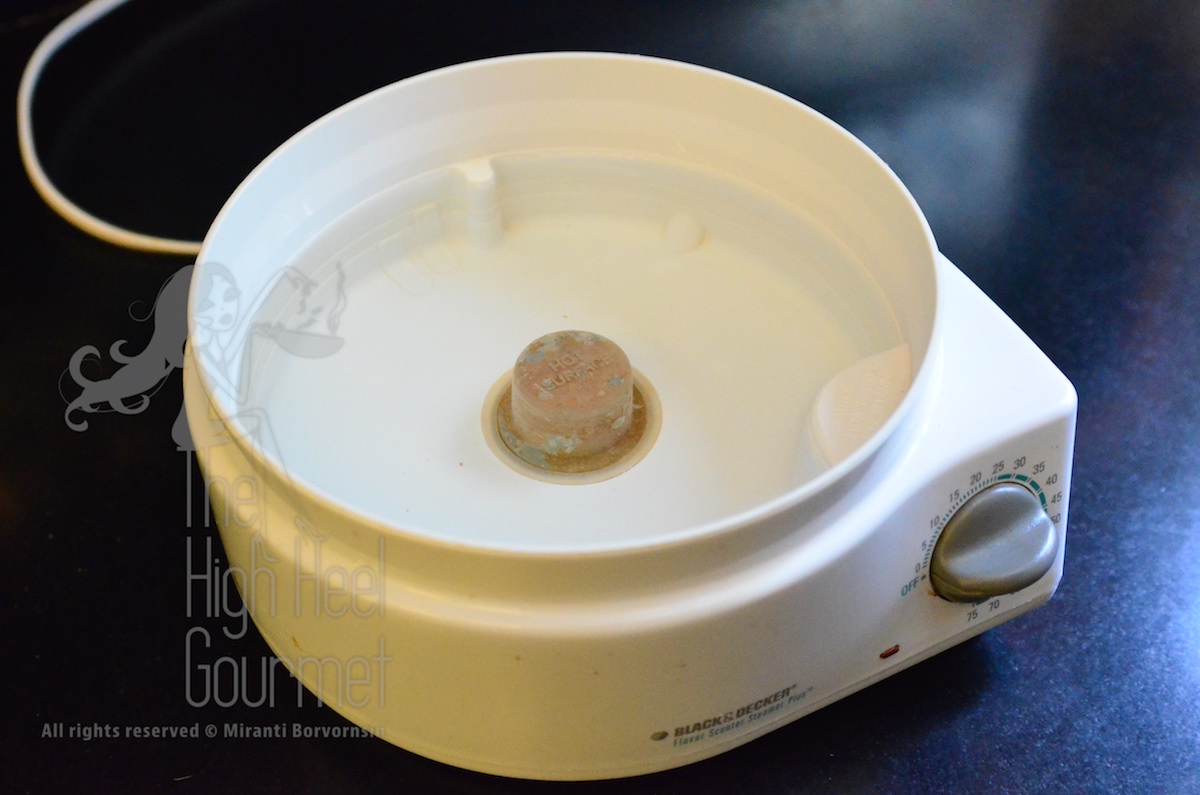
2.1) Steaming Done all the way until the rice is finished. This is actually not a bad method. If you have steamer at home, all you have to do is just put rice in a cup or a bowl, add water, then put the bowl in the steamer and set the timer. For white Jasmine riceI usually steam it for 20 minutes from the minute I turn the steamer on, or 15 minutes form the minute the water in the steamer reaches a boil and releases steam. You will need longer time for brown rice. I use to steam purple Thai sticky rice for one hour and it still wouldn’t be done, so the cooking time varies depending on many factors, such as:
– Amount of water in the rice grains
– Amount of water in the bowl
– The type of the rice grains
– Amount of water used in the steamer
– Amount of heat
Steaming is the easiest method, and ensures perfect rice every time. You can check if the rice is cooked by opening the steamer and pick a rice grain from the top of the cup or bowl and taste it. If it soft all the way through, you are done. The idea is to let the rice grains absorb the water from the cup. The water isn’t going to reach the boiling temperature but will be very close.
With this method the amount of water used in cooking and the time used for cooking needs to be adjusted according to each type of rice. You need to try on your own.
There is another way to steam rice. I mentioned in the Mango Sticky Rice post that I steamed the sticky rice without water in the bowl. That method requires the soaking of the rice grains overnight so each grain absorbs the water to the max before the steaming time. You can also bypass that if you put the rice in water and put the whole bowl in a microwave and heat it at high until the water is bubbling, then you can drain the water and steam the rice in the steamer without the water. However, keep in mind that by throwing out the water that you used to soak the rice grain in the microwave, you are losing some of the nutrients in the rice too. That’s why I personally don’t use that method. I only use the steaming without water with sticky rice that has been soak overnight only.
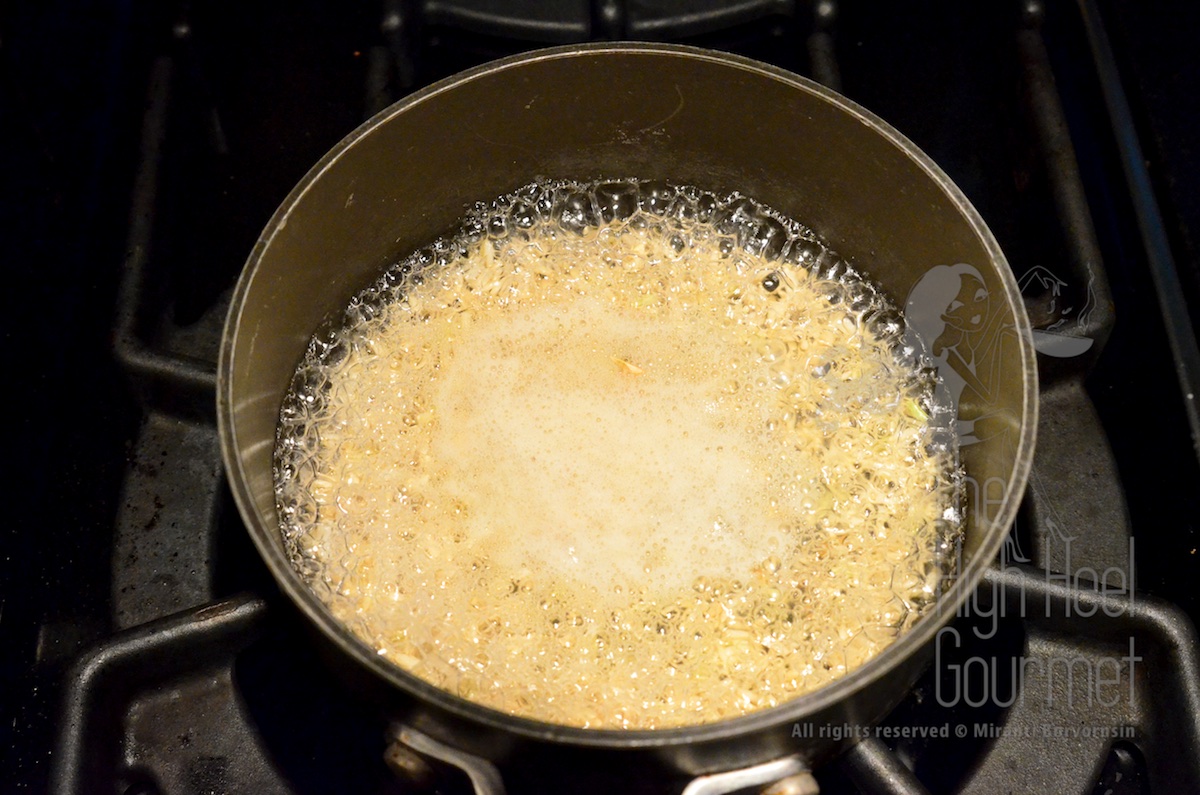
2.2) Cooking rice in a pot. This is the most popular method, and this is the theory that the rice cooker is using to cook the rice. If you know the principal, you don’t even need the rice cooker.
All you have to do is putting the right amount of water in the pot with the rice, CLOSE THE LID (very important) and cook at high heat until the water reach the full boil, then simmer it until the rice is cooked. It sounds very easy and it is easy. But (of course there is always “but”) the trick is to know what is the right amount of water to the rice you use. This is something you have to try it with your rice. I can only give you guideline but it’s not going to be the perfect amount.
This is the approximate ratio of rice : water
White Jasmine rice 1:1 (New Jasmine rice 1 : 0.9, Old Jasmine rice 1 : 1.15)
Brown Jasmine rice 1:1.8
White Calrose rice 1:1.25 (This ratio can be used with most Japanese rice such as Koshihikari and Nishiki)
Brown Calrose rice 1: 1.65
What California rice 1:1.15
Brown California rice 1:1.65
Thai Sticky rice 1:1.25-1.5 depending on the age of the rice after harvest.
Thai Purple rice 1:2
Chinese Black rice 1:2
Basmati rice 1:1.5
Thai red rice or Himalayan rice 1:1.5
Bomba rice 1:2.5 (Yes, believe it or not. This is the rice that makes paella so delicious. I recommend trying it at least once for paella. If you are using soup stock, you can’t use 1:2.5 ratio because the stock has more than just water. The ratio or rice:stock will end up around 1:3-3.5. If you are substitute Bomba rice with another short grain rice like Calrose, you need to reduce the amount of soup stock accordingly.)
Arborio rice 1:1.5
Every time you buy a new batch of rice, you normally have to adjust the amount of water a little. If you keep your rice grain for a long time because “You don’t eat rice every day”, after 4-5 months of storage, you have to start adding slightly more water to the pot before cooking the rice.
2.3) Cooking rice in a pot, but with the old method of pouring water out after the rice grains are cooked. This is the ancient method that the Thai used before the automatic rice cookers invaded and conquered our country. And this method is still good for cooking brown rice.
First you put rice in the pot. Then you add water. You need to use a large pot because we will be adding a lot more water and once the water reaches a boil, it will really foam up. So the rice shouldn’t fill more than 1/3 of the pot and the water might go up really high, almost all the way to the brim. Set the stove to high. Then wait until the water reaches a boil, then lower the heat to medium high. The water should still be bubbling but not foaming out of the pot. Stir so the rice grains are separated, flipping the bottom up onto the top so it won’t be burn.
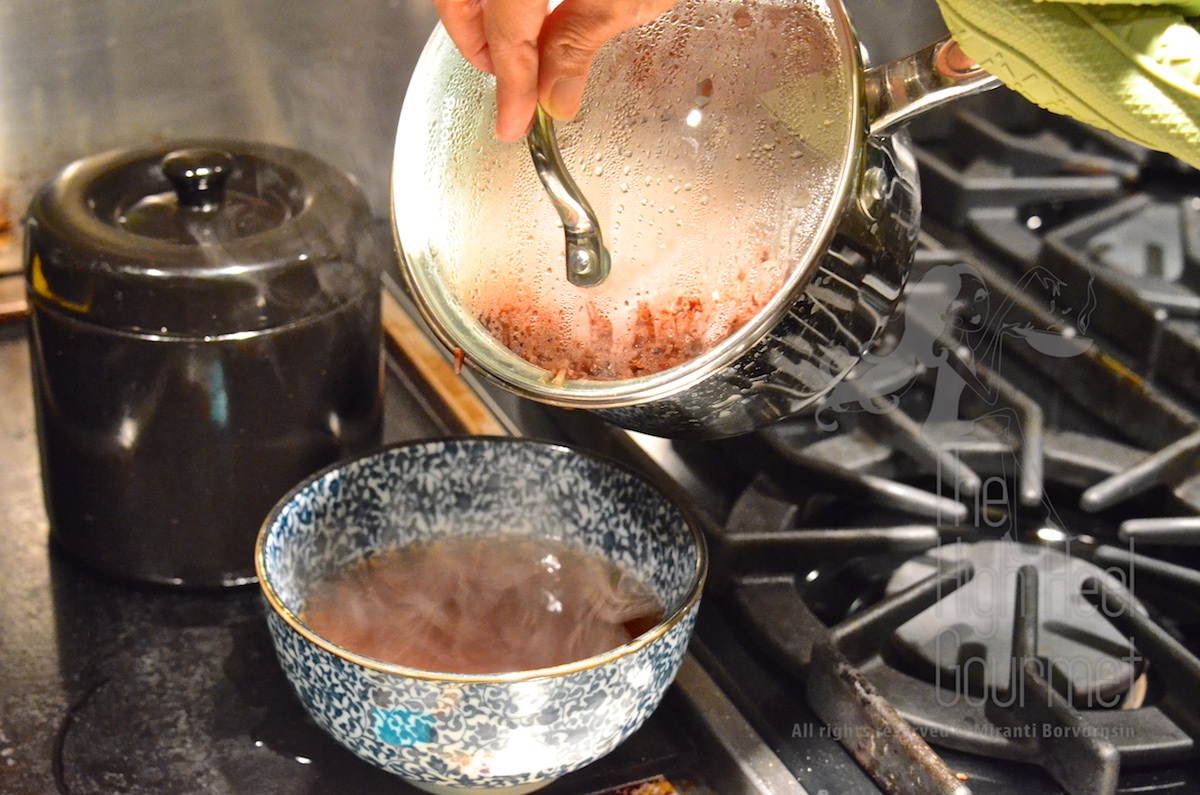
Cook until the rice grains are cooked through. You can tell by biting into a grain, and if it’s soft all the way through, then it’s cooked. You can just look at the grain, too. If the grains look fluffy and expanded, it’s normally fully cooked. The next step is to pour the excess water that is left in the pot out. This water is delicious and full of nutrient so, don’t throw it away. You can drink it. My grandmother liked to add a pinch of salt and a pinch of sugar before she drank it.
After the water is all drained, put the pot back on the stove over low heat, cover the pot and dry excess water from the rice. Make sure that the heat touches every part of the pot so the rice grains are all dry, not by stirring the rice but by moving the pot around over the heat.
2.4) Cooking rice in a microwave oven. This is not my favorite method, even though the result isn’t so bad at all, I have to admit, and less messy too. The idea is to heat the water until it reaches a boil and let it rest, COVERING it, of course. Then keep heating the water and resting for just two rounds, and you will get the perfectly cooked rice. This is the method that I use when I want to cook just enough rice for myself (about 1/4 – 1/3 cup of dry rice grains).
– White rice Heat at high 2 minutes, rest 5 minutes, stir, then heat at high again another 2 minutes, then rest 5 minutes. Most of the time if you check the rice grains, they should be all cooked, but if they aren’t, you can heat it at high again for another 1 minute and rest another 3 minutes, then you should be done.
– Brown rice Heat at high 2 minutes, rest 5 minutes, stir, then repeat the whole process 3 – 4 times depending on the type of brown rice.
– Sticky rice Heat at high 2 minutes, rest 5 minutes, stir, then repeat the whole process one more time. Sticky rice is different; you have to heat at high for another one full minute and take the extremely hot bowl out to stir while you spray cool water on the cooked rice grains to stop the cooking process or else the sticky rice will become mushy.
I never use this method to cook more than a cup of rice, so i don’t know if this is good for cooking a large batch.
Congratulations…Now you are done with the lecture. We’re ready for your laboratory time.
3) Let’s cook the rice
3.1) Steaming the short grain rice:
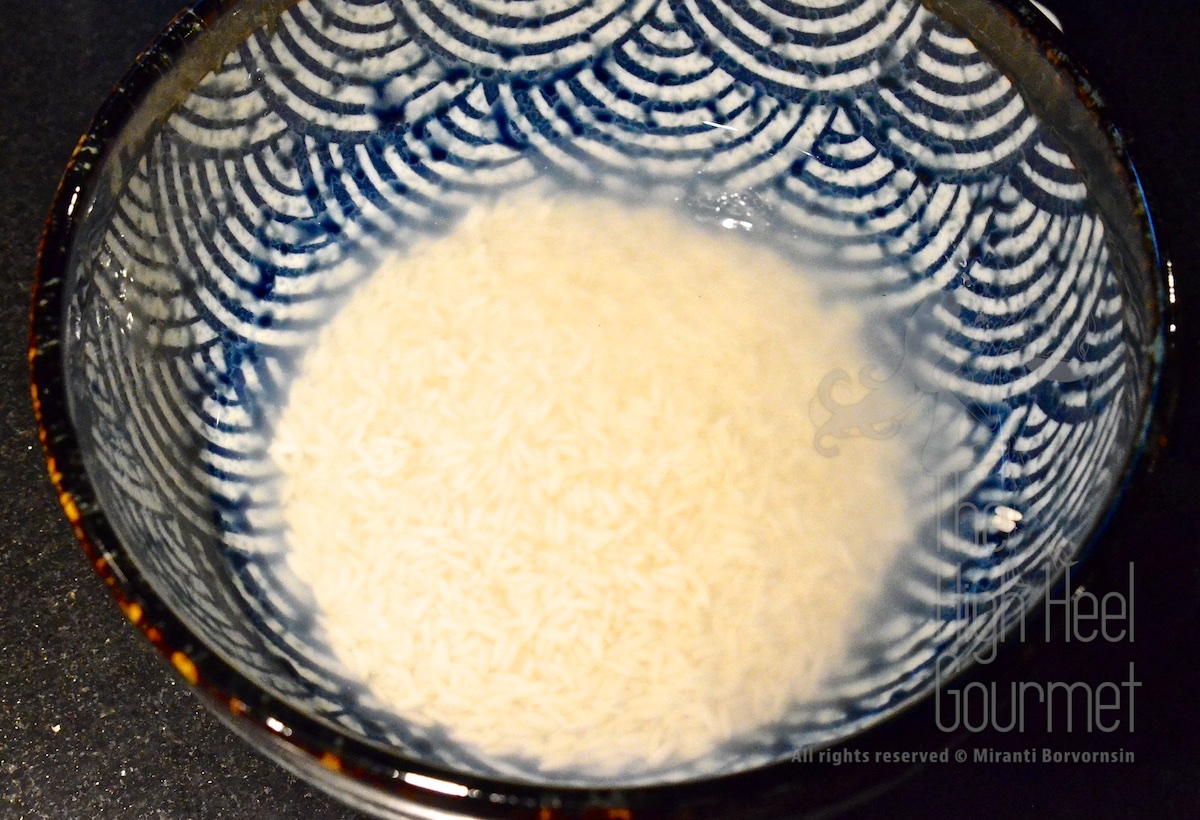
First, add water to the steamer at the highest level allowed.
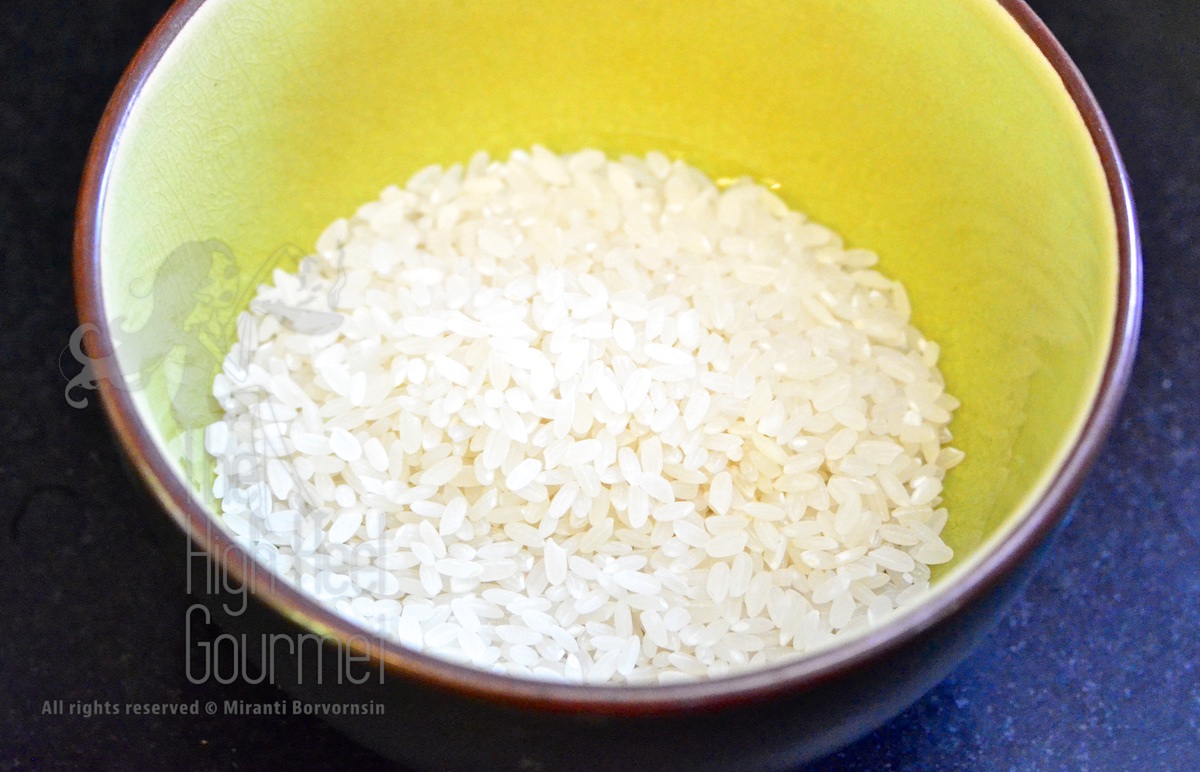
Put rice in a bowl or bowls, if you want to steam for more than one person.
Add the right amount of water
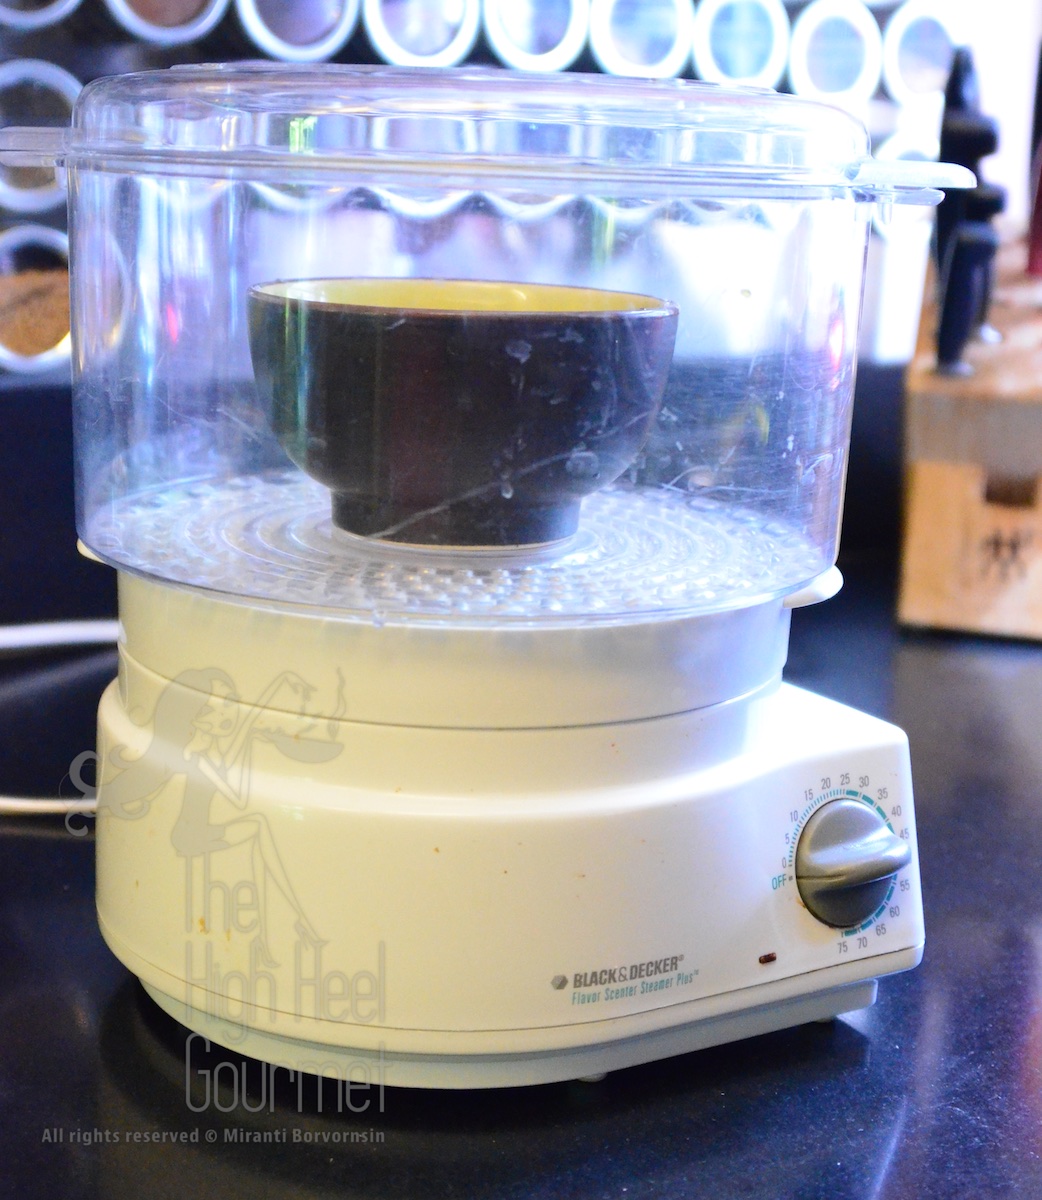
Put the bowl in the steamer and set the time to 30 minutes if you start from cold water, and 25 minutes if the water is already steaming hot. (Of Course much longer for the brown rice, some can take up to 1:30hr! but most of the brown rice will be cooked between 45 minutes to one hour.)
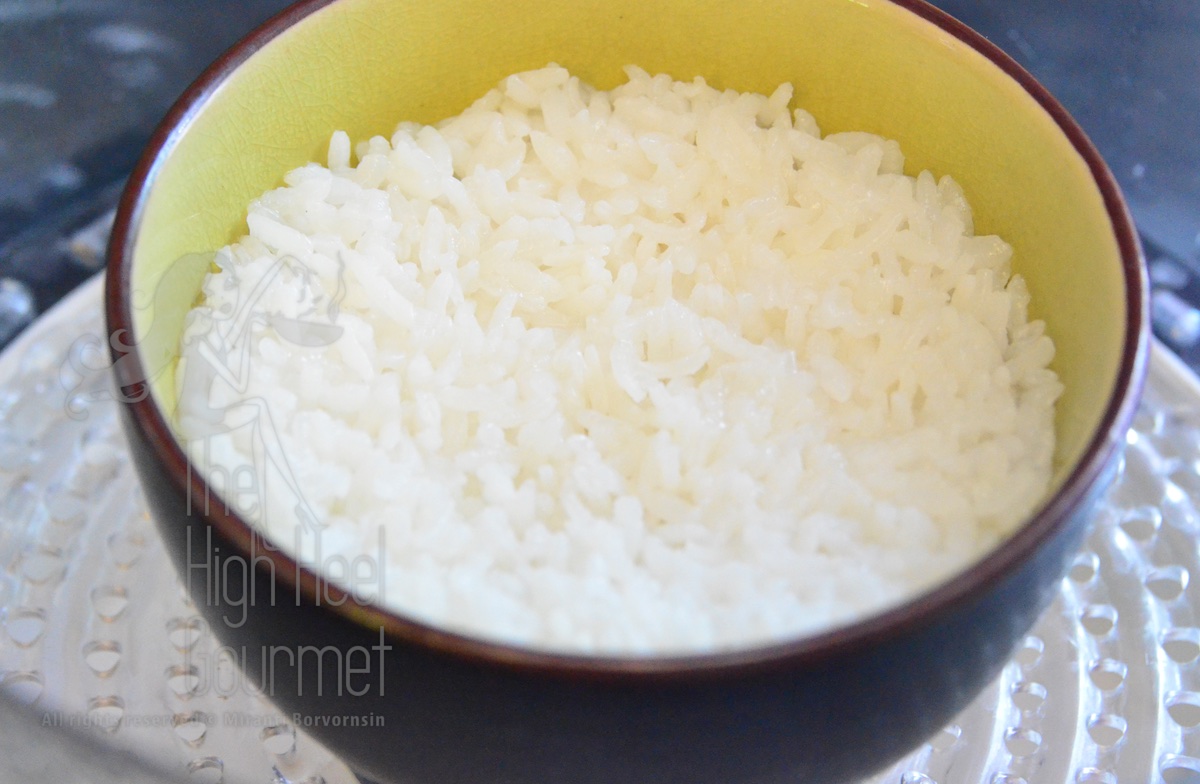
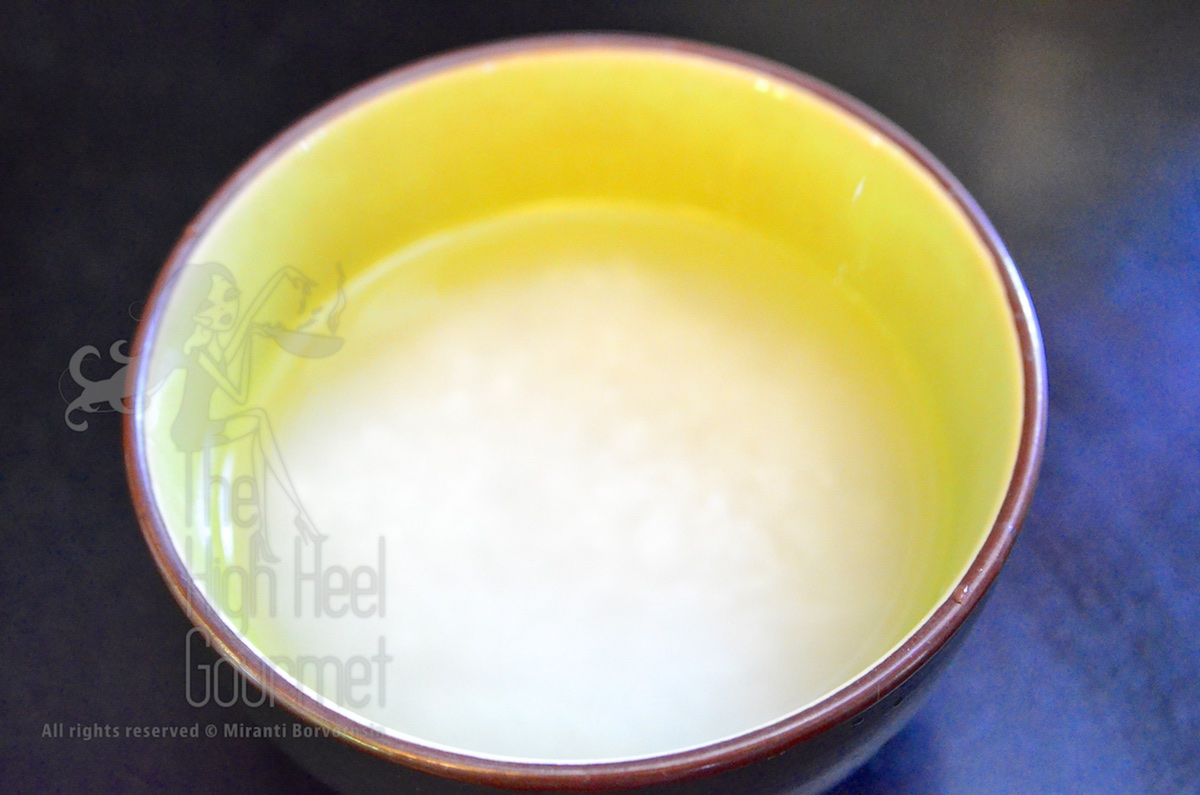
Let the steamer do the work. Once the time is up, leave the bowl inside the steamer for another 5 minutes.
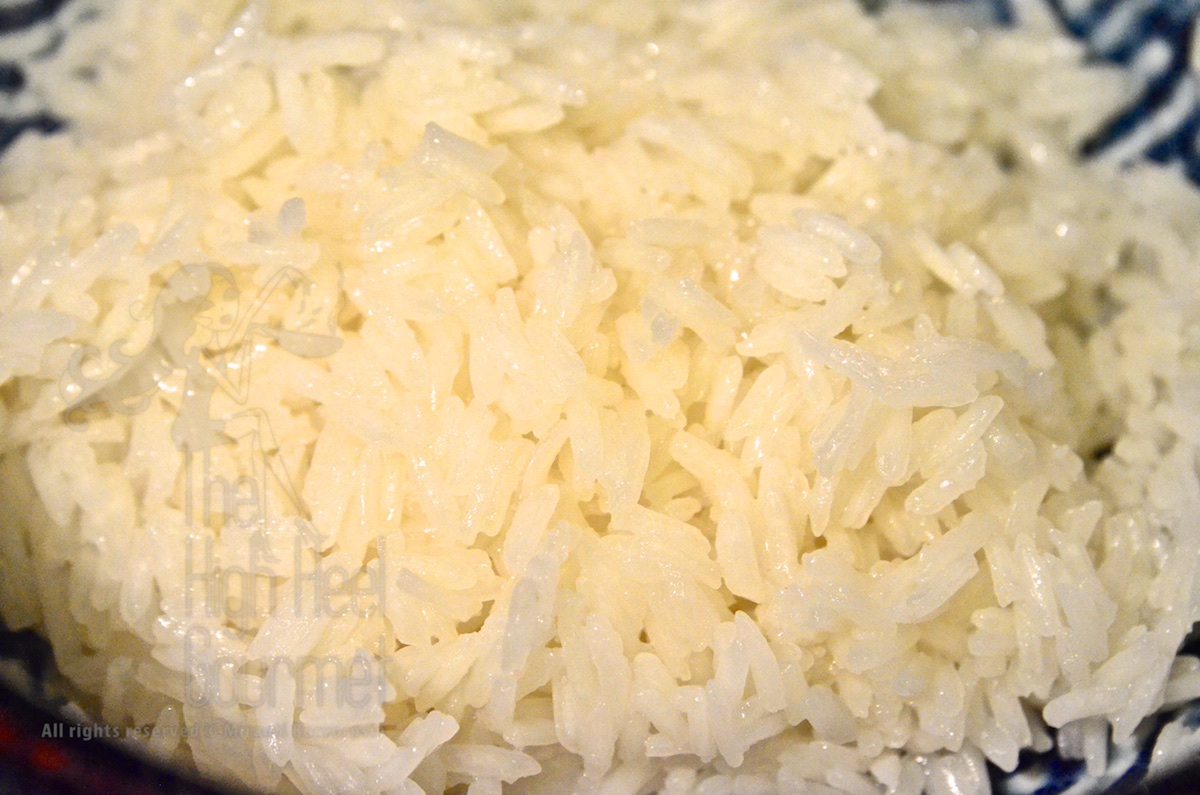
This is the result.
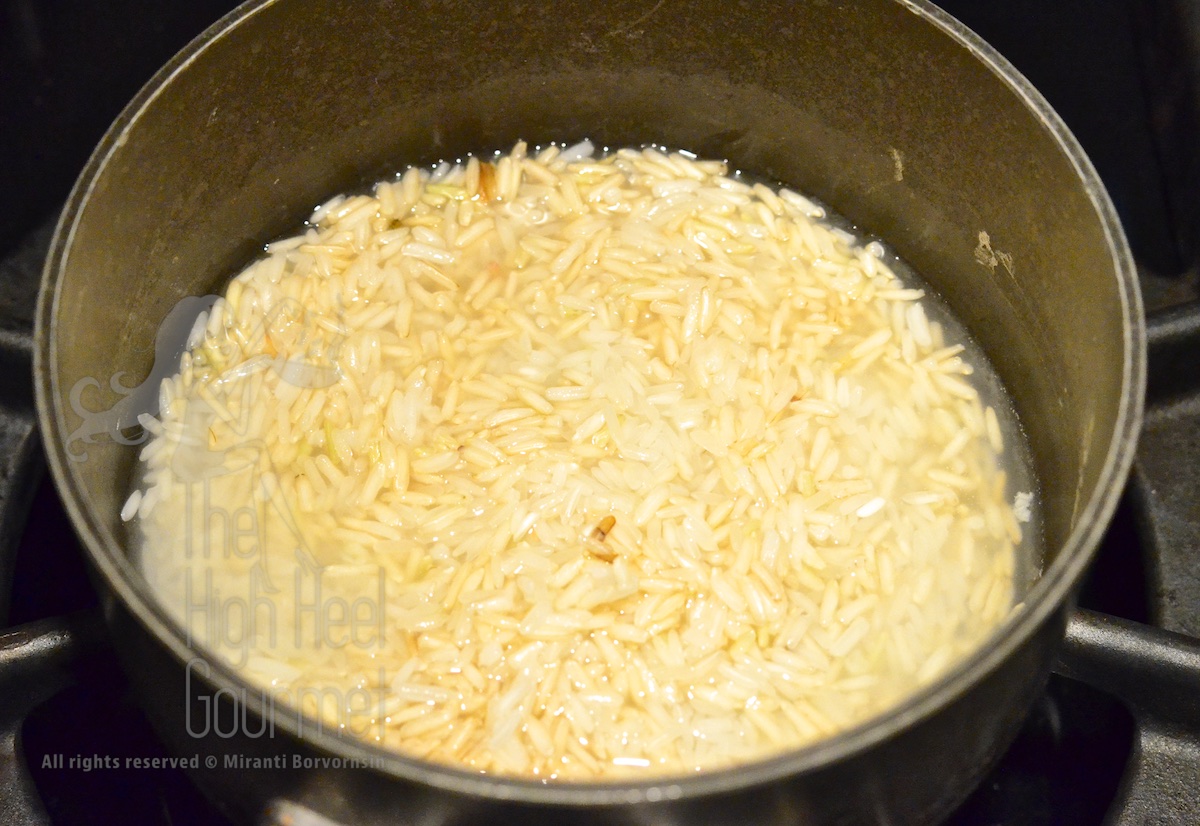
3.2) Cooking mixed brown rice and white rice together in a pot:
Put rice grains in the pot, add three times more water and cook at the highest level of heat.
Once the water reaches a boil, reduce the heat to medium.

CLOSE THE LID and cook for 10 minutes.

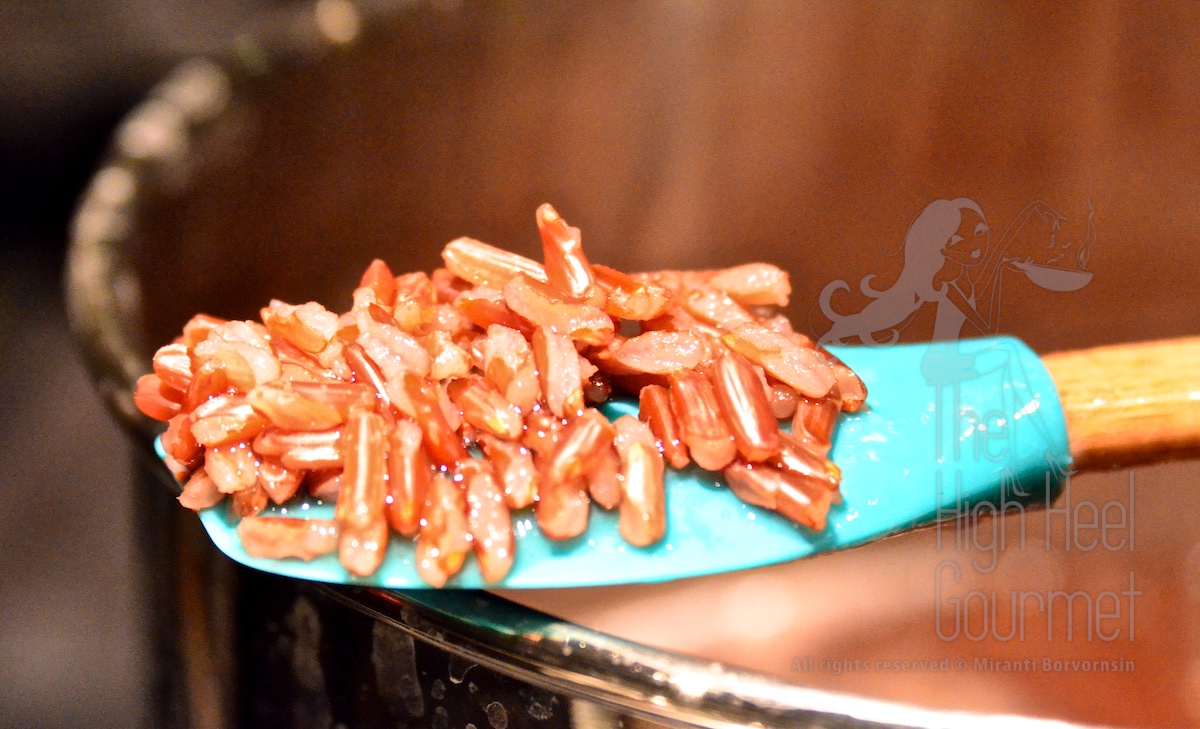
After 10 minutes, this is how the brown rice will look.
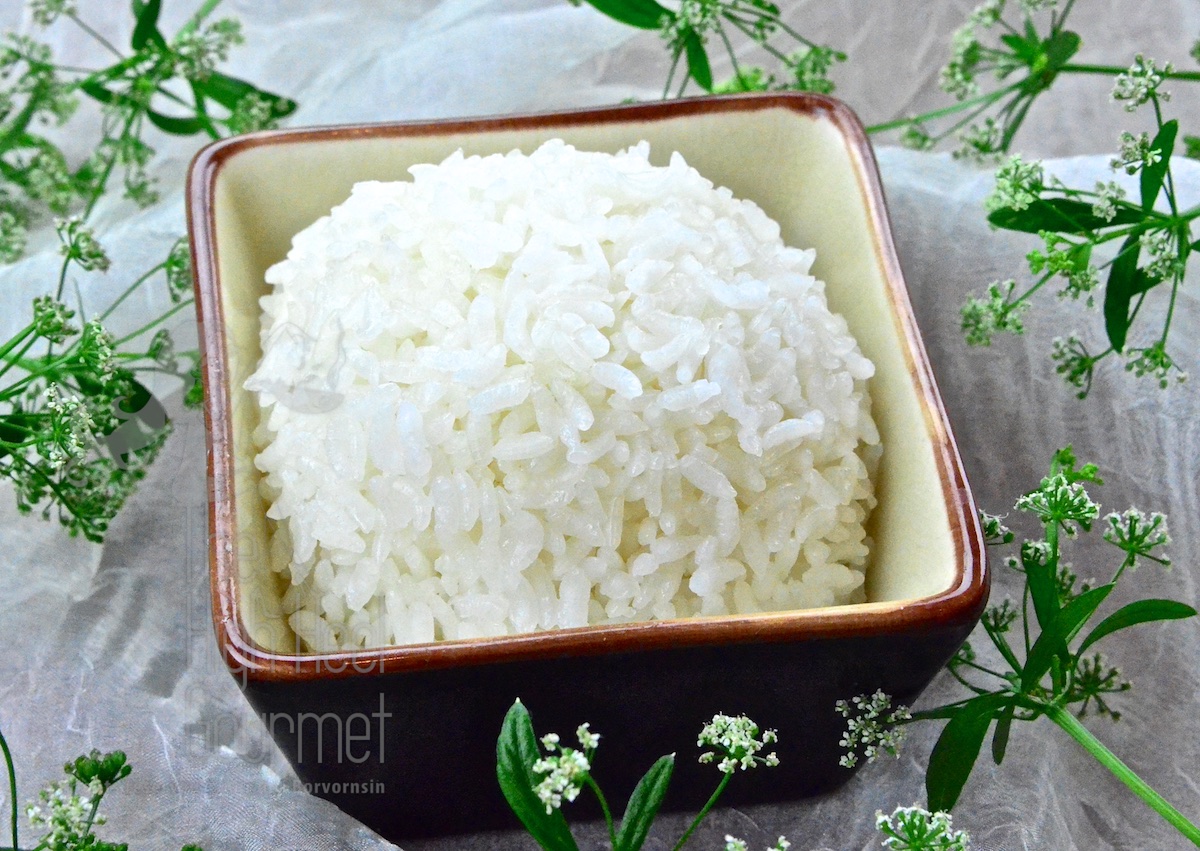
Add the white rice and the right amount of water and CLOSE THE LID. Set the heat back to high until the water reaches a boil again, then lower the heat to the lowest you stove can do and simmer for another 15 minutes.
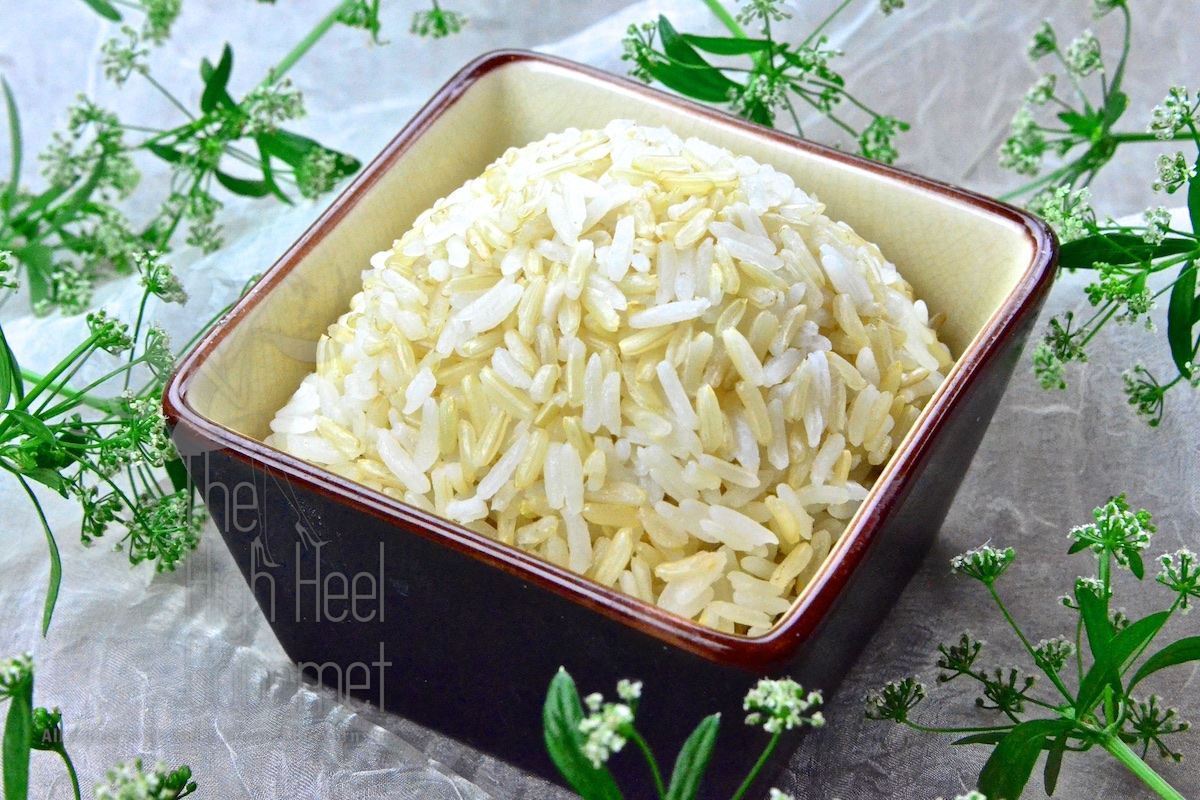
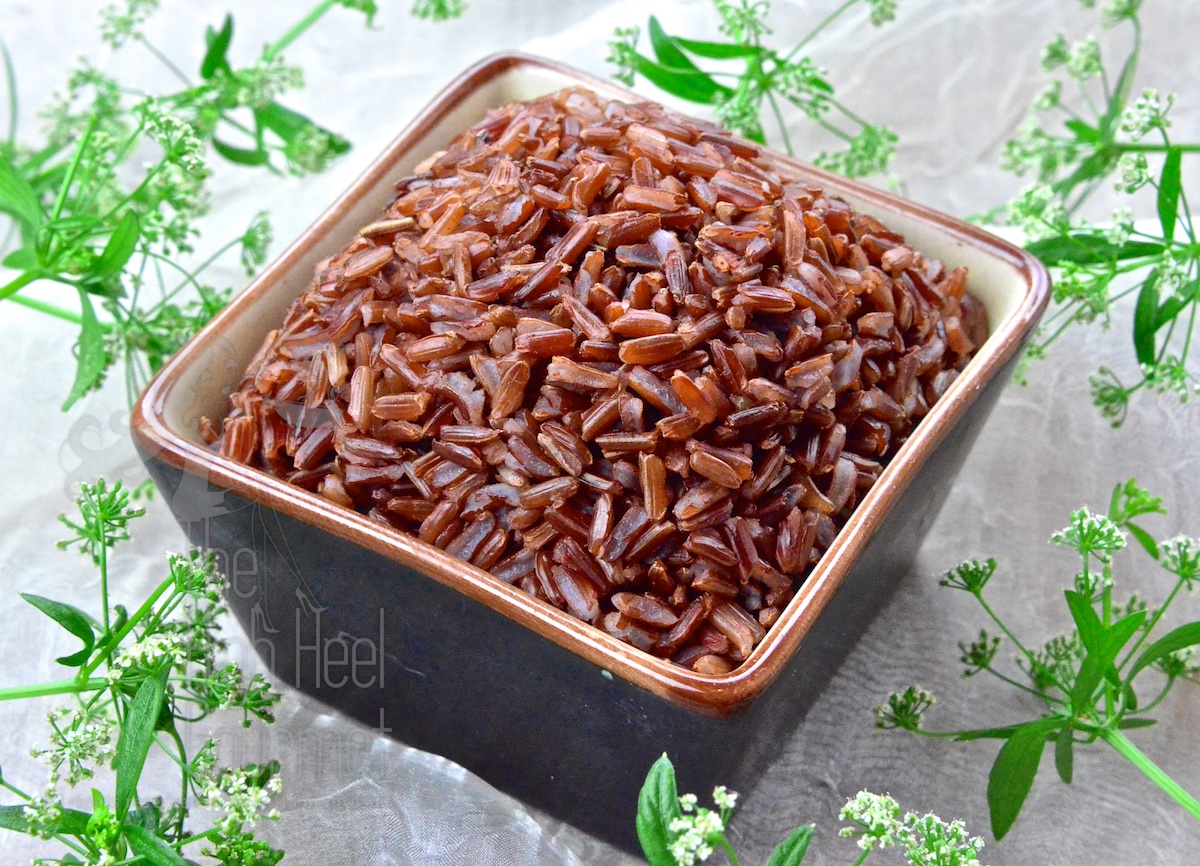
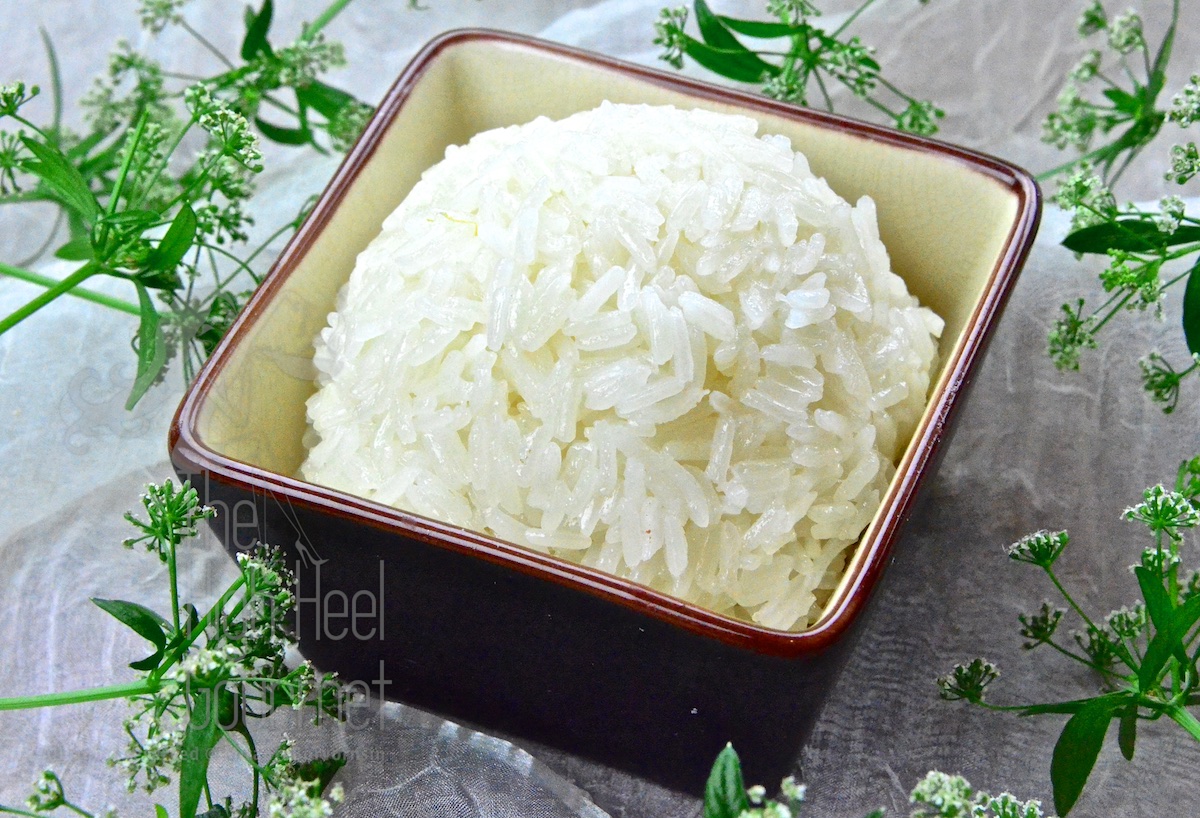
This is the result.
If you want to cook only white rice, you don’t have to par-boil the brown rice. You just add the white rice and water, boil at high heat until the water reach a boil and reduce the heat to the lowest and simmer for 12-15 minutes.
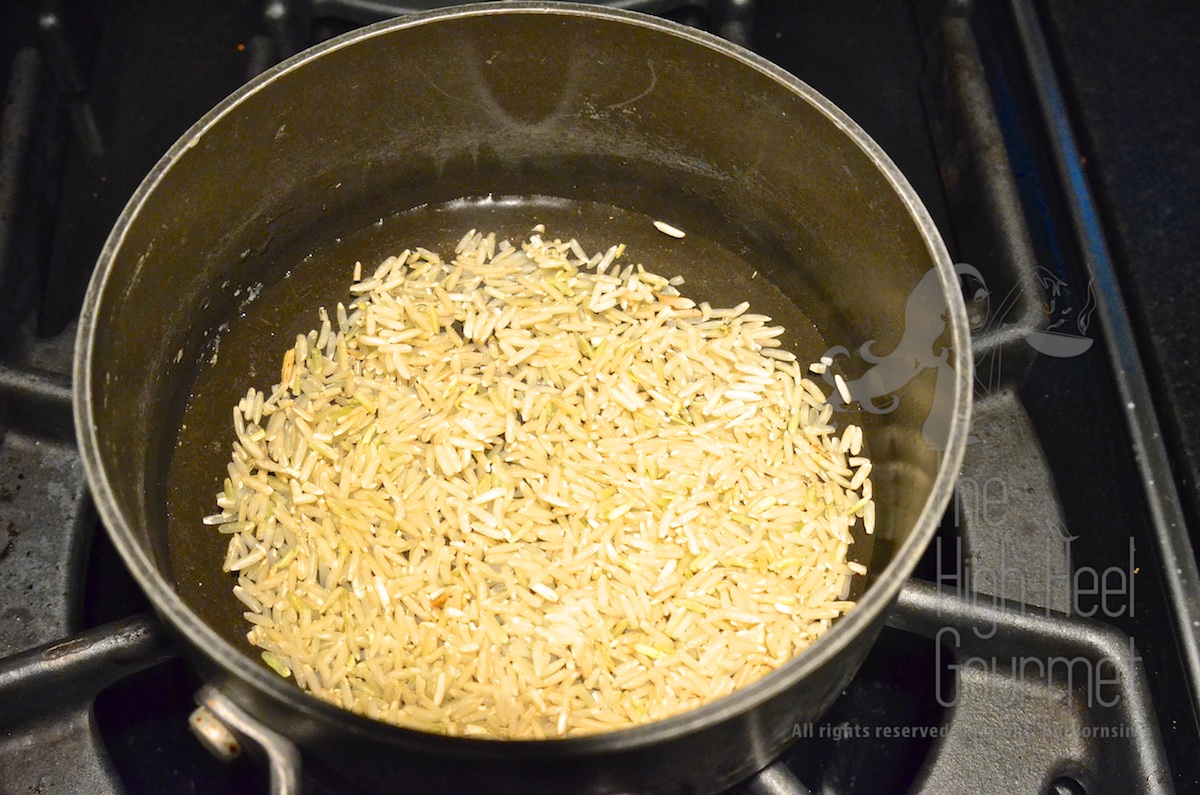
3.3) Cooking brown rice with the old method:
Add the rice to the pot.
Add water a lot of it.
Boil the contents at high heat until it reaches a full boil.
Lower the heat down to medium and stir once in a while.
Check if the rice is cooked. This is just 3/4 cooked after boiling for 20 minutes. Caution: time is different so don’t rely on the time. Checking the rice grain for doneness would be a better way to tell.
How can you tell that the rice is cooked? You can taste it or you can just look. It the grains expand like these, it’s cooked.
Pour ALL the water out and set the pot back on the stove. LID IS ON. Use the lowest setting of your stove and cook the leftover water out of the rice.
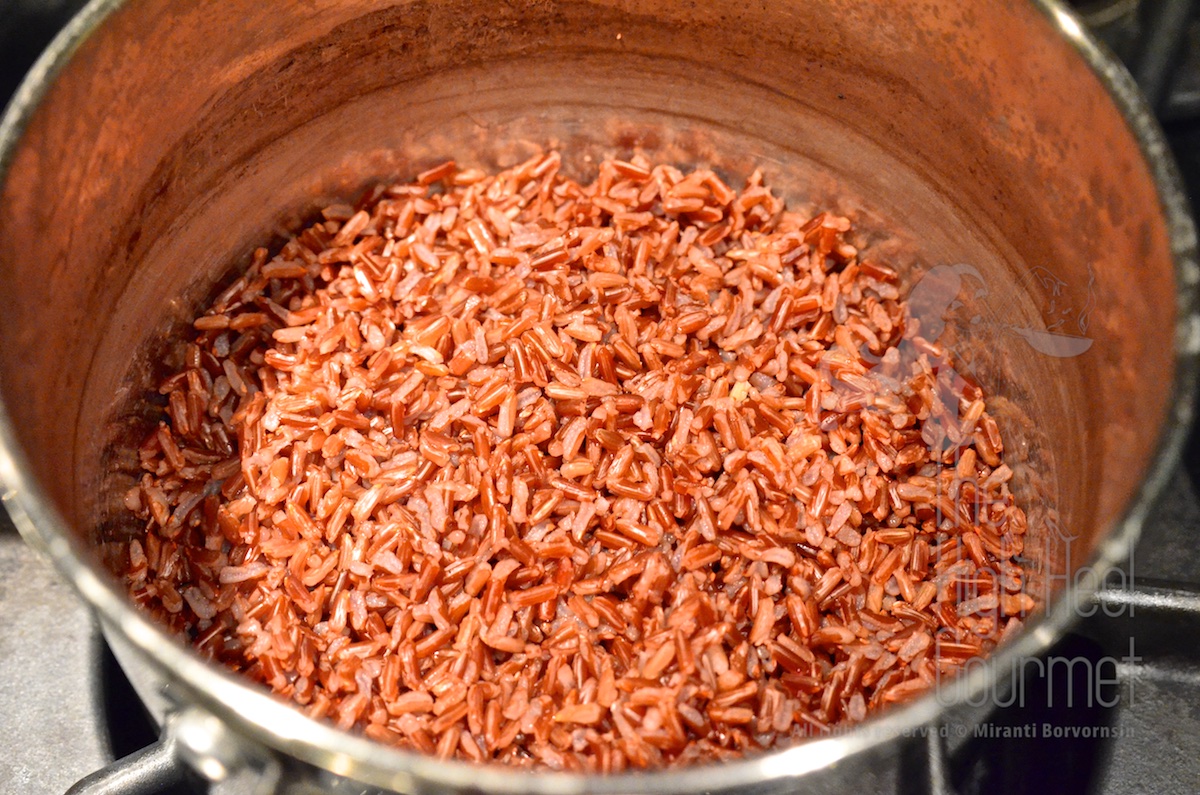
Once the water is all absorbed and evaporated, you are done.
This is the result.
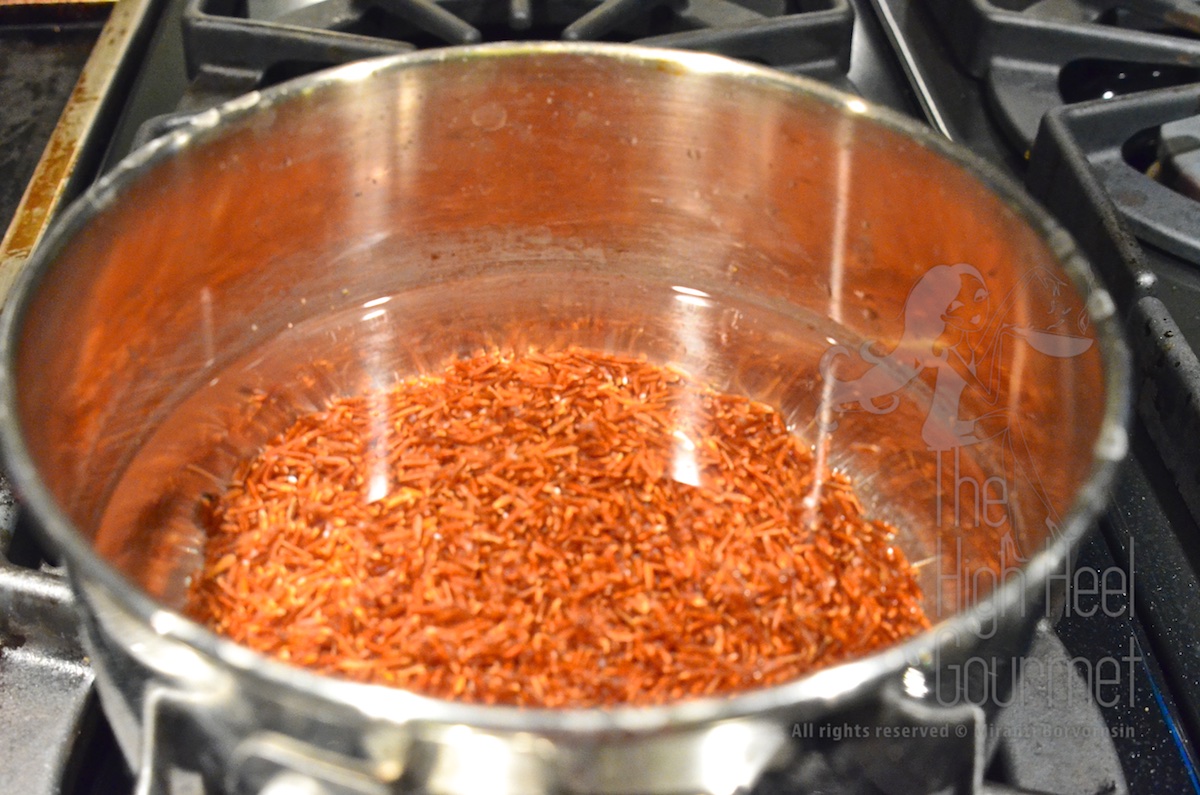
3.4) Cooking sticky rice in microwave:
Put sticky rice and water in a deep bowl, deep enough so when the water reaches a boil it will not overflow.
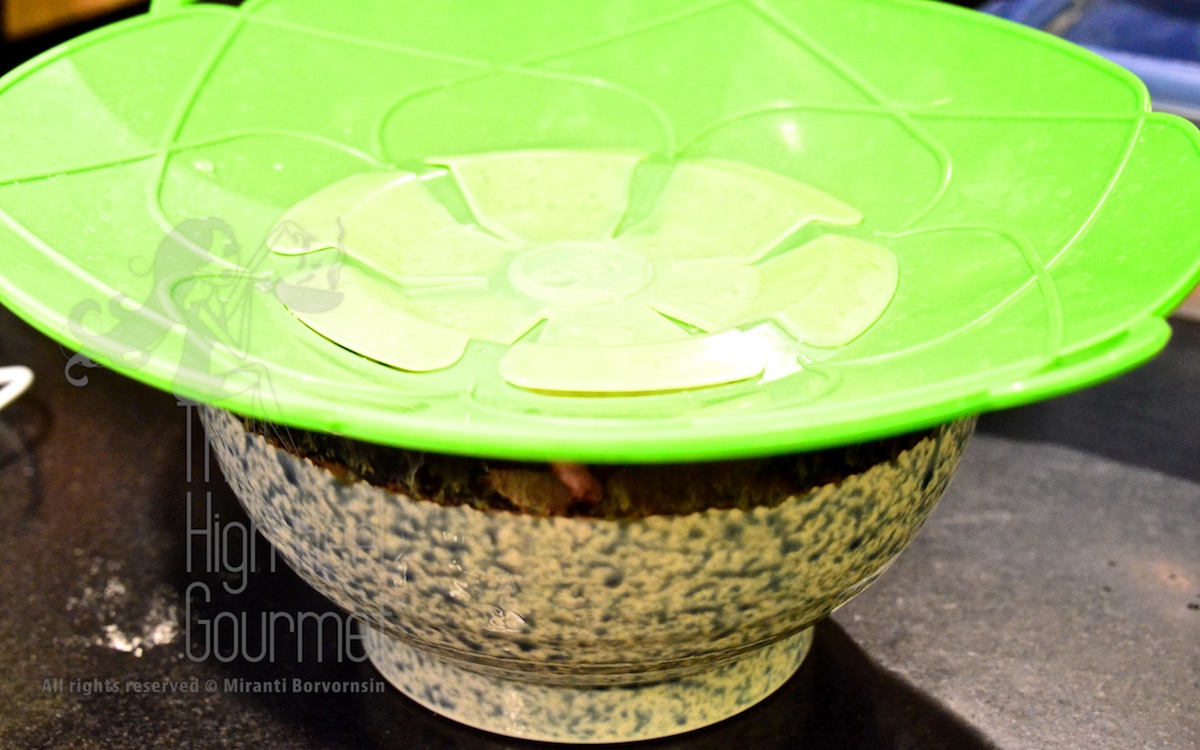
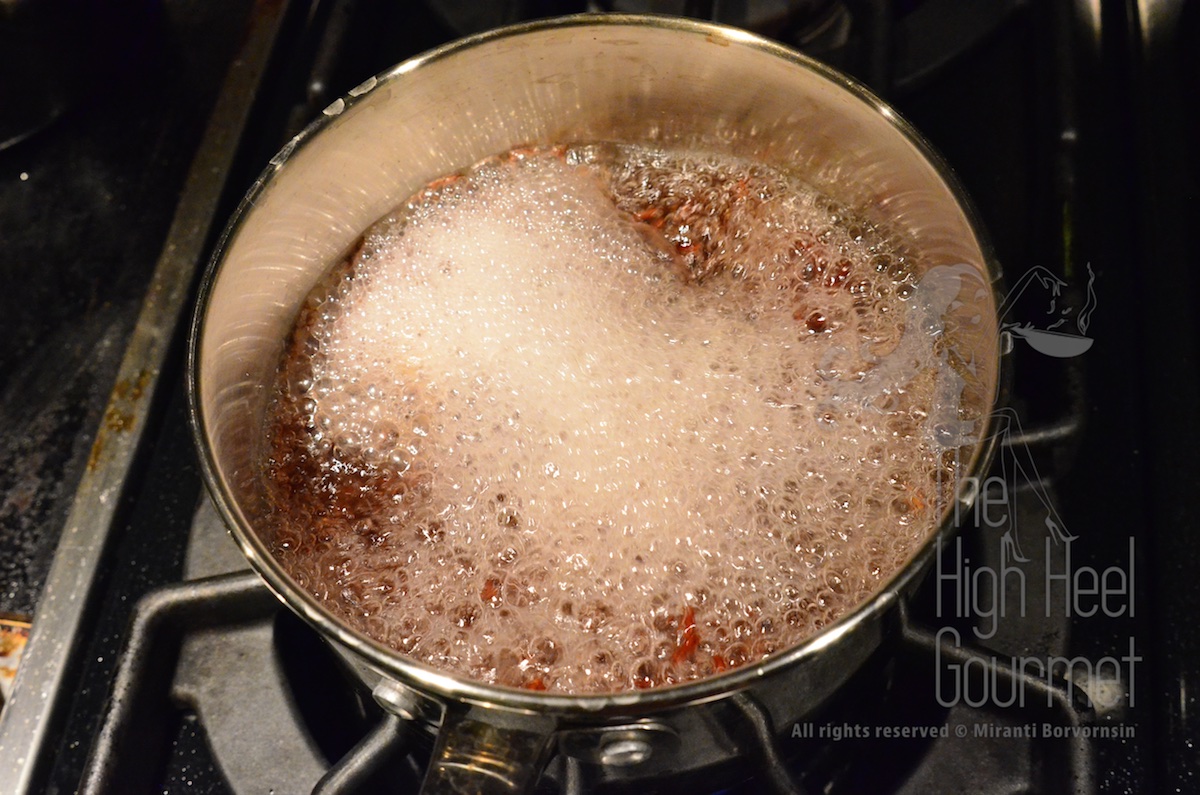
I use this device to cover. You can use anything to cover as a lid. Cook at high for 2 minutes and let it rest undisturbed for 5 minutes.
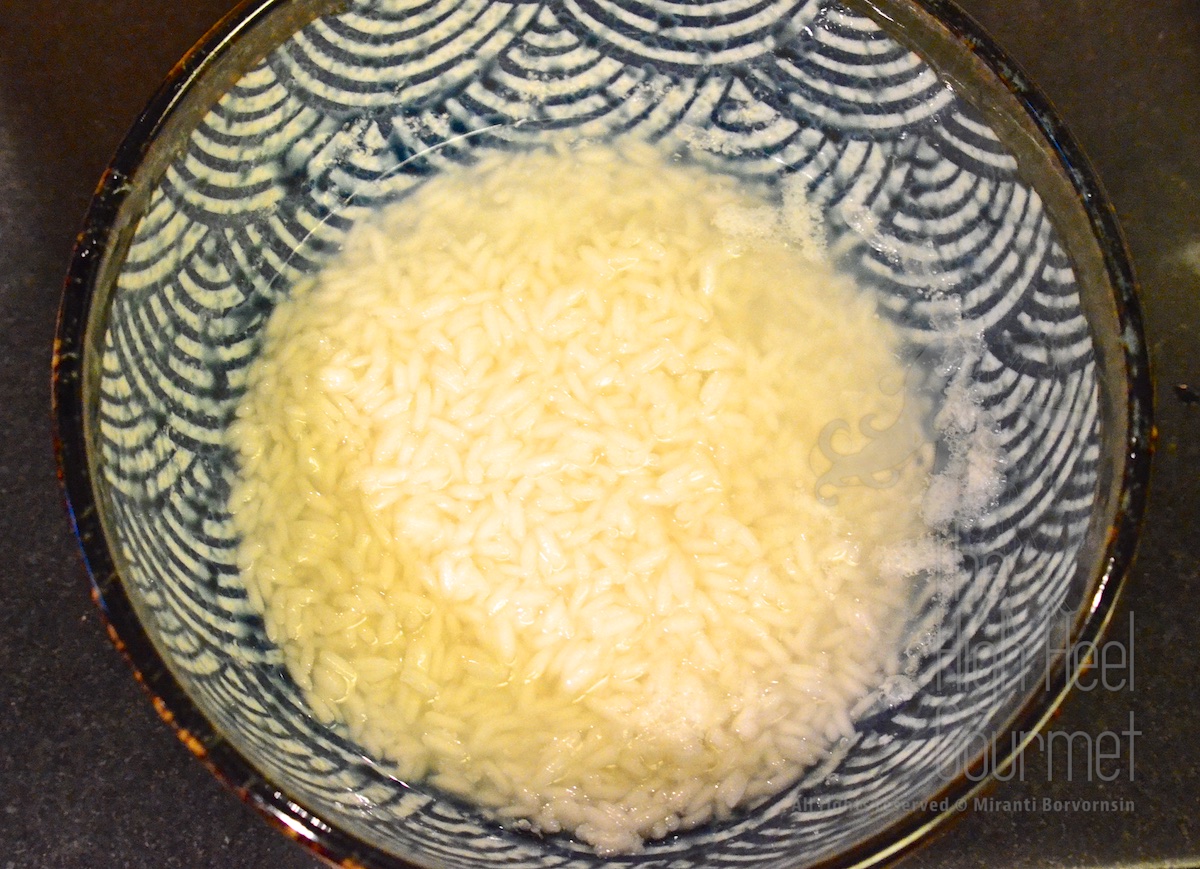
After the first 7 minutes, your rice should look like this.
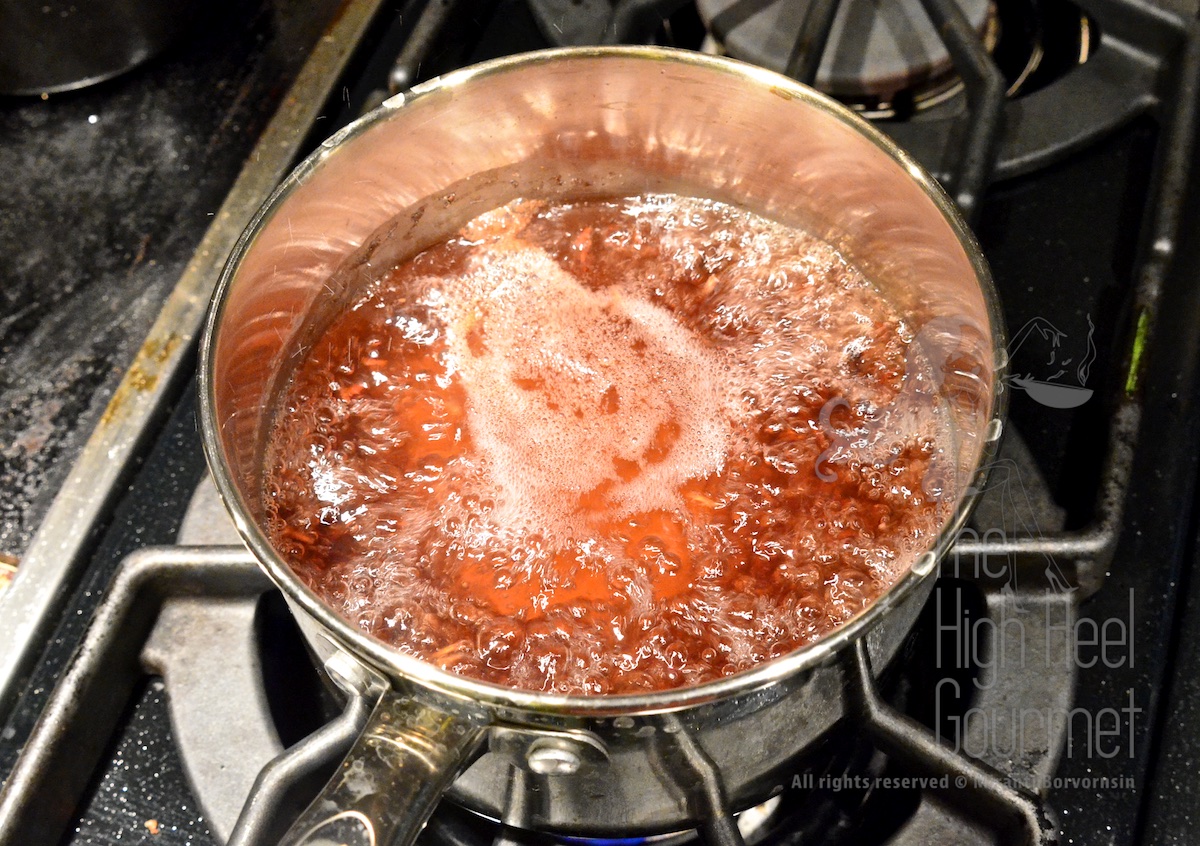
Stir the contents in the bowl, flip the bottom up to the top, break all the lumps and make sure that all grains are separated. Cook at high for another 2 minutes and rest covered the same way for another 5 minutes.
Open the lid and stir again. This time the water should already be absorbed. Cook at high again for another 1 minutes. Bring the bowl out right away. We’re going to spray or sprinkle the rice with room temperature water. Add just a little at a time, then stir the rice back and forth and sprinkle more water and stir, separating all the rice grains. The idea is to cool down the rice grains. The water we sprinkled on the rice will be absorbed into the rice grains. The cooled water will stop the cooking process.
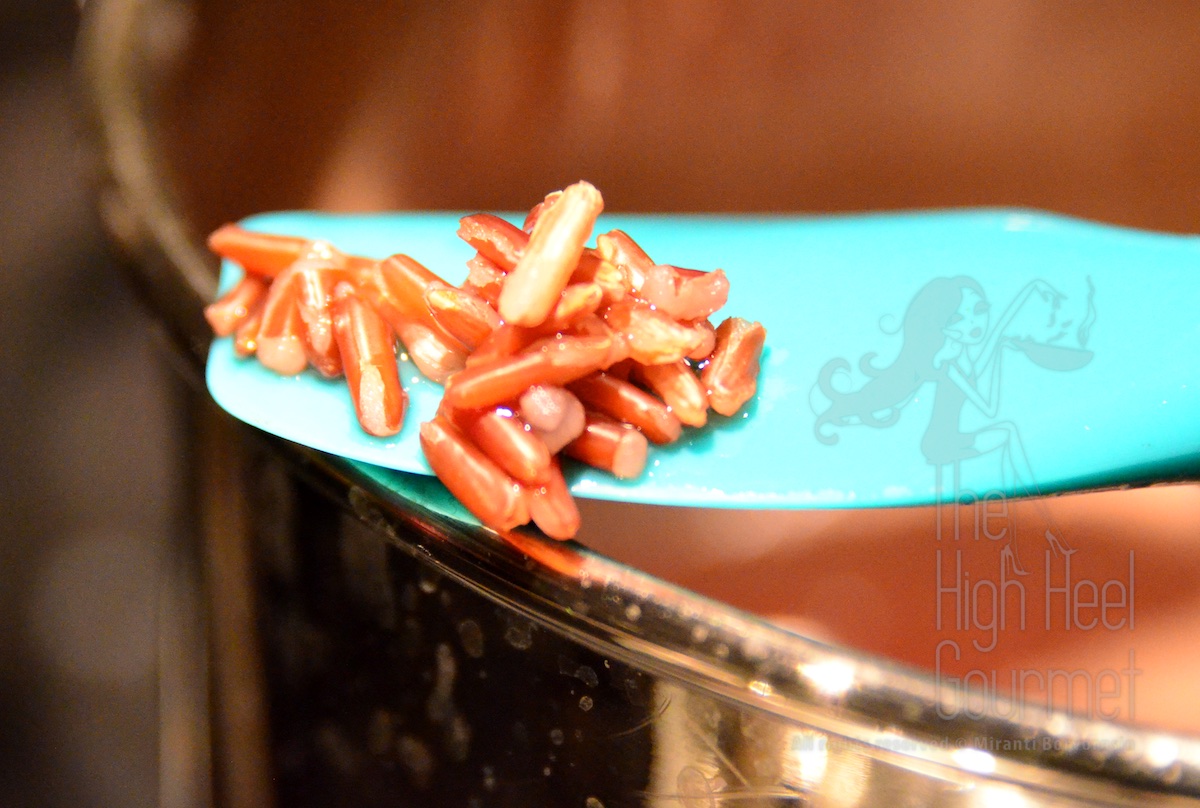
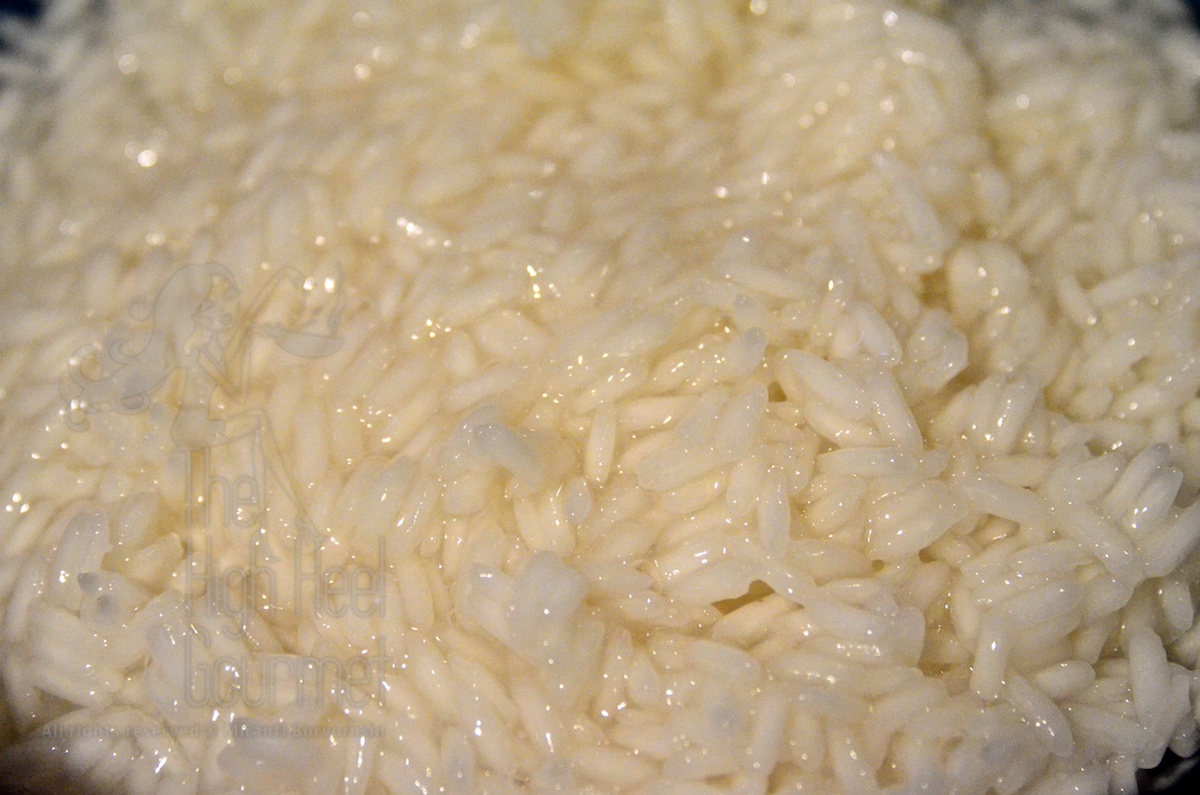
This is the result.
Thanks to my aunt Chutarat Borwornsin for teaching me how to cook rice without a rice cooker at age 15. So since then I’ve been a freedom rice cooker. Love you Auntie Paew!
I’m Asian ( though I grew up in the US ), and therefore I eat rice everyday, lol.
Some really racist non – Asians call rice little maggots. I dumped one guy when he said that. LOL
Hmmmm…I wish I knew you back then. I would help you shove the real maggots in his mouth so he knew better in the future!…lol…
Ahahha ! yeah !
wow, what a great and in depth post!! I eat rice every single day so this is very useful 🙂 thank you! just started following you, I have a vegan recipe/lifestyle & Cruelty-free beauty Blog as well, http://www.veganneeds.com
so glad I found your blog & Happy to connect with you 🙂
Nice blog. BTW have you ever tried the Vegan Mayo from Hampton Creek “Just Mayo” yet?
I haven’t, I try to stay plant based as much as possible unless its a special occasion or something 🙂
That’s is totally plant base but taste so real. I have been in their office. Their products are all plant base.
oh wow! then I defiantly have to try it out… usually there are ingredients in these things I can’t pronounce.. haha
So informative & visually interesting!
Thanks 🙂
What an absolutely informative post and so beautifully explained. I have bookmarked it.
Thanks 🙂 I hope it becomes useful to you.
Very informative; excellent pictures. I must admit, I’m lazy so I use a rice cooker. $300.00 well spent. I eat rice probably 10+ times a week, but I’m not inclined to make a fresh batch every time. A rice cooker keeps it edible for a day or two. And I don’t have nor want a microwave. I admit though, fresh is better. Great summary Mira!
You are so fancy! $300 for a rice cooker. It must be the one that you can do so many things with. Mine is not that fancy at all. I don’t like to keep the rice warm in the cooker. I don’t like it when the grains expand and too soft. But that’s from my not so fancy one.
You are truly a chef! I had NO idea there were that many types! That little steaming gizmo was cool, too! As for the other dishes in which you boil in a pan – call me Burn Master when I try!
You know, the cooking in the pan method, if you DP t know how to do it the right way, you can get three different stage of rice, burn at the bottom, mushy in the middle, partially uncooked on top! 🙂
My favourite method was always: boil the rice first and then steam it. It always end up with a nice fluffy hot rice. Until we got a good ol’ rice cooker, and now my favourite method is: push the button and wait. 🙂
You are colonized 😉
Machine will take over the world.. Muhahaha…
I hope it’s not in my lifetime though.
Thank you for in depth and detailed article. It is much appreciated. I love rice and like to cook with rice. Not any particular authentic dishes, but anything can be cooked with rice to amazing satisfaction. Irena
I agree .
Wow! This is the most exhaustive and thorough treatise on rice that I have ever read – including the mention of bomba. I shall keep a copy in my kitchen notes. Thanks very much for your hard work.
And this is only rice cooked with water! There are so many ways to cook the rice. It almost unlimited to me.
Incredible informative post .Thank you for sharing.Best regards.
You are very welcome.
I can never make rice!! Thanks for this!
Great! Now you can 😉
Wow so much great information about rice and cooking methods. I was always a boil water and simmer for 15-20 minutes kind of girl but I want to try steaming 😀 Thanks for sharing!!!
The method you normally do is one of the best. Steaming is just easy for the beginner because it ensure the perfection.
Our people in Kerala eat rice and rice based preparations, all 3 meals a day. My mother cannot stay away from rice even for a day! I have diversified a little but still need cooked rice at least once in a week. I have about 7 different types of rice in addition to rice flour ground to different textures. Rice is like the staple in our household. I still have problem cooking brown rice. This is a great guide! Your pictures are so crisp and clear!
It took me so long to perfectly cook the brown rice. I tried the pot method and I have to keep adding water and time and the rice still not all evenly cooked. I steam it. It came out either too hard or too mushy. The deeper the color the harder to cook but we have to eat them because of its nutrients. I settle with the mixed half and half white and brown rice these days. I’m curious to know what’s the seven different kinds you have at home?
What a great post!!! So glad i found your blog.I always use rice cooker and add sea salt , good olive oil before i push the botton.
I am wondering if you use some salt, any spices or dry mushrooms to add it when you cook rice.
If I cook Thai food I usually don’t do that but I will do it with Japanese style cooked rice. It’s more like bake rice. You slightly fried the rice with oil then add the vegetable, add soup stock and and cook them. I love to make that rice using short grain rice, bamboo shoot and mushroom.
I would be careful to add anything to Japanese Dishes.
I worked for many famous Japanese Restaurants and also in Japan. The LAST thing you do is add ANYTHING to the rice while it is cooking. ONLY after it’s cooked do you add the ingredients to make sushi rice.
Japanese are very particular about rice, and they should be, they are recognized as the country with the highest quality rice production in the world.
Hmmm… I guess you never eat the Takikomigohan, Kurigohan or Gomokugohan. We Asian don’t eat just plain steamed rice or fried rice but you probably don’t know. Normally the Japanese will cook their steamed rice without any thing add same as the Thai, Vietnamese or Korean but they do have baked rice or some might called it mixed rice too. Those are the dish they would add seasoning into the raw rice before they cook. In the summer when the young ginger is available, they also cook the rice with young ginger, mirin and sake. Thai and Malaysian also cook rice with coconut milk sometime too.
If you want to talk about sushi rice, the rice need to be cooked as the normal steamed rice would but add the seasoning right after while the rice still steaming hot. BTW most Asian also know this too. (I’m trying really hard not to type “duhr”…oops…I did type it didn’t I…lol)
What are you trying to do here Mr. John Appleseed? Are you trying to teach an Asian how to and not to do with rice. That’s the same as trying to teach the crocodile to swim, you know.
Just FYI to add it to your brain cell so you can comment in some other blog in the future. If you really want to talk about the best rice, we Asian don’t compare short grain rice grow in Japan with long grain rice grow in Thailand or Vietnam. And even among the long grain category, we don’t compare the Basmati to the Jasmin either. We do love them all in different dishes. We don’t close our minds and only eat one type same the Westerner won’t only eat one kind of bread.
Your article on cooking rice is very helpful. I use the microwave oven to cook white jasmine rice and a traditional method to get the right amount of rice and water. Works fine on any method of cooking rice. After rinsing the rice twice to get rid of the starch, measure the height of rice in the pot with an index finger. Add water and measure it from the surface of the rice. The water level is the same as level of the rice. So if the measure of rice comes up to one finger joint, the level of water is also one finger-joint. Microwave on High for 3 minutes, then on Medium High for 10-12 minutes. Cover and let it rest for 10 minutes. Perfect every time.
I encounter your site when I tried to solve my problem while cooking in coconut milk the mix of White sticky rice and Thai purple rice. It came in disaster in the beginning because I did not know that these two types of rice have different cooking time. That is when I read your blog, really helpful to me. I thought my problem will not be solve but as an Asian, I managed to sort out my problem 🙂 I would love to hear your next post about cooking rice with other liquid than water.
I won’t be writing a while longer but here is the tips.
When you calculate the amount of water in coconut milk, use the real water content to calculate.
Example: normal coconut milk assumingely contains 70% water 30% oil. (You can get this from the package or you can calculate with the amount of water added to the shredded coconut to squeeze the milk out). You can add more water to the coconut milk from the package too if you want to make less oily rice (like the Malaysian rice). Omit the oil and measure the true amount of water to cook the rice. This way your rice will definitely cook through.
Ask again if this is not understandable.
Thanks to Jane for posting this question which has always baffled me and thank you Miranti for providing the answer!!!