Yes, I’ve been not only spending the whole year last year putting together my photo exhibit in Bangkok but also learning and practicing making these little French confections called macarons.
First of all, let’s agree on the pronunciation here real quick. Macarons with this French spelling (pronounces MA-CA-RONG) refers to a specific confection made with egg whites, icing sugar, granulated sugar, almond powder, food coloring and, most important, there are two pieces of these confections that sandwich a wide variety of fillings in the middle. That’s how “macarons” differ from all other macaroons. Are we on the same page now? Macaroon, pronounced MA-CA-ROON, is also a meringue-like cookie, with most recipes calling for egg whites, with ground or powdered seeds, generally almonds or nuts or coconuts, and sugar. It’s not wrong to call a “macaron” a macaroon but I wouldn’t do that myself.
The English word macaroon and French macaron come from the Italian word “maccarone or maccherone”. This word is itself derived from ammaccare, meaning crush or beat, the word used to reference to the almond paste which is the principal ingredient.
If you want to know more about their history, go google it. I’m not going to bore you more with it.
Let’s make these for your Valentine’s, then.
Ingredients for the macaron shell:
Aged* Egg Whites 100g
Almond Meal 130g
Powdered sugar with 3% corn starch 160g (Some might call this thing “icing sugar” or “confectioner’s sugar.” As long as it doesn’t taste salty, no need to freak and correct me…duh!)
Baker’s sugar 30g
Dried egg whites 4g
Salt, a pinch
Egg whites
I found it’s best to use white-shelled non-organic eggs. I’ve tried the brown and white organic eggs and also the pre-separated/pasteurized egg whites sold in a box. The strength of the macaron shell varies slightly depending on the type of egg white. I have listed them in order of the strength of the finished product. Meaning if you would prefer to use them you might have to add more dried egg whites to strengthen the macaron shell. I’m not opposed to the pre-separated egg whites but I’m warning you about the result. It’s sure to be an unpredictable one.
OK. I suggest starting with whole eggs, with normal crackable shells. First, you need to separate the egg whites cleanly, making sure there is ABSOLUTELY NO OIL, which means no egg yolk (that’s one form of fat) and no grease residue on the container, your hands, etc. Don’t let your fingers touch the whites—use an egg separator.
The most important part of the egg white process, regardless of the type, is aging. You need to leave the egg whites in a jar, cover the jar with cheese cloth, and let it sit for at least 24 hours. This is to reduce the amount of moisture and acid in the egg whites.
Powdered sugar
I’ve found so many blogs saying that using powdered sugar, which has 3% of corn starch, isn’t the best. Some even go all the way to powder their own sugar to get the 100% pure sugar. I go the opposite way. Why? Because I read those blogs and believed them and tried to use 100% pure sugar in every form possible. I always believe in using the best ingredients for my cooking, you know. My first month of making macarons was all failure. Tray after tray of cracked macarons with no “feet” (a little ridge at the bottom of the cookie) came out of my oven. NONE of them were even close to being called macarons. I almost gave up. They were not “dry to the touch”. They were not acting like they were going to be macarons when they grew up. I kept adjusting the baking temperature, time of drying, even tried drying my almond flour (bake it at low temperature in the oven), changing the macaronage technique, etc.. Nope, the feet never showed up! I asked so many people and got a lot of answers but none of them hit the right problem.
The sugar I used was the wrong type. The last change I tried was the one that yielded the first successful batch. I used the powdered sugar instead of the 100% pure sugar. My macarons not only were “dry to the touch” but also developed feet, ending my sleepless nights.
All right, enough about ingredients, now let’s talk about the…
Methods:
1) Sifting: the almond flour and powdered sugar TOGETHER, unless you have OCD.
2) Mixing: the dried egg whites with the Baker’s sugar.
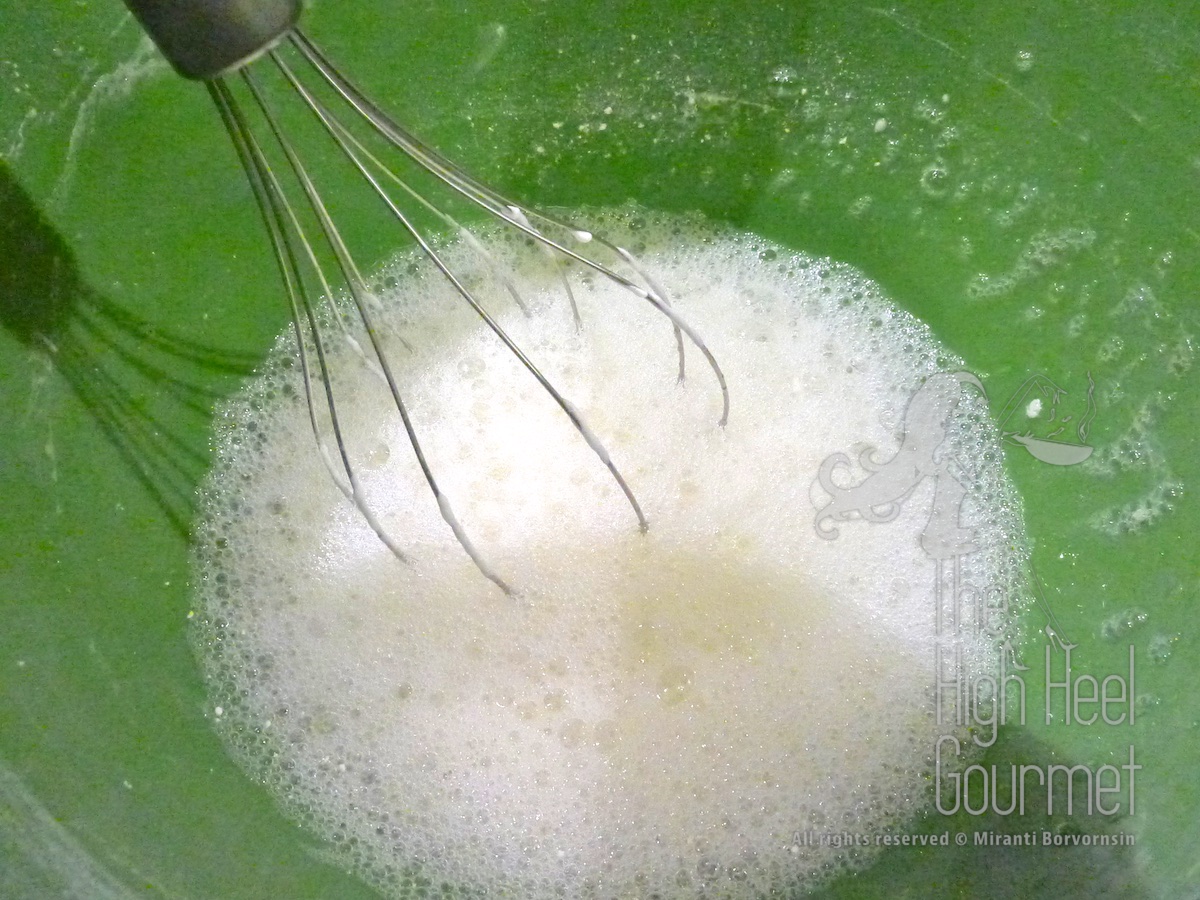
3) Whipping: the egg whites with salt at a low speed until foamy only takes 5-10 seconds.
– Add the 30g of baker’s sugar mix from #2. You can dump all of them at once or carefully add in a stream or batch, up to you. It’s not going to make a significant difference.
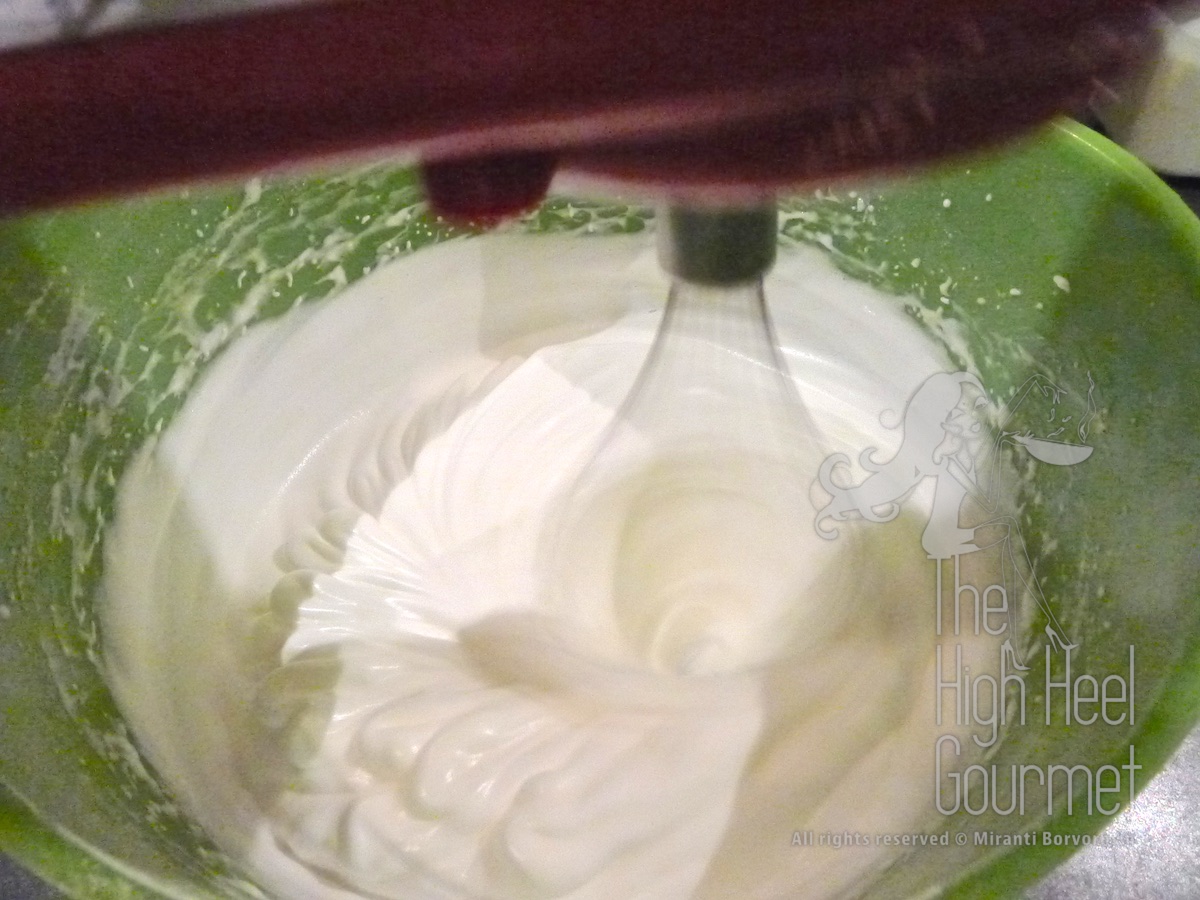
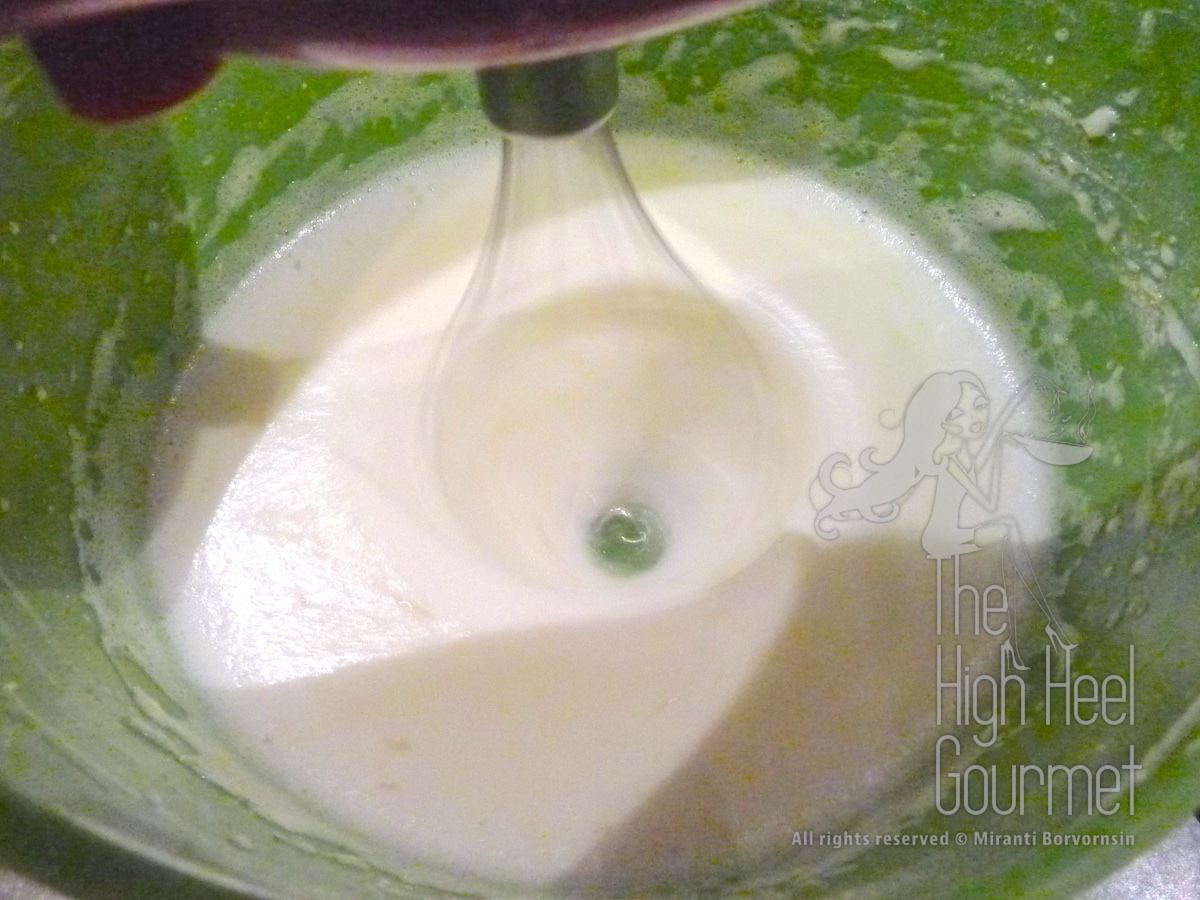
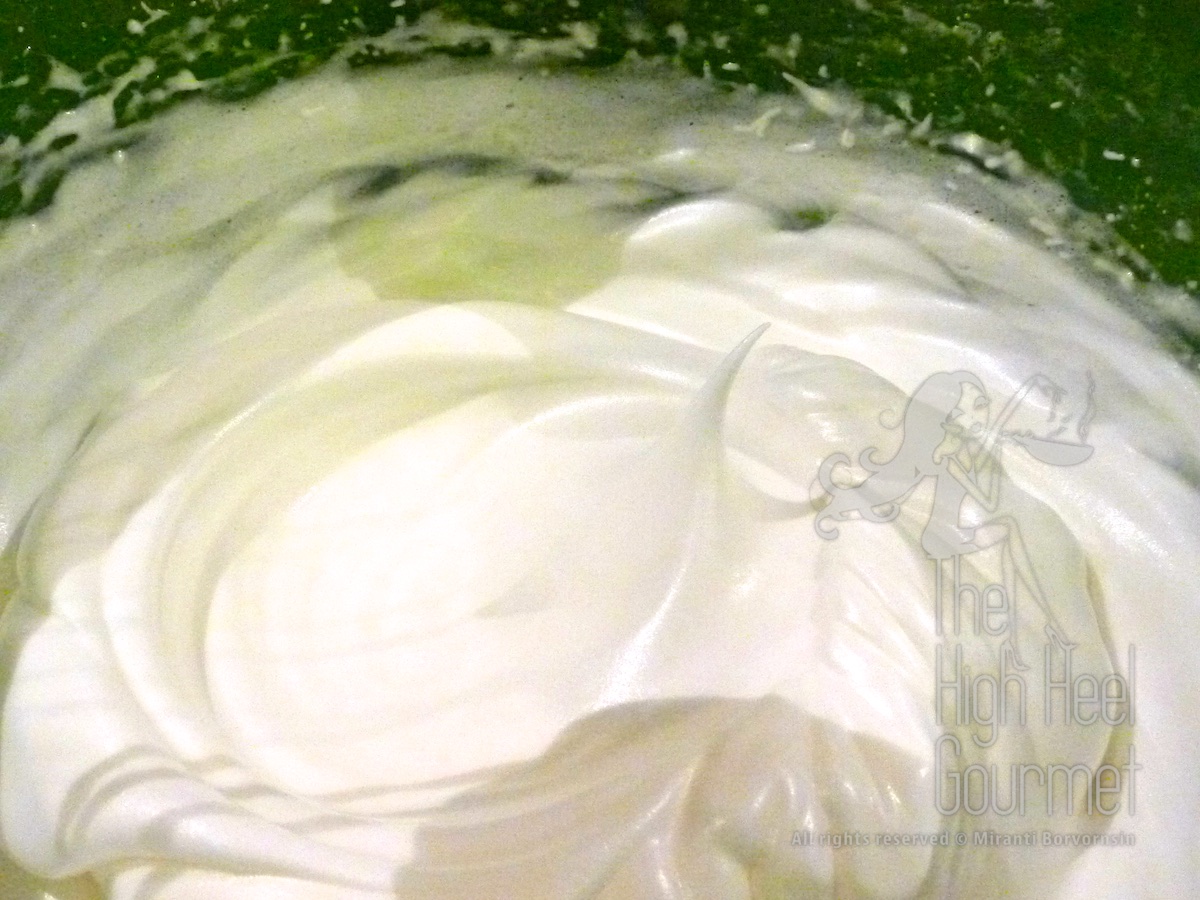
– increase the speed to medium. REMEMBER, never beat at a high speed. I’m using a Cusinart Hand Mixer, with 7-speeds, and I only use it at number 3 with the whisk head. This stage should take about 1-2 minutes but I normally look at the meringue and I stop as soon as the meringue inside the whisk is at the same level as the outside. What does this mean?
When I start whipping, the meringue doesn’t stay inside the whisk because the whisk spins the meringue out.
The more I beat the meringue, I loosen the protein bond in the egg whites by adding air bubbles. That’s make the meringue less sticky and the whisk can’t throw the meringue out anymore.
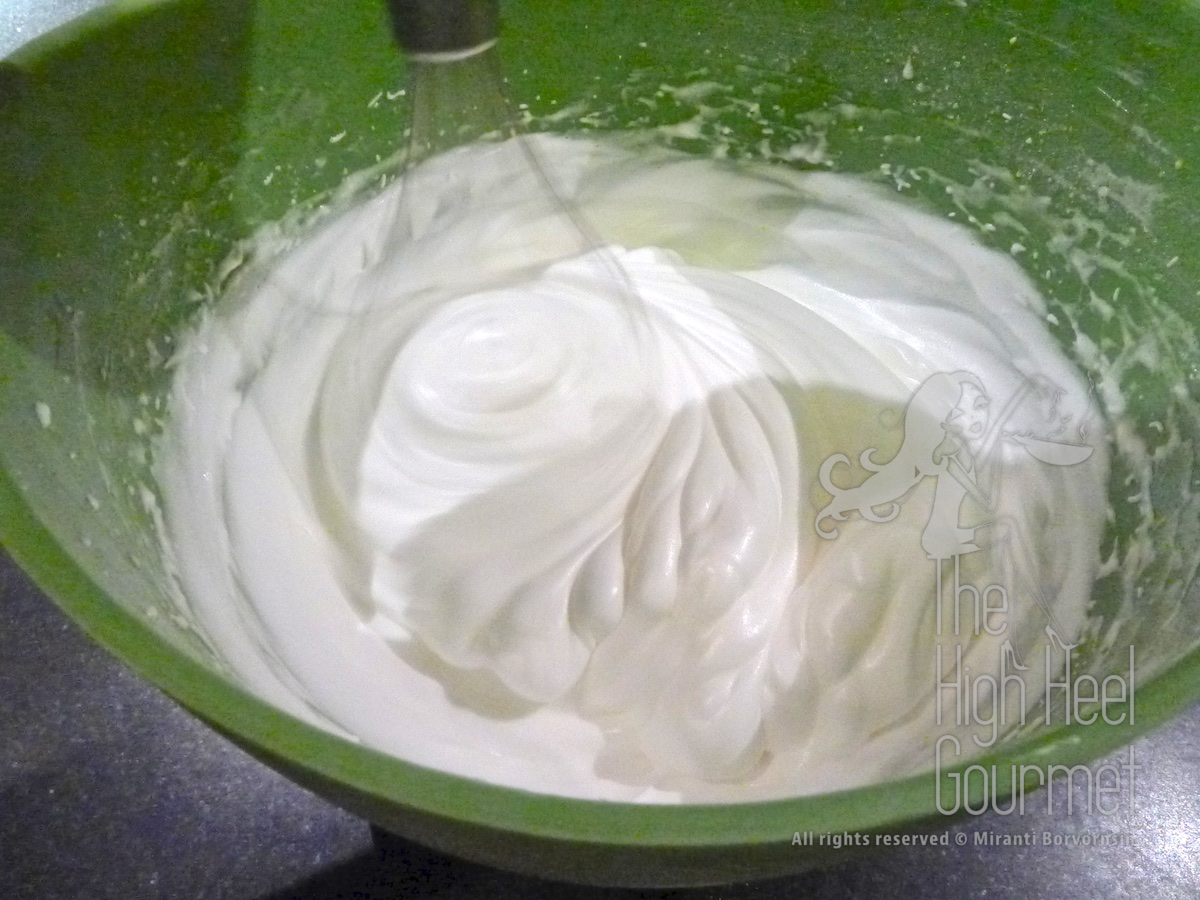
REMEMBER, this in general works as an indicator only when you use medium speed with the whisk head. If you are using some other mixer, I would say whip them until they reach between soft and hard peaks.
– Very important! STOP whipping as soon as it’s ready! Do not over-whip or under-whip. Making macarons requires precision.
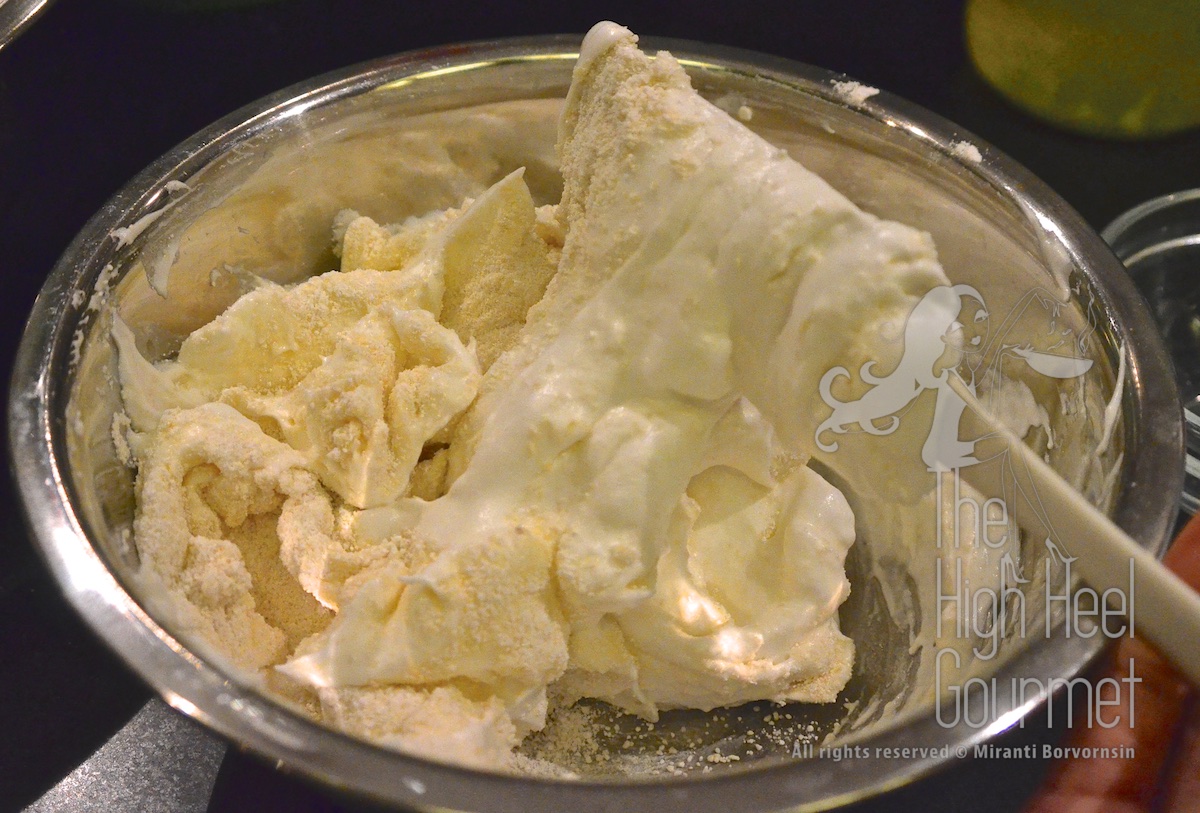
4) Folding: (or Macaronage) add 1/3 of the almond flour mix from #1 above to the meringue.
– If you want to add color, add it now. I use AmeriColor gel paste. It gives a freshly bright color with less amount of gel, that helps speed up the drying process. Sometimes I use Chefmaster powdered color but I’m not happy with the amount of powder that I have to use to get bright color. I found that Wilton gel color is a little too clumping. If you want to use that, add it while you whisk the egg whites.
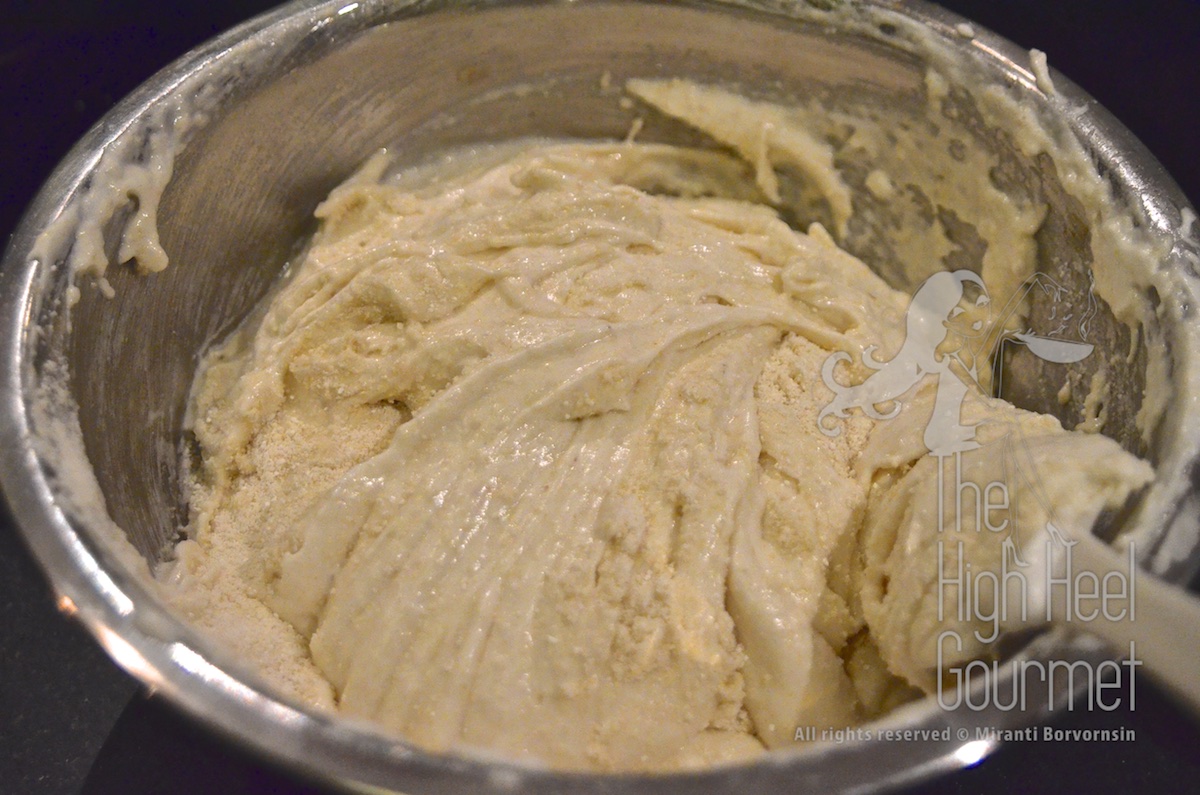
– Fold until they blend well. Fold means you use a spatula to dig the meringue from the bottom of the bowl and pile it on top, then turn the bowl about a quarter of diameter and repeat the same process. Do not stir. Do not use the whisk to do this.
– Add another 1/3 of the flour mix to the well-blended meringue.
– Fold again until they are well-blended.
– Add the rest of the flour mix.
– Sure enough, you must fold it again. After it is all blended, then test it.
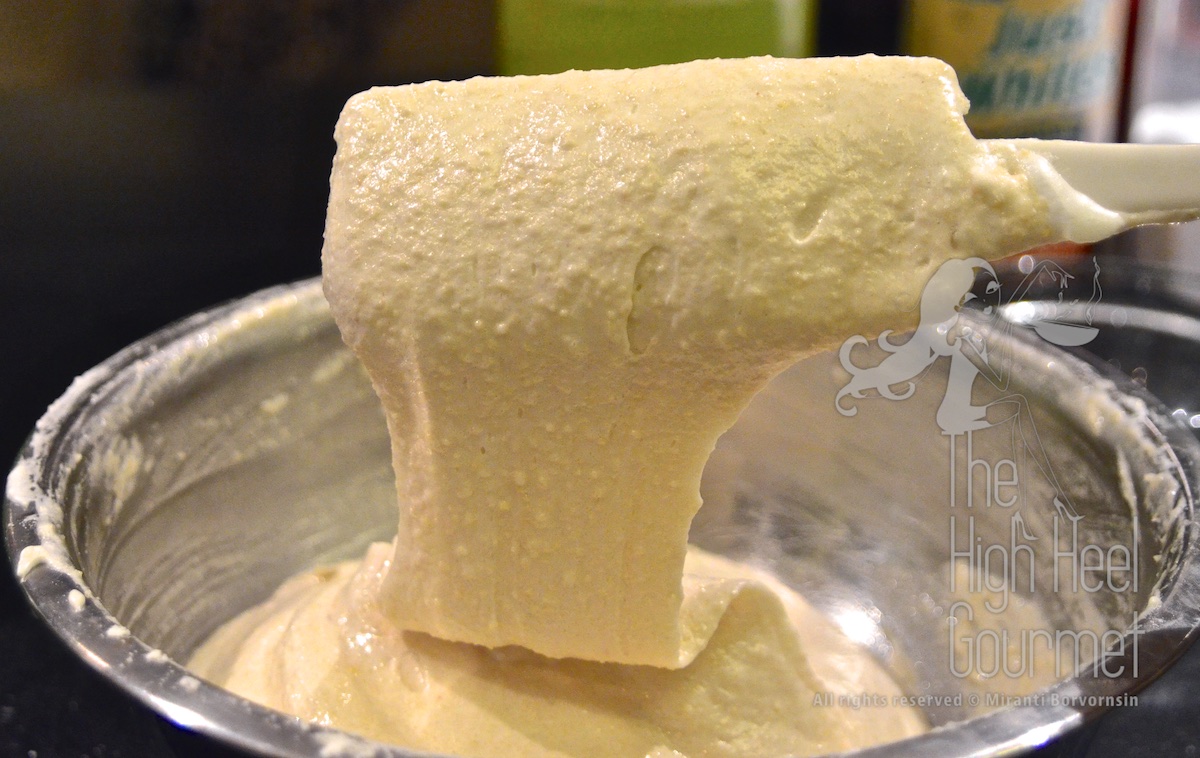
– Testing: lift the spatula and let the meringue cascade down to the bowl. You should see the mixture fall back and start to blend back to the rest of the mix in the bowl. Count 1001, 1002, … at 1010 the surface of the mixture should be smooth again. That signifies you are done with the macaronage stage.
Well, what if it’s not? Easy. Fold some more and every 5 folds test it again.
How about if the meringue flattens out before you count to 1010?…Yikes! You already over mixed it. You need to make an under-mixed batch of meringue then blend the two together. Fold it lighter and with less number of folds.
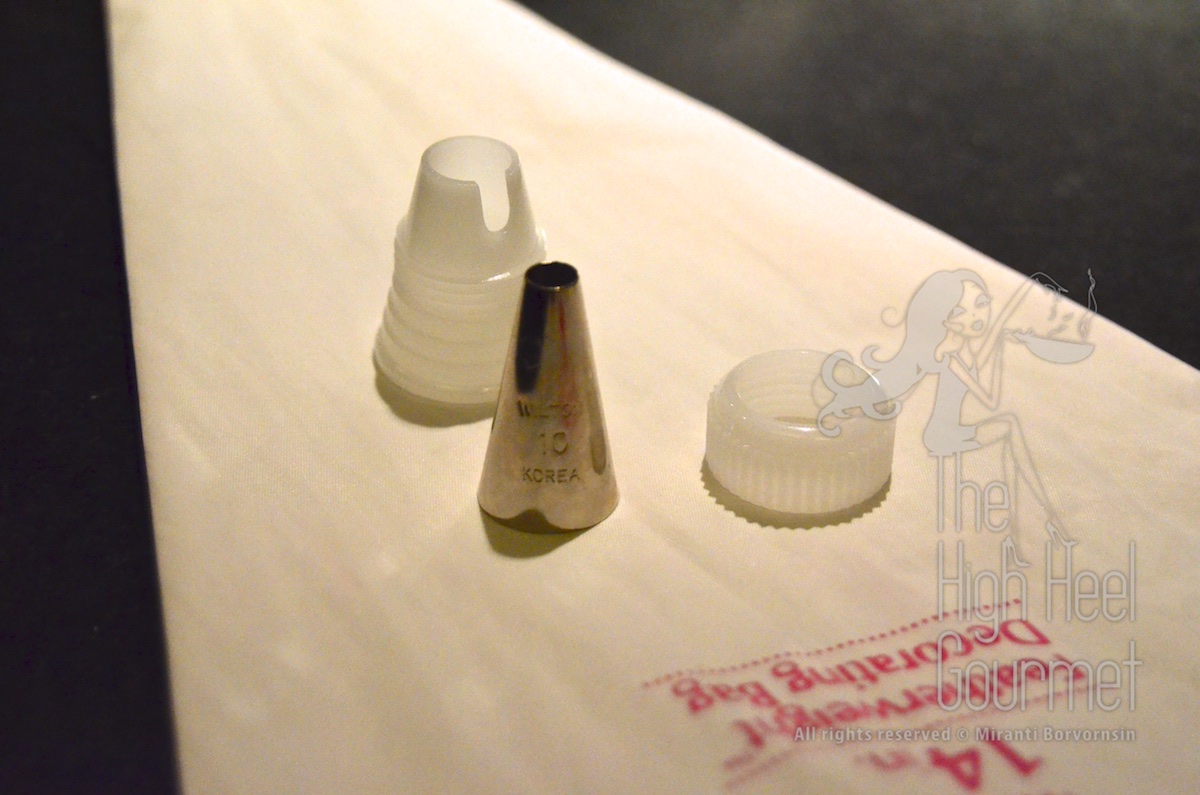
5) Piping: Put the meringue in the piping bag. Fit the round head #10 to the bag
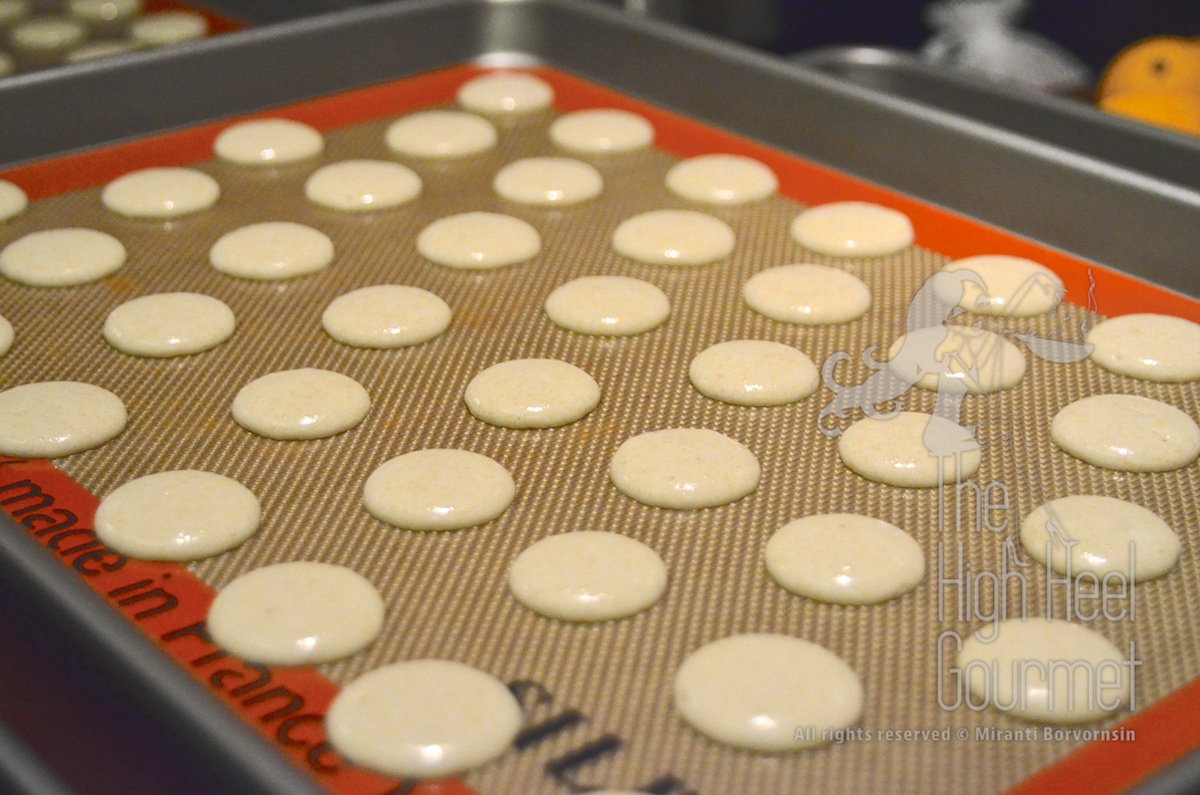
and start piping onto the cookie sheet lined with parchment or Silpat (those fabulous French non-stick silicone baking sheet liners). Try to pipe them at the same size. I usually don’t use a size guide but someone else recommended it. Try that if you like. I count from 1-3 for the small size of 1”, 1-4 for a medium size of 1-1/4”, and 1-5 for the big ones of 1-1/2”…Good luck!
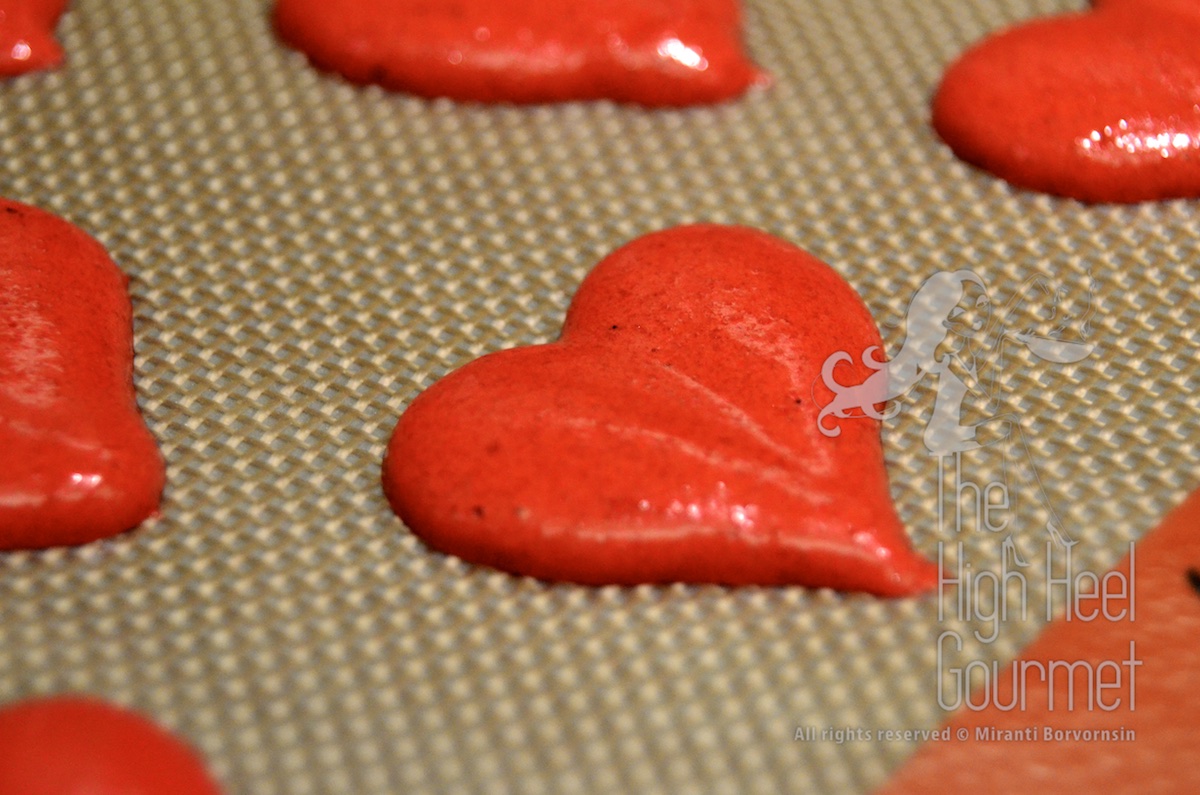
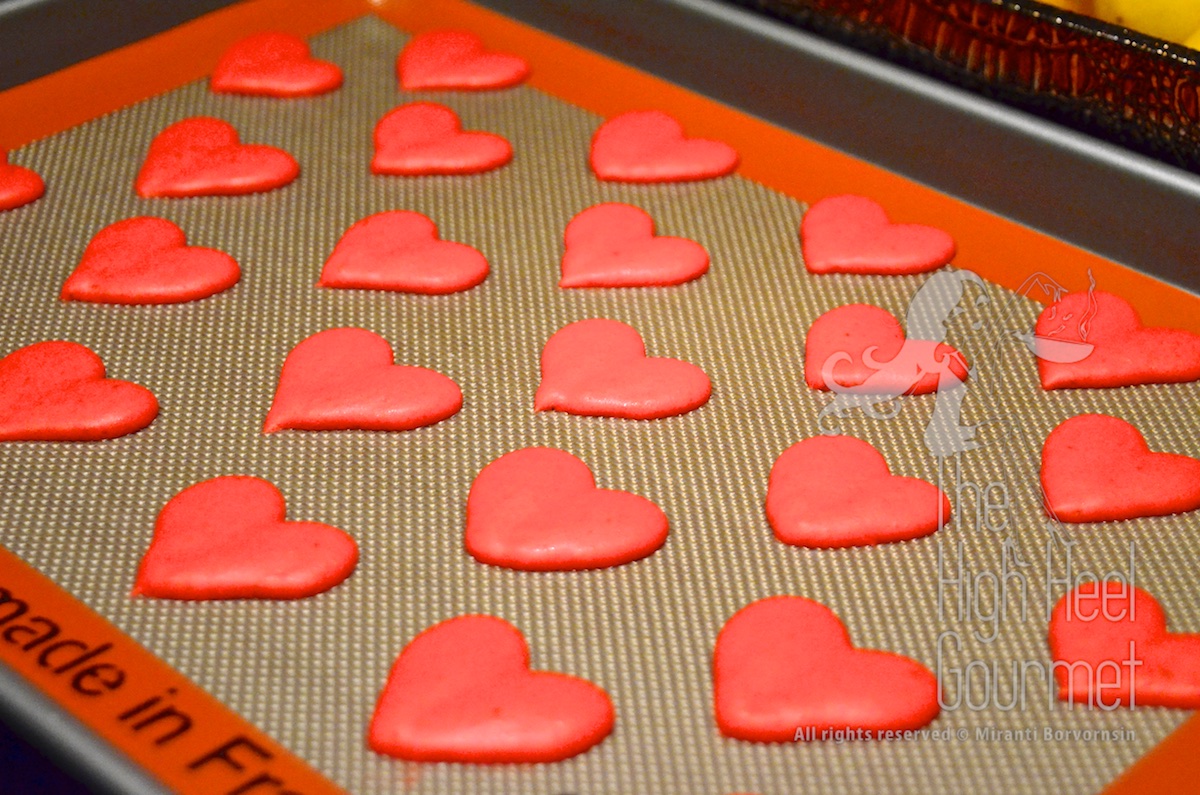
Heart-shaped macarons
Instead of piping them out using #10, I use the petal decoration tips #104.
They are great for this. Pipe half heart at a time. You will need to practice for a while before you can make a perfect heart shape.
6) Drying: Tap the tray to the counter a few times to get rid off the air bubbles. Then leave them for 15 minutes – 2 hours, depending on the humidity in the air and how well you mixed the meringue. The good meringue shouldn’t take longer than 30-45 minutes. This is for beach climate in California. If you are in Florida, Chicago or Las Vegas it’s different. You can test it by touching the surface of the macaron. If it is “dry to the touch” then you are ready to bake.
7) Baking: Turn your oven to 350, and once the temperature reaches 350, lower it to 300 before you put the tray in. Bake for 15 minutes, with the convection on for the first 10 minutes.
This is very important: You need to test your own oven. I’m telling you the guidelines for cooking times, but this is for my oven, not yours. Pipe only 4-6 macarons on many different trays and test your oven yourself. Start with my guideline and see if it works for you.
If your macarons come out too dark, you need to reduce the temperature.
If your macarons stick to the parchment or Silpat, you need to bake longer.
If your macarons crack, you need to reduce the temperature, but this might be from over-mixing or under-drying.
If your macarons don’t develop “feet” in the first 2-5 minutes, temperature might be too low, you didn’t dry them enough or you over-mixed them.
And so on…
– Take them out of the oven and let them cool. If you do every step correctly you should be able to pick the macarons off the parchment without any problem.
– You can keep them in the air-tight container and store them in the refrigerator ready to be fill with the various fillings.
8) Fillings:
8.1) Cream cheese & Honey (mature in 12-24 hours and last up to 3 days)
Cream cheese 8 oz.
Honey 1/3 cups
– Whip cream cheese with the beater as you drool in the honey.
8.2) Raspberry Jam (mature in 24-36 hours and last up to 2 weeks)
8.3) Cassis (Black Current) curd (mature in 12-24 hours and last about a week)
Black Current puree 3/4 cup (I use frozen puree, Boiron brand)
Egg yolk 100g
Sugar 60g
Corn starch 5 teaspoons
Butter 30g
Creme de Cassis 1/3 cup (I use Hiram Walker)
– Mix everything but the Creme de Cassis and butter in the pot. Use a whisk to blend them well and put them over medium-low heat on the stove. Stir constantly with the whisk until it thickens and starts to bubble. Turn off the heat and add the butter and Creme de Cassis and mix.
9) Sandwich: Select two macarons shell that are close in size, pipe the filling on one of the shells and put the other on top.
10) Maturity: This process involves leaving the finished macarons, with the filling, in an air-tight container in the refrigerator for at least 24 hours. This time varies based on many factors. First, let’s understand why we need to mature the finished macarons.
Macaron shells actually have very little flavor as the almond, sugar and egg whites are all very mild in flavor. They do provide texture and sweetness. When they first came out of the oven, they are crunchy, dry, airy and sweet. The filling adds moisture to the shell and the moisture is the key to making the macarons soft in the middle while the outer shell stays crunchy. Once you fill the filling in the shell, naturally the shell starts to absorb the moisture from the filling, fast or slowly depending on the amount and type of moisture in the filling. Ganache and butter cream usually take longer to mature than curd or jam because they contain mostly an oil-based type of liquid, while the curd and jam contain more water-based liquid.
The perfect filling is the one that has just the right amount of liquid to soften the inside of the shell but leave the outer shell crunchy. The chocolate ganache is the easiest to work with (for me) but it takes at least 36-48 hours to reach the full maturation. After that I don’t need to worry about them because they generally do not continue to mature. The curd, on the other hand, is quite tricky. It matures fast but usually continues maturing if I’m not careful with amount of liquid I put in the curd. It might make the whole macaron soft and fall apart.
Back to maturity; when I give you recipe for the filling, I also give you the maturity time and the life of the macarons after filled and you should follow that in order to achieve the awesome finished result. Some of the other savory macaron recipes (like the shrimp and coconut or the cheeseburger) would be pretty fuzzy timing, some maturing in 2 hours with a life of only 6 hours, meaning you need to finish eating them before the end of the day or you get a pile of edible goo that used to be macarons on the plate.
If you compare my recipe with others, you will find that my recipe uses much less sugar than most. This is intentional. I tried and tried to reduce the sweetness of the macaron shell while maintaining the shape and texture, and I finally became confident with my own recipe. Most recipes that you can find from the internet or cook books would use a ratio of egg whites : almond flour : powder sugar as 1: 1.2 : 2.25, but mine is 1 : 1.3 : 1.9. So the result is a more well-balanced taste to the filling but trickier to accomplish the perfect appearance.
Also, my maturing time is calculated based on how the filling reacts to my less-sweet macaron shell. If you want to make your macaron shell using someone else’s recipe, or even another method such as Italian (where you pour hot syrup into the egg whites to make meringue), Swiss (where you dissolve sugar into the egg whites and set them on a double boiler before you start whipping them), or Finnish (where you put ALL the sugar into the egg whites and whip), please be aware that I never tested my filling with those other macaron shells.






Very soon this website will be famous among all blogging users, due
to it’s pleasant content
Thanks Graffity. That’s so nice of you. 🙂
Very skilled piping with the hearts! I want to try making macaroons soon.
Thanks! It’s fun and delicious. It might be a great decoration for your cup cake too 🙂
magnificent submit, very informative. I wonder why the opposite experts
of this sector don’t realize this. You should proceed your writing. I’m
confident, you have a great readers’ base already!
Hi there! I know this is kinda off topic however , I’d figured I’d ask.
Would you be interested in trading links or maybe
guest writing a blog post or vice-versa? My website covers a lot of the
same topics as yours and I feel we could greatly benefit from
each other. If you’re interested feel free to shoot me an e-mail. I look forward to hearing from you! Terrific blog by the way!
these look so perfect! Bet they tasted amazing.
Simply wow… seems to require the precision of a pharmacist!
Or simply just using a toothpick 🙂
At any rate, very impressive.
i have tried making macarons yesterday for the first time and they turned out so well! well i do agree with the sweet taste of the macarons and i wanted to try your recipe! thanks for sharing!
Yay…congrats! You know it took me weeks before my macaron came out looking ok with “feet” and all. 🙂
Hello, what does it mean when it says “mature” next to the jam?
Mature the macaron is when you put the filling inside and let the shells absorb the moisture or liquid from filling and soak the shells until soft. This process takes between 24-72 hours in the refrigerator.